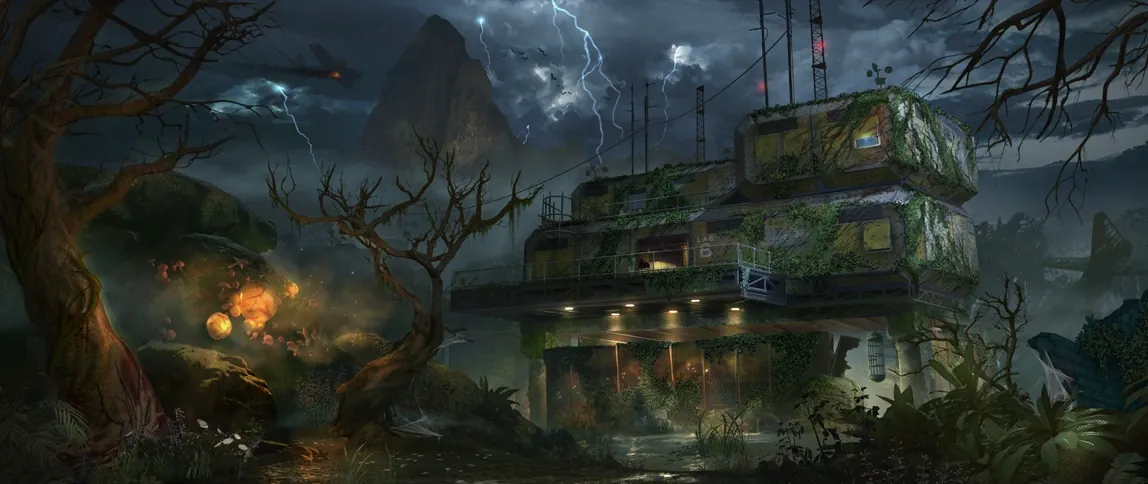
Key Features
Permanent power, Pack-a-Punch and protection
- Collect a bucket at spawn or either laboratory and fill it at a colored pool. Power Lab A and Lab B by pouring water into their generators. Both temporary generators must run at the same time to open the bunker; refill one if it expires. Open the bunker, enter the left power room, dive down and knife the web blocking the turbine. Survive the underwater lockdown, then use the power switch. Break underwater spores to replenish air and surface whenever the room allows it.
A gas mask protects against gas and spores; it does not give unlimited air underwater.
- Recover the three drainage parts: from the underwater power-room vent after its lockdown; from a hanging cocoon that you knife open in the purple-water room; and from the underwater tunnels beside Mule Kick. Search the branches of the tunnel carefully and use the air spores. Fit the three parts to the marked valves around the central flooded chamber to drain it and reach Pack-a-Punch.
- Build the shield and gas mask at the laboratory workbenches. Each part has three nearby possible positions; collect one from each region. Replace a broken shield at its bench. The mask has limited durability, so watch its HUD indicator.
- Shield handles: against one of the three supports beneath Lab A. Frame: against one of the three trees outside Lab B. Screen: on the artillery platform in the bunker.
- Mask strap: near the crashed plane’s propeller, on rebar at either end or the rock by the box. Cover: by Lab B’s green pool, on crates, the wheelbarrow or the perk-side walkway. Tube: docks, on the ritual-side crate, VMP-side rock or other crate.
Shield handles: search the Lab A supports. Shield frame: search the trees outside Lab B. Shield screen: search the artillery platform. Mask strap region: crashed propeller. Mask cover region: green water. Mask tube region: docks.
Skull of Nan Sapwe and personal trials
- At the ritual platform near spawn, pick up a skull and compare its white markings with the small bloodied altars around the map. Take it to the altar with exactly the same markings. The pairings change each game; inspect both rows instead of memorizing a room order. The four altars are at spawn beside the large rock, the crashed propeller, the docks, and the lower bunker beside the KT-4 area.
Spawn altar. Crashed propeller altar. Docks altar. Lower bunker altar. - Place the skull and defend it from the green-mist attackers. They attack the skull, so kill them before they reach it. When the ritual finishes, return the cleaned skull to its original stand. Repeat all four. If one fails, retrieve it from the main platform and retry that ritual. Enter the newly opened staircase beneath the platform, survive the Keeper attack and collect the Skull of Nan Sapwe.
The staircase opens after all four skulls are returned. Complete the downstairs ritual to claim the specialist. - Read your personal challenge pillar beside the skull platform. Every active player must finish all three of their own trials for lightning to strike this area. Work on plant or fruit trials early. Claim the rewards from the pillar as they unlock. Once all players finish, hold out a fresh shield in a lightning strike to electrify it; this charge is needed at Lab B and for the zipline cog.
The Skull has two different attacks. Mesmerize reveals hidden quest objects; Vaporize kills enemies. Use Mesmerize for the poster and hidden walls.
Read your own pillar: teammates can have different trials.
KT-4 and Masamune
- Collect the three KT-4 ingredients. After permanent power, kill the green-glowing scientist zombie near Lab B and collect the vial. Lower Lab A’s cage, lure a spider into it, raise it and extract the venom. Swim to the deepest plant in the tunnel beyond Mule Kick, collecting air from spores on the way back. Mix all three on the lower bunker’s KT-4 bench.
The scientist drops this vial. Extract venom at the raised Lab A cage. The first plant is deep in the underwater cave. Build KT-4 at this lower bunker bench. - Mesmerize the torn poster by the purple pool until the complete plan appears. Mesmerize the wall beside the bunker elevator to reveal its cog mechanism. This poster is also the prerequisite for revealing the secret underwater planter used for Masamune.
Hold Mesmerize on the torn poster. The elevator mechanism is behind this wall. - Collect the three Masamune ingredients below, then use the other KT-4 workbench to upgrade. Start the rainbow plant as soon as possible: it takes three consecutive watering rounds, followed by a harvest round.
- Spider tooth: dissolve the blue web behind Lab A’s blue pool with KT-4. In the cave, shoot the giant spider’s open glowing mouth. After it dies, interact with its mouth for the tooth. The pool behind its body gives free Widow’s Wine.
- Divinium vial: electrify your shield at the trial platform and bash Lab B’s cage-control panel. Enter the cage; in solo it lowers automatically, while a teammate operates it in co-op. Collect the vial from the skeleton below and ride back up.
- Rainbow plant: ride the sewer from bunker toward Lab B, holding interact as you pass the glowing 115 deposit on the right to fill your bucket with rainbow water. In the deepest underwater KT-4 plant room, Mesmerize the wall to reveal a special planter. Plant a seed and water it with rainbow water on three consecutive rounds. Harvest on the following round; an ordinary ground planter does not grow this quest ingredient.
Electrify this panel before entering Lab B’s cage. Take the vial from the submerged skeleton. KT-4 opens the blue web into the spider cave. Interact with the dead spider’s mouth. Collect rainbow water during this sewer ride.
Main Quest
Grow the flak shell and shoot down the plane
- Collect a bucket and a seed dropped by a zombie. Fill the bucket at the blue pool behind Lab A, beside the webbed spider-cave entrance. Interact with an empty circular stone planter to plant the seed. On this round and each of the next two rounds, water it once, then shoot it with KT-4 or Masamune. Grow several plants in parallel because the flak shell is a chance reward. The helper below has water-location photos and a care plan for each recipe.
Blue water is behind Lab A, beside the webbed spider-cave entrance. - Harvest on the fourth round. Collect an anti-aircraft shell if one appears. A different reward does not necessarily mean your care was wrong: plant another batch and repeat. If you missed a watering or treatment round, start a fresh plant rather than adding an extra round to the old one.
Harvest and collect the shell. - Load the shell into the bunker artillery cannon. Wait for the plane to pass directly in front of the cannon and fire at it. A miss costs the shell. After a hit, look for falling debris and smoke, then collect the cog at the bunker/Bowie Knife approach, behind Lab A near the stairs, or beside Lab B’s green pool.
Load the shell and wait for the plane’s pass. Possible landing site: bunker approach. Possible landing site: behind Lab A. Possible landing site: Lab B.
Plant recipes & water locations Open helper
Choose what you need to grow. Find the right water in the photos, follow the three-round recipe, then record what you did in your match.
New to plants? Start here · seed, bucket & planter photos
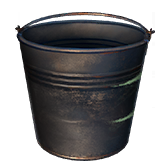
Pick one up at spawn, either lab or the bunker. Hold interact at a water pool to fill it; check the colour in your inventory.
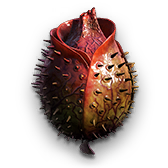
Kill zombies until one drops a seed, then collect it. At an empty circular stone planter, interact to plant the seed.
Once the seed is planted, interact with it to water it. Care for the same plant once on the planting round and once on each of the next two rounds. Three waterings in one round do not count as three rounds.
For recipes that use KT-4, shoot the plant after watering on each of those rounds. Harvest on the following round. For example: plant and care on rounds 8, 9 and 10 → harvest on 11.
Where to find water · photos & directions
Blue water
Behind Lab A · near the spider cave
- Go behind Lab A to the pool beside the webbed entrance to the giant spider cave.
- With a bucket, hold interact at the pool. Check that the bucket icon turns blue.
Refill at the pool whenever your bucket runs out. Filling it at another pool changes the water colour.
Observations save on this device and are shared with the helper inside the guide.
Gameplay photos: COD Zombies Guides · CoDZ Library / credited Steam creators · game: Activision / Treyarch.
Recover the three elevator cogs
- After revealing the elevator’s hidden mechanism, use Anywhere But Here. It takes you to the secret room above Lab A. Pick up the cog on the floor before dropping back out. This is a classic GobbleGum; a paid Mega is not required.
Take the cog from the secret room’s floor. - The final cog sits on the small dock beneath the zipline. In solo, bash the zipline control with an electrified shield, ride it and melee to release directly over the dock. Traveling from the docks toward Lab A gives an early release point. In co-op, have a teammate electrify the control while the rider is over the dock to drop them. Collect the cog and use the path back.
Check the dock’s position before riding. Dropping over the water can kill you; do not copy a timed button press from another player’s connection.
Bash the zipline control with the charged shield. Land on the small dock beneath the cable. - Fit the plane, secret-room and zipline cogs into the revealed mechanism. Collect Masamune, a fresh shield and mask, perks and ammunition before gathering the team at the elevator.
Repair the elevator and defeat the boss
- Insert all three cogs in the revealed mechanism. Collect Masamune, a fresh shield and mask, perks and ammunition; gather the team in the elevator. Descend, then cut the orange vine barriers with Masamune to reach the arena. Do not spend all your wonder-weapon ammunition on ordinary enemies.
Install the three cogs before boarding. Masamune opens the orange barriers below. - Keep moving around the outer path and clear spiders, Thrashers and zombies between openings. When an orange spore appears on the giant Thrasher, shoot that weak point with Masamune. Its arm slams and spawning enemies are the main danger while waiting. Repeat for all exposed weak points until the boss collapses and the ending begins. Return up the elevator after the cutscene if you want to continue the match.
Wait for the orange weak point; ordinary gunfire does not replace Masamune.
Side Quests
Plant recipes, imprint insurance and the golden bucket
- A seed has three care rounds, beginning immediately when planted; its mature reward appears on the next round. Blue water favors loot, green grows a zombie-holding plant and purple grows a killing plant. Use all three different colors over the three rounds for a chance at fruit. Fruit can grant a perk or make you vomit; grow several when a trial needs you to eat fruit. Missed care, mixed recipes and KT-4 treatment change possible outcomes.
The plant helper separates recipes from guarantees and shows the exact rounds for planting, care and harvest.
- Shooting a watered plant with KT-4 on all three growth rounds can produce an imprint plant. Interact with a mature imprint to save a copy of your current equipment and perks. If you bleed out or die afterward, it can restore that saved loadout. It restores the snapshot you made, so finish upgrading before imprinting; activating another imprint replaces the previous save. Imprints are chance-based, even with correct care.
- Grow a reward plant, a zombie-holder, a killing plant and a fruit plant. Beneath Lab B, use the Skull to clear the roots around the special planter and place your bucket there. Plant seeds in the three revealed spots and feed the resulting killing plants zombies until the sequence finishes. Retrieve the golden bucket: its water does not run out, and you can switch water color. Each player should collect their own reward.
Spider Bait transformation
- During a spider round, use the Skull’s Mesmerize attack to identify the spider with a red glow. Keep it alive and lead it to the blue, green and purple water pools so it drinks from each. Move slowly enough that it follows you instead of becoming trapped behind a web or door.
- Lead that spider into Lab A’s lowered cage. Raise the cage, strike the control with an electrified shield and lower it. After two rounds, survive the special red-spider wave. Raise the cage again and collect the cocoon from it. Spider Bait lets you become a spider for a limited time once per round; you can move through small spider passages during the transformation.
Friendly Thrasher, music and jump scare
- After revealing the purple-pool poster, Mesmerize the wall on the left of the test-subject room’s entrance. Shoot the revealed vines with Masamune, then shoot the spore behind them. Lure a zombie into the gas to create a friendly Thrasher. This can be repeated.
- For Dead Flowers, interact with three teddy bears: beside Lab A’s blue pool, just left of the lower bunker’s KT-4 bench, and on the table next to the radio at the top of Lab B.
- For Samantha’s Lullaby (Magic Mix), find the seven melody bulbs on the wall beside the purple-water pool. One is the playback bulb. Fill the other six with purple water to the levels 1, 3, 5, 6, 7, 5, reading the six playable bulbs in order, then activate playback. Use the linked reference if you need to identify the playback bulb before pouring.
- For the optional jump scare, turn on power and obtain a sniper rifle. Scope the people in the test-subject tanks closely, scanning down each body, then finish the round. The scare appears behind you. This is an audiovisual secret with no quest requirement or combat reward.
- The island also has story radios and ciphers. Use the community reference for their locations, transcripts and decoded messages; they are optional lore and do not replace any cog or upgrade step.
Sources and review
Instructions adapted from Reddit community guides and the illustrated references below, with AI-assisted source checks on 3 October 2026. Gameplay images: mmmrkennedy, COD Zombies Guides and their credited community creators; game: Activision / Treyarch. Symbols and sequences marked as observations must come from your match. Source and software checks do not replace an in-game playthrough.
- r/CODZombies community guide ↗
- COD Zombies Guides illustrated walkthrough (2) ↗
- Steam Community walkthrough (3) ↗
- callofdutyzombies.com reference (4) ↗
Select any reference image to enlarge it. Screenshot and symbol sources are credited in the linked walkthroughs; this guide uses local copies for reliable access.