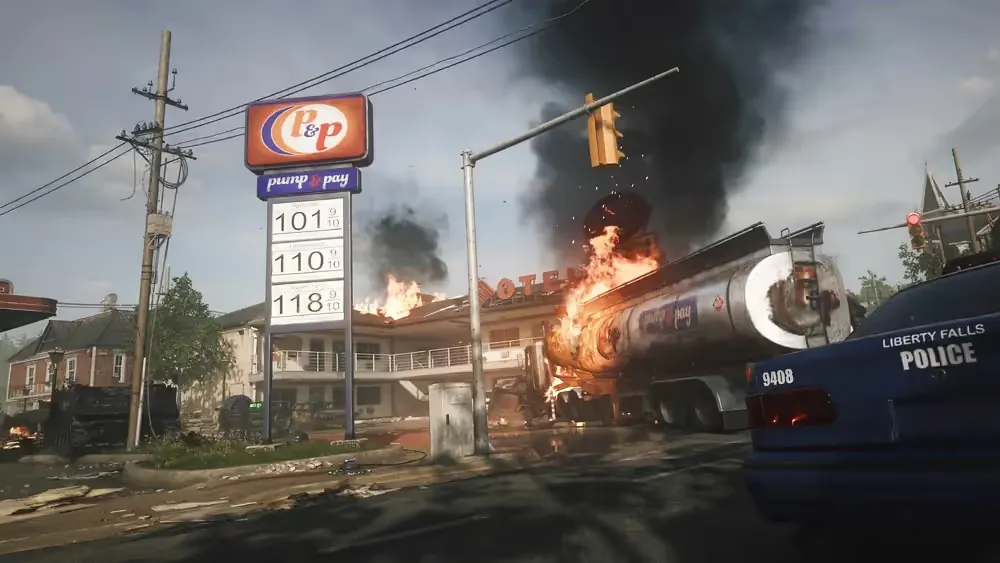
Key Features
Open the town & prepare your route
- Open the road from Pump & Pay through Riverside and Washington Avenue to the church, buying the marked debris as you climb. Purchase the church’s dimensional barrier to reach Pack-a-Punch; Liberty Falls has no separate power-switch task. Interact with the S.D.G. machine against the church’s right wall and wait for the white flash and Panos’s dialogue.
The church S.D.G. starts the quest and receives both charged canisters - Upgrade one reliable damage weapon and keep the Jet Gun as your crowd-control tool. Jugger-Nog, armor plates, Quick Revive and a charged defensive Field Upgrade make the holding steps safer. Carry Decoys or Monkey Bombs for the valve. If using Pack-a-Punched explosive weapons, buy PhD Flopper before relying on them at close range.
The main quest works solo or in co-op. GobbleGums are optional. Standard mode supports the full set of side activities; Directed mode changes round progression and disables many side eggs.
Main Quest
Build the Thrustodyne M23 / Jet Gun
- Take the small water valve from the hose fitting outside Lily’s Flowerpot on Washington Avenue, beside the bloody storefront door near Speed Cola. In Fuller’s Liberty Lanes, melee the square panel on the wall to the right of the lanes. Install the valve and hold interact until the pressure bar fills, then pick up the gauge that drops onto the floor.
Zombies keep arriving during the pressure task. Release interact to defend yourself, but stay in the bowling alley and resume promptly; leaving the area drains progress and can reset the attempt. In co-op, assign one turner and one guard. Solo, alternate short holds with a Decoy or Aether Shroud.
The flower-shop hose fitting holds the removable water valve Melee this bowling-alley panel and install the valve - Spend time killing zombies in the Cemetery until the named Groundskeeper appears in overalls. Kill him before he leaves, collect his Toolshed Key and unlock the shed in the Groundskeeper’s Yard below the Cemetery. Take the handbrake from the table inside.
Do not mistake an ordinary zombie for the named Groundskeeper. If he escapes, keep playing and check the Cemetery again on later rounds.
Collect the named Groundskeeper’s dropped key The handbrake waits on the opened toolshed’s table - Open Radio House at Riverside using a Mangler cannon blast: stand in front of its shutter, bait an enemy Mangler’s shot and move aside, or fire your own Mangler Cannon/Mutant Injection cannon into it. Interact with the debris piles inside until the wires are exposed, then pick them up.
A hostile Mangler gives a no-salvage route once one spawns. Some piles release Vermin, so clear the room before searching the next one.
Radio House shutter: ordinary gunfire does not replace the Mangler blast Search the interior piles for these electrical wires - Approach the closed upstairs Motor Lodge room to make the zombies burst through its door. Clear them and build the Jet Gun at the workbench using all three parts. Its primary suction collects quest objects and kills groups; let its charge recover between uses.
A Jet Gun obtained from the Mystery Box also works for the quest. Do not discard your only one before collecting the LTG parts or any Aetherella figures you want.
Build the Jet Gun in the upstairs Motor Lodge room
Collect all three LTG parts
- Use the Jet Gun’s suction on each floating component. In Olly’s Comics, aim into the broken ceiling. On Washington Avenue, climb onto the delivery truck and aim into the open upper window of Buzz’s Cuts. In the church, aim up beside Panos at the balcony after the S.D.G. introduction has finished.
Olly’s Comics: aim into the damaged ceiling Buzz’s Cuts: use the truck for a clear upper-window sightline Church: the component floats beside the balcony and Panos - Reach The Alamo, the Savings & Loan bank roof, using the available ascender/roof route. Craft the LTG at the rooftop workbench. Clear a return route from Riverside up Washington Avenue to the church before starting the captures.
The LTG workbench sits on The Alamo bank roof
First capture — Riverside to Pump & Pay
- Take the empty Aether Canister sticking out of the S.D.G. and carry it down to the Dark Aether Field Generator trap between Pump & Pay and the Motor Lodge. Drop it directly beside one of the trap’s small ground emitters. Carrying a canister prevents sprinting, so make this delivery before summoning the enemy.
There is no socket for this placement: drop the canister on the ground. This guide does Riverside first; Cemetery first is also valid if you swap both portal and nearby trap together.
Take the canister protruding from the S.D.G. The canister must sit inside one emitter’s capture field - Place the LTG beneath the storm cloud at Riverside/East Main Street and activate it. Protect the portal for its countdown, concentrating fire on zombies running into the device. A successful defense releases a named purple HVT. Damage it until its purple glow and dialogue indicate it is ready to capture, then stop shooting and lead it to your canister.
An LTG defense failure can be retried on a later round. Killing the HVT away from the capture field also requires another spawn; do not keep firing while it is still walking toward the trap.
Defend the LTG beneath the Riverside storm cloud - Activate the Dark Aether Field Generator and kill the weakened HVT while it stands inside the same emitter’s purple field as your canister. Watch for the energy transfer into the canister. Pick up the charged canister only when ready to leave, then walk it directly back to the church S.D.G. before the 90-second delivery timer expires.
A death in a different emitter’s field does not count, even if the trap is on. If no transfer occurs, or the delivery fails, reset the capture on a later round. Keep explosives and automatic damage effects away from the target while positioning it.
The HVT’s energy must flow into the nearby canister A charged canister starts the return countdown when carried
Strauss Counter — calibrate three projectors
- After returning the first charged canister, take the Strauss Counter from the left side of the S.D.G.; it replaces your tactical equipment. Visit the three projectors below and hold the tactical button near each one to read its local energy. Set that projector’s lamp to the inverse reading: Red/High becomes Green, Green/Low becomes Red, and Yellow/Medium stays Yellow.
- Hilltop Stairs: on the grass above Liberty Lanes, near PhD Flopper.
- Groundskeeper’s Yard: beside the handbrake toolshed.
- Yummy Freeze rooftop: open the wooden debris on The Alamo, then drop onto the lower ice-cream-shop roof.
The lamp cycles Green → Yellow → Red with interactions. Read each location separately; do not copy a color from a guide screenshot or treat all three projectors as one shared reading.
The Strauss Counter is collected from the S.D.G. after the first charge - When the three settings are correct, wait for their beams to converge on the device at Pump & Pay. Take its newly released second canister. Retrieve the LTG from the completed Riverside portal before heading back uphill.
Strauss Counter & projector helper Open helper
Take the Strauss Counter after returning your first charged canister. Stand beside each projector, hold the tactical button to read the counter, then choose its reading here. The target below is the projector’s light.
Hilltop Stairs
Grass beside the stairs above Liberty Lanes, near PhD Flopper.
Choose the counter reading to see the target.
Groundskeeper’s Yard
Grass beside the toolshed where you collected the handbrake.
Choose the counter reading to see the target.
Yummy Freeze rooftop
Buy the wooden debris on The Alamo bank roof, then drop to the lower roof.
Choose the counter reading to see the target.
Projector interactions cycle Green → Yellow → Red. When all three lamps are set correctly, their beams meet at Pump & Pay and release the second canister.
Saved on this device; inline and full-page helpers share observations.
Second capture — Cemetery to Hill Street
- Drop the second canister beside a ground emitter at the Hill Street Dark Aether Field Generator. Install the recovered LTG beneath the Cemetery storm cloud, defend the portal, and weaken the next named HVT. Lead it down to your chosen emitter, activate the trap and kill it inside that emitter’s field.
The second portal site lies under the Cemetery storm cloud - After confirming the transfer, pick up the canister and return it to the S.D.G. within the delivery countdown. The machine is now ready to offer the final encounter. Resupply before accepting it; bringing the canister back does not require you to start the fight immediately.
If you chose Cemetery first, perform this second capture at Riverside with the Pump & Pay trap instead. Each portal is used once successfully; keep the capture site and its nearest trap paired.
Church finale — three waves
- Upgrade your damage weapon, fill armor and ammo, replace tactical equipment after the Strauss step, and carry a self-revive where available. A defensive Field Upgrade and Mutant Injection are useful emergency options. Have every player accept the S.D.G. encounter when ready; the church becomes a closed arena.
Avoid starting with an empty Jet Gun meter. Keep an escape lane around the pews rather than grouping every player in one corner. Optional Aetherella can help, but collecting the ninth figure starts its effect immediately and is not a quest requirement.
- Keep moving and clear the first wave of zombies and Manglers, claiming the Max Armor when needed. The second stage adds a named HVT Mangler: remove its arm cannon/armor and focus its exposed head while controlling ordinary zombies. Collect the resulting Max Ammo before pushing the last stage.
The named Mangler is the second stage’s priority target - The last stage brings an HVT Abomination alongside the horde. Shoot its glowing open mouths during attacks, keep out of its beam and charge lanes, and use the Jet Gun or support item to create room. When the final HVT dies, the scripted blast downs the team and triggers the ending. That forced down is the successful quest sequence.
There is no speed requirement for this encounter. Survival and controlled damage matter more than standing still for a full magazine.
Use the Abomination’s exposed glowing mouths while maintaining space
Side Quests
Aetherella — all nine figures
- Vacuum nine small figures with the Jet Gun’s primary fire. Four are inside Olly’s Comics; the other five are at the church window, Hill Street air conditioner, Liberty Lanes sign, Fast Forward roof and Motor Lodge sign. Use the photographs below to line up each shot and keep suction aimed at the figure until it disappears.
The ninth pickup transforms you immediately and unlocks World Domination. Plan the last pickup for a crowded round or before an objective.
- Olly’s Comics · entrance table: Inside the shop, on the table just right of the door.
Olly’s Comics · entrance table: Inside the shop, on the table just right of the door. - Olly’s Comics · Quick Revive: Look up at the shelf above Quick Revive.
Olly’s Comics · Quick Revive: Look up at the shelf above Quick Revive. - Olly’s Comics · boarded window: Low shelf beside the boarded zombie window.
Olly’s Comics · boarded window: Low shelf beside the boarded zombie window. - Olly’s Comics · statue display: Shelf to the left of the large Aetherella trap display.
Olly’s Comics · statue display: Shelf to the left of the large Aetherella trap display. - Hill Street · air conditioner: From the Washington Avenue roof above Speed Cola, aim across toward the figure on the air conditioner at the house window.
Hill Street · air conditioner: From the Washington Avenue roof above Speed Cola, aim across toward the figure on the air conditioner at the house window. - Church · front window: At the church entrance, look up to the right-hand front window ledge.
Church · front window: At the church entrance, look up to the right-hand front window ledge. - Liberty Lanes · sign: Climb onto the West Main Street bus and vacuum the figure on the front ledge beneath the Liberty Lanes lettering.
Liberty Lanes · sign: Climb onto the West Main Street bus and vacuum the figure on the front ledge beneath the Liberty Lanes lettering. - Fast Forward · rooftop: Drop from The Alamo to Yummy Freeze’s roof; aim across to the figure between the air-conditioning units on Fast Forward.
Fast Forward · rooftop: Drop from The Alamo to Yummy Freeze’s roof; aim across to the figure between the air-conditioning units on Fast Forward. - Motor Lodge · motel sign: Stand beside the motel and aim up at the figure on the ledge of the red MOTEL sign.
Motor Lodge · motel sign: Stand beside the motel and aim up at the figure on the ledge of the red MOTEL sign.
Savings & Loan vault — three notes in order
- Record three two-digit sticky-note values in this order: Savings & Loan reception desk; under the counter inside Olly’s Comics; the Liberty Lanes snack counter under the ice bucket, which you must shoot away. Enter those values at the bank vault door in the same order.
Preserve leading zeros. The values change each match. The vault allows a limited number of wrong attempts per round, so read all three before experimenting.
Vault entry 1: note on the Savings & Loan reception desk Vault entry 2: note beneath the Olly’s Comics counter Vault entry 3: remove the ice bucket on the Liberty Lanes snack counter - Take Loot Keys dropped by special and elite enemies into the opened vault and spend them on the locked deposit boxes. Higher-rarity keys improve the reward quality. Your time inside is limited; decide which boxes you will open before lingering over rewards.
Mister Peeks bowling — shoes & repeat games
- Shoot five hidden pairs of bowling shoes through their zombie windows. Hitting the final pair transports the team to the bowling minigame, so prepare the group before firing that last shot.
- Pump & Pay: counter inside the gas-station shop below the spawn rooftop.
- Frank’s Hardware at Riverside: shelf through the open shopfront across from Olly’s Comics.
- Hill Street: under a chair inside the house window near the AK-74 wall-buy.
- Cemetery: shoes hang from a tree beyond the rear fence near the Tier III armor wall-buy.
- Benson Funeral Services: on the coffin through the window across from Liberty Lanes.
Bowling shoes: gas-station counter Bowling shoes: shelf in Frank’s Hardware Bowling shoes: house window near the Hill Street AK-74 Bowling shoes: tree beyond the Cemetery fence Bowling shoes: coffin in Benson Funeral Services - Collect a bowling ball from Mister Peeks and hold fire to charge your throw. Aim down the lanes through groups of moving zombies; a charged ball can hit several in one pass. Keep collecting and throwing until the timer ends, then open the trophy for your reward. A score of at least 300 awards the bowling challenge reward.
For another game, wait at least five rounds and shoot the new shoes in the toilet through the zombie window beside the Liberty Lanes pool table. The initial five-shoe hunt is not repeated. Bowling supports three games in a match; the third also triggers the hidden song Echo.
Free Deadshot, Aether Tool & quick loot
- At the back of the Cemetery, look beyond the boundary at five cans on a fence. With an accurate bullet weapon, hit all five without missing and within the short challenge window to receive Deadshot Daiquiri. A scoped, non-explosive weapon makes the small targets easier to distinguish.
A miss or timeout knocks the cans away. Advance a round and try again; do not use an explosive Pack-a-Punch conversion that makes exact hits unclear.
The five cans stand on the fence beyond the Cemetery boundary - Throw an explosive at the zombie/Mangler head mounted high on the front of the church. Falling zombies drop loot when they hit the ground. For a useful early weapon upgrade, wait until round 10 before triggering it to obtain the Rare Aether Tool reward.
- Crouch and melee the retrieval opening of the vending machine beside the Motor Lodge stairs once each round for a small random reward. Melee Macchiato breaks it permanently and produces a final burst of loot, so leave that finish until you no longer want the repeatable attempts. Shoot the Liberty Lanes pool balls for a separate small Essence pickup.
A rare weapon is possible from the vending machine, not guaranteed. Avoid promising a Ray Gun from any individual hit.
- Check the intact black-and-yellow cars at Hilltop outside the church, beside the Groundskeeper’s Yard and outside Olly’s Comics. Find the one with Mister Peeks sitting inside, then hit it with a Mangler cannon blast. The trunk releases a random weapon. Recheck the remaining cars after five rounds.
Blowing up a car before the toy appears wastes that car’s reward opportunity.
Songs, dancing zombies & blood-pool rewards
- Hold interact on three Mister Peeks headphones to play Destroy Something Beautiful. Look on the ground in the Motor Lodge alley, on a church pew, and under the bench along the Washington Avenue fence. Listen for each pickup’s confirmation sound.
Song headphones on a church pew Song headphones on the ground in the motel alley Song headphones under the Washington Avenue bench - At Riverside, spend 50 Essence on each of the two viewfinders and aim each one at the dancing zombie on the distant cliff. Keep it centered long enough for the cue; after both are registered, the local zombies gather for a bus rave. If it does not activate, try both viewfinders again on a later round.
- After a Vermin round, throw three Semtex into the fenced blood-filled swimming pool outside Liberty Lanes. The emerging red orb releases equipment, salvage and enemies. Repeat after later Vermin rounds; the third activation also awards a Fire Sale.
- Use a Chopper Gunner to destroy the wooden barrel outside the map beside the Washington Avenue rooftops. Collect the shovel that falls near its base, then interact with dirt at Cemetery graves to dig up rewards or enemies. This costs a valuable support item, so do it as an optional loot hunt after securing your main-quest loadout.
Use the linked community screenshot for the barrel’s exact sightline before spending the Chopper Gunner.
Gravedigger barrel reference ↗
Ping this barrel above the Washington Avenue rooftop Mystery Box before activating your support item - Equip Napalm Burst and shoot both candle groups beside Pack-a-Punch: one on its left, and one in the right-hand corner. Igniting both creates fire patches in the church that damage players as well as zombies. It can be activated again in later rounds.
This is optional. Keep clear of the flames and leave yourself a safe movement route if using it during the church finale.
First candle group: left of Pack-a-Punch Second candle group: corner right of Pack-a-Punch
Hidden free power-ups — save them for useful moments
- Shoot a hidden miniature power-up to make its full-size pickup appear near you. Most are a one-time resource in that match, so leave Max Ammo and Full Power available for a defense rather than collecting them automatically.
- Max Ammo: on the bridge beyond Pump & Pay.
- Insta-Kill: on top of the church, visible from the Cemetery.
- Bonus Points: upper window ledge across/outside Olly’s Comics.
- Nuke: the Savings & Loan ceiling chandelier; an explosive inside or a shot through the roof opening can reach it.
- Full Power: underneath the wrecked vehicle on West Main Street.
- Max Armor: on a metal serving tray behind the Washington Avenue diner barrier.
- Double Points: on the eastern water tower; use a scoped sightline from town.
- After shooting all seven other hidden power-up models, find the Fire Sale model in the garbage bin left of PhD Flopper at Hilltop Stairs. Shoot it for the additional pickup. This is separate from the blood-pool Fire Sale.
The final hidden Fire Sale appears in the bin beside PhD Flopper
Map reference — perks, upgrades & travel
- The town is a loop with two climbs to the church. Riverside/Washington Avenue is useful for LTG parts; West Main Street/Liberty Lanes gives the valve task and PhD route. Use the bank ascenders and roof ziplines to cross quickly when not carrying canisters.
- Jugger-Nog: Savings & Loan. Quick Revive: Olly’s Comics. Stamin-Up: Liberty Lanes.
- Speed Cola: Washington Avenue. PhD Flopper: Hilltop Stairs. Melee Macchiato: outside the church.
- Der Wunderfizz: The Alamo bank roof from round 25; use it for perks without a local machine.
- Arsenals at Riverside and the Cemetery handle weapon rarity and ammo mods. Pack-a-Punch is inside the church. Armor wall-buys include Olly’s Comics/West Main Street (Tier II) and Cemetery (Tier III).
Sources and review
Walkthrough adapted from community and illustrated guides, with AI-assisted source checks on 2026-10-02. Use Standard mode for the full set of side quests. Screenshots are credited to COD Zombies Guides and the r/CODZombies community wiki; local source manifests record each image. This revision has not yet been verified in a complete in-game run.
- r/CODZombies community guide ↗
- COD Zombies Guides illustrated walkthrough (2) ↗
- Official Call of Duty guide (3) ↗
- r/CODZombies community guide (4) ↗
- dexerto.com reference (5) ↗
- youtube.com reference (6) ↗
- r/CODZombies community guide (7) ↗
- COD Zombies Guides illustrated walkthrough (8) ↗
- COD Zombies Guides illustrated walkthrough (9) ↗
- COD Zombies Guides illustrated walkthrough (10) ↗
- COD Zombies Guides illustrated walkthrough (11) ↗
- COD Zombies Guides illustrated walkthrough (12) ↗
Select any reference image to enlarge it. Screenshot and symbol sources are credited in the linked walkthroughs; this guide uses local copies for reliable access.