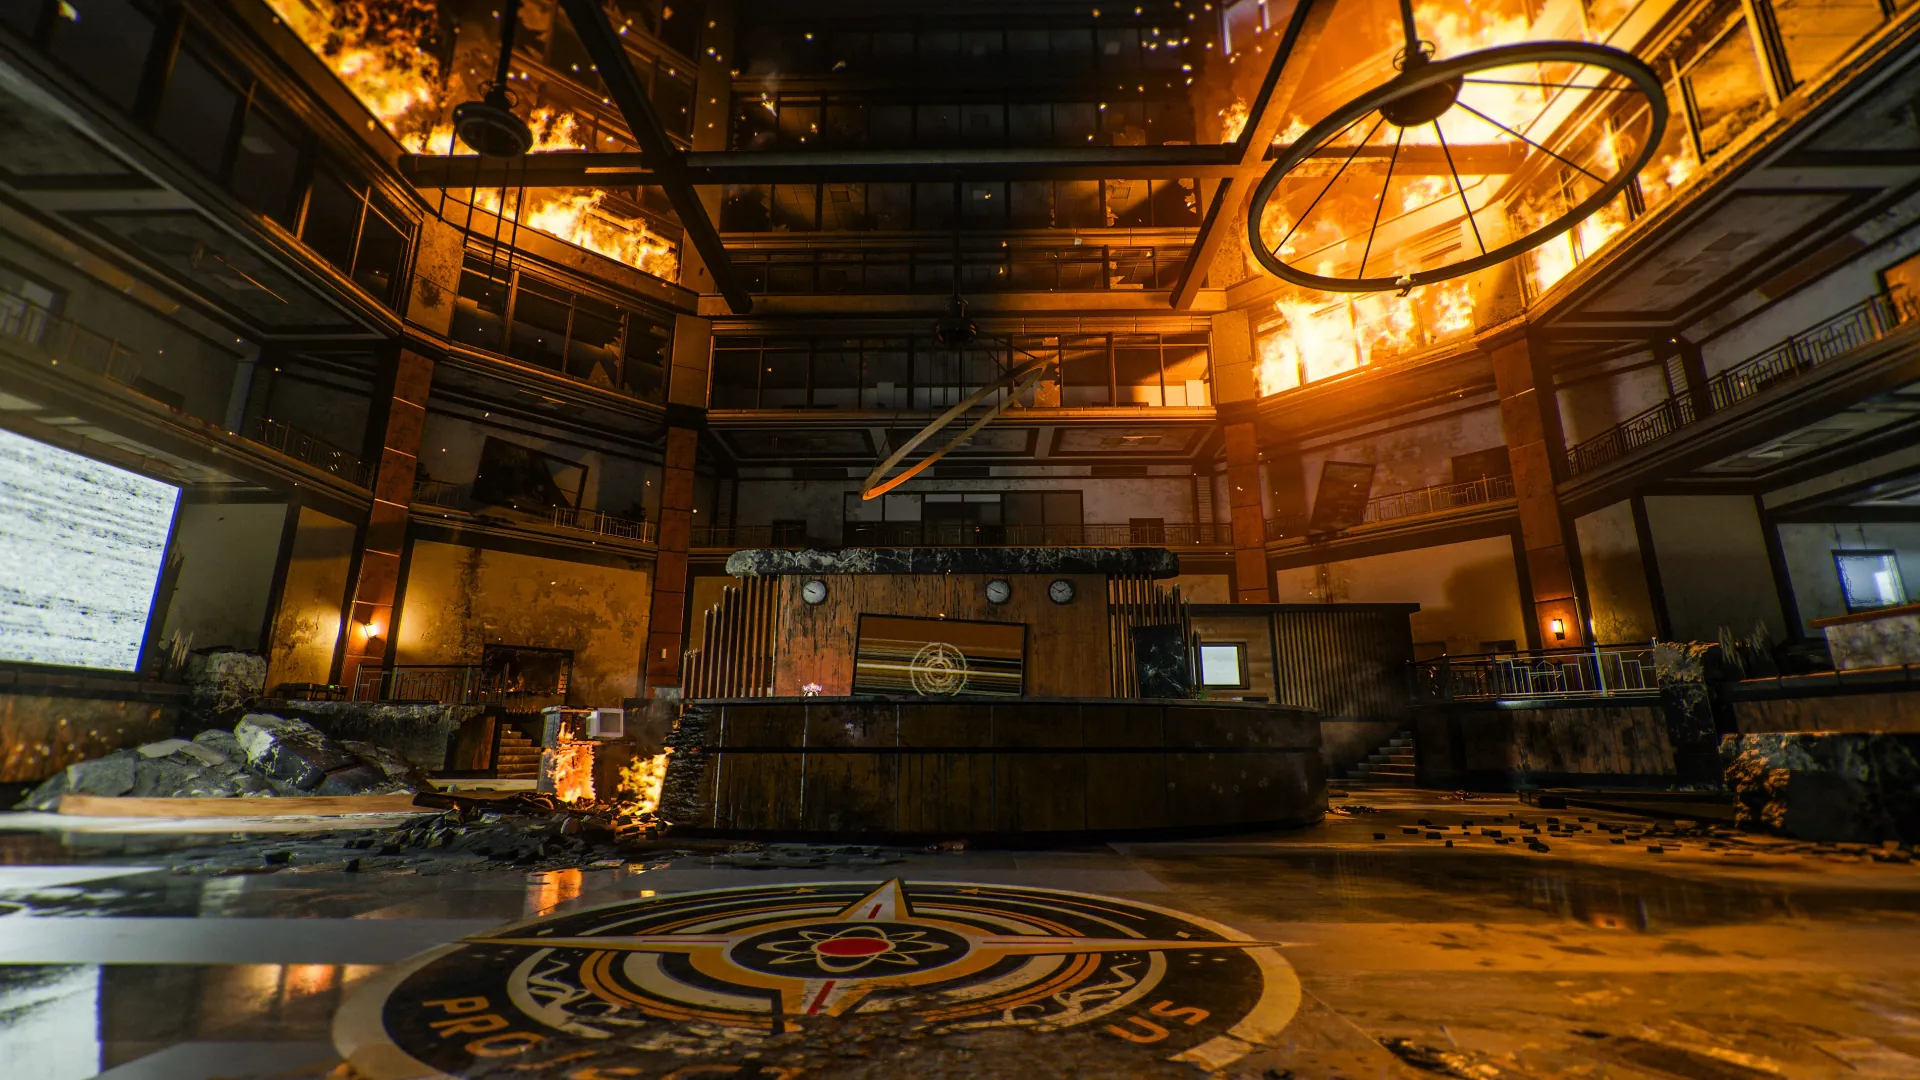
Key Features
Power, Pack-a-Punch & early collection
- Follow the opening objectives through the two towers to T1 Executive Office. Interact with the snow globe to open the route to T2 Sublevel 10. Restart its Particle Accelerator, then destroy every purple crystal around the chamber until Pack-a-Punch appears. Scan above and below the walkways for the last crystal.
- In the first Kommando Klaus special round, shoot robot arms and pick up the quest arm that drops; you need both sides eventually. Keep an explosive for the later smoke detector and buy Melee Macchiato before the brain carry. At spawn, you can melee the mop bucket under a ceiling sprinkler now, saving work later.
Useful landmarks: Quick Revive in T1 Reception; Juggernog in Executive Suite; Melee Macchiato in Quantum Computing Core; Speed Cola in Quantum Computing Lab; Deadshot in Mutant Research Lab; PhD in its Test Area; Double Tap and Wunderfizz in T2 Android Assembly; Stamin-Up in Dark Entity Containment; Vulture Aid in Sublevel 10.
Main Quest
DNA, Fowler & Teleportation Lab access
- After Pack-a-Punch opens, kill the named Geneticist in T1 Mutant Research Lab and take its Keycard. Open the refrigerator in the adjacent Mutant Research Test Area and collect the DNA vial. Take the Syringe from the genome-sequencer/centrifuge in Mutant Research Lab.
The refrigerator contains the DNA vial Take and later replace the Syringe at this machine - At Sublevel 10, jump into the accelerator beam and collide with the suspended body to knock it down. Interact with the fallen body to draw blood. Return the filled Syringe to the Lab machine and defeat Fowler’s Mangler plus the enemies released from the tanks. Take the special Fowler Mutant Injection.
- Carry the Injection to the upper scanner in T2 Dark Entity Containment. Activate the scan and transform in front of it so it recognizes Fowler. Use the newly opened teleporter to reach T2 Teleportation Lab.
This requires Fowler’s quest Injection. If the transformation expires or the scan fails, buy another at the genome sequencer for 1,500 Salvage and return to the scanner before activating it.
Use Fowler’s transformation at this scanner
Grow the Gorgofex
- Read the flashing word beside Deadshot Daiquiri first, then the monitor behind Richtofen’s family tank if it also has a word. Combine their first letters into an element symbol. Find its atomic number on the Test Area periodic table and enter it as three digits at the upstairs Bioweapons Lab keypad: Cu is 029.
Sometimes only the first monitor has a word. Both readings must come from the same round because the words change. Use the atomic number, not the decimal atomic mass.
- Inside Bioweapons Lab, feed the exposed Cyst three weakened Vermin, then three weakened zombies. Bring them close enough for its tendrils to absorb them; confirm each absorption instead of killing enemies far from the container. Pick up the Cyst and stand beneath the three yellow Aetheric Flora around Quantum Computing Core and Lab until each drains.
Fowler’s Elder Disciple can help provide Vermin. Watch your health under Flora: the draining plants spill damaging acid.
The Cyst absorbs the ordered enemy types at this container Stand under each glowing yellow Flora until it drains - In T2 Dark Entity Containment, locate the green-text power-surge computer and activate it, then promptly activate the other three matching terminals. When the floor panel in front of the Forsaken chamber is electrified, break the spawned Uber Klaus’s shoulder generators and lure it onto that panel alive.
Find all terminal positions before starting. If the timed sequence dissipates, restart it. Do not kill the original Uber Klaus before the transfer.
Lure the weakened Uber Klaus over the active floor panel - Defeat the Forsaken-controlled robot and its released core. Interact with the remaining energy orb while carrying the charged Cyst to create the Gorgofex. The base weapon is enough for the portal tasks; choose one of the optional C/N upgrades below if you want to Pack-a-Punch it.
Gorgofex monitor code Open helper
Read both flashing monitors during the same round. Take the Deadshot monitor’s initial first, then the family-tank monitor’s initial if it displays a word.
See the in-game periodic table
Confirm whether one or both monitors display a word this round.
Saved on this device; shared with the full-page helper. Screenshots: COD Zombies Guides and r/CODZombies, linked in the map guide.
Build Franken-Klaus & let him work
- Collect a left and right arm by shooting Kommando Klaus arms. The first special round supplies only one; continue collecting from later robots. Find both legs in Android Assembly: check the shelf near the line, scrap pile, floor by shelving and behind the broken TV/mirror. Install all four limbs on the suspended Franken-Klaus.
Leg spawn behind the broken display Leg spawn atop the scrap pile Leg spawn on the floor by shelving Leg spawn on the assembly shelf - Bait an Uber Klaus electrical attack into the suspended body to energize it. If available earlier, the Gorgofex quest’s robot can do this before its Forsaken transfer; otherwise use a later Uber Klaus. Franken-Klaus works at his first terminal until the next round. Escort him toward Dark Entity Containment; activate the S.A.M. Trial machine beneath the Forsaken chamber and complete its nearby-kills trial. Then escort him to the Teleportation Lab terminal.
If the S.A.M. machine is absent, wait for its spawn instead of abandoning the escort. His pauses are part of the sequence; complete the trial rather than only activating its screen.
The assembled body must also receive an electrical attack
Four S.A.M. files → chronological code
- Read the four S.A.M. folders that appear across Executive Suite, Director’s Office and Teleportation Lab. Check coffee tables and desks upstairs, the credenza beside the lamp, and the Lab’s trolley and terminals. Each folder shows one belonging, a file number and a date. Sort only your four documents from oldest to newest; their file numbers form the code.
- Enter the four-digit result into Teleportation Lab’s computer and wait for access granted and the facility reboot. Use the visual helper to select actual found documents and verify the chronological sequence.
Dates use month/day/year. The complete reference sequence is Badge 6, Collar 1, Scarf 3, Watch 4, Goggles 5, Katana 2; your match uses only four of them.
S.A.M. archive order Open helper
Select the four belongings shown in your S.A.M. files. Each photo shows a search location. The helper orders the printed dates and keeps their file numbers attached.
Only four of the six appear. Read the document itself; finding an empty table does not select its usual file. U.S. dates on the documents use month/day/year.
Select exactly the four files present in this match (0/4 selected).
Saved on this device; shared with the full-page helper. Screenshots: COD Zombies Guides and r/CODZombies, linked in the map guide.
Timed brain delivery & portal crystal removal
- With Melee Macchiato, punch the metal brain container in Quantum Computing Core. Rehearse the route to the Teleportation Lab first, then lift the purple brain and move immediately. Install it in the receiving chamber beside Franken-Klaus. Carrying it disables weapons and the delivery is timed.
Use the already opened tower route and let a teammate clear ahead. If the carry fails, return to the original container for another attempt.
Punch this Quantum Computing Core container to release the brain - At Sublevel 10, press the red boost button and kill five blue Quantum Vermin with the Gorgofex during the accelerator overcharge. Interact with the resulting blue orb above the terminal to empower the weapon. Carry that charge to Teleportation Lab and fire one charged shot at the portal’s blocking crystals.
Do not fire away the special charge on the journey. Removing the crystals does not make the portal safe: wait until the head, vacuum captures and lockdown are complete before entering.
Cleanse & feed Mortimer’s head
- In Quantum Computing Core, shoot a charged Gorgofex shot into the high square opening opposite Melee Macchiato, right of the C.A.S.T.E.R. turret. Collect the fallen Fungal Head. Find a mop bucket in Reception, Executive Suite or Android Assembly, melee it under its ceiling sprinkler and trigger the nearby smoke detector with an explosive.
Aim a charged shot into this high opening Position the bucket beneath the sprinkler Trigger the nearby smoke detector to fill the bucket - Put the head in the filled bucket to wash it. Kill enemies near it until its eyes and collection effect turn purple; carrying it also lets you gather souls but slows your movement and attracts a damaging shadow. Bring the fully charged head to Teleportation Lab and interact with the center of the portal to install it. Confirm fungal growth around the frame.
Keep collecting if the head is not fully charged. Do not walk through an unfinished portal: premature travel can kill you or drop you into a dangerous fall.
Four vacuum captures & the last lockdown
- After the brain delivery unlocks the blue Janus containers, take their special Vacuum-Seal Devices. Containers are in Reception, Mutant Research Test Area, Android Assembly, Dark Entity Containment and Teleportation Lab. Find a floating purple-glowing object, throw a device at it and retrieve the captured result. Repeat with fresh devices until four captures are confirmed.
Search Reception, outside Quantum Computing Lab, Mutant Research and Director’s Office. Ordinary Kazimirs are not substitutes for these compact quest devices.
The quest’s Vacuum-Seal Device comes from a blue Janus box A floating purple object is a capture target - Install the four captures at the console facing the Bio-Aetheric Portal, then interact again to begin the defense. Search the room for the currently red lever, turn it green and move to the next newly red lever. Continue until the lockdown’s completion flash and the enemies clear.
Published guides disagree on a fixed lever count. Follow the active lights and confirmed completion instead of stopping after a memorized number.
Only operate the currently red switch; the sequence advances around the room - Finish purchases before taking the now-safe portal to Tower 3; this trip has no return. Bring strong upgraded weapons, Tier III armor, useful perks, Self-Revive, healing and ammunition. A precision weapon helps against distant Richtofen; the Gorgofex helps clear crowds. Decide your alliance: help Richtofen to fight S.A.M.; help S.A.M. to fight Richtofen.
If Richtofen keeps directing you back to Mutant Research instead of admitting you, collect the DNA vial from the Geneticist-keycard refrigerator. It is required for the final encounter.
Tower 3 ascent & both boss endings
- Enter Tower 3, attune the Sentinel Artifact at the lift and select your ally. At Vault 1, charge three LTG canisters with nearby kills; purple-eyed enemies are in range. At Vault 2, shoot every Aether crystal. Return to the lift after each objective to reach the roof. The first stop has an Arsenal; the second has Wunderfizz and crafting.
- Against S.A.M., stay near cover and evade purple barrages, the red tracking beam and spinning electrical volleys. After the red beam, shoot the four exposed glowing vents around her eye, then attack the red central eye. When she leaves and starts a S.A.M. Trial, prioritize its stated task and reach Legendary to earn a perk rather than a penalty. Repeat the vulnerability windows until she is defeated.
Read each trial instead of continuing ordinary kills. Lower rewards can impose ammo or weapon penalties. Replenish during intermissions and stay mobile when her later volleys travel around the arena.
S.A.M.’s opened vents surround the central eye - Against Uber Richtofen, break shoulder generators and focus the exposed head/core while clearing robot adds. Keep clear of his leap and electrical attacks. After the mech breaks, he fights from a jetpack with the Wunderwaffe. Use cover, sidestep bolts and leave marked missile zones immediately. Smoke or Aether Shroud creates brief firing windows; watch his aerial attacks instead of standing still to reload.
Both routes complete the main quest. Do not build your plan around a Chopper Gunner: these bosses can destroy it. Round 100+ also has a harder encounter variant.
First phase: shoulder generators open the damage opportunity
Side Quests
Choose Gorgofex C or N
- With Gorgofex, speak through Blanchard’s Executive Office door. Choose your quest before starting: beginning one upgrade locks the other quest for this match. Either upgrade permits Pack-a-Punch. This choice is separate from the final S.A.M./Richtofen boss alliance.
- For Corpsloder, press Reception’s red button and protect Maintenance Klaus until it shuts off an elevator. Use the working shaft to reach Quantum Computing Core. Jump into the disabled shaft with your parachute and interact with all three red buttons on the descent. Back at Core, kill the blue-effect zombies using Gorgofex, then interact with Panos to receive Gorgofex C.
Use the parachute to reach each red shaft button - For Necrodystonia, collect the Strauss Counter from Quantum Computing Core’s terminal. Follow its rising reading to a Life Drain vial; out of range means search the other tower. Shoot the out-of-bounds vial with a charged Gorgofex shot and retrieve it. Also collect Clean Hood in Bioweapons Lab, PC Fan left of Containment’s Arsenal and Tubing outside Quantum Computing Lab.
The Strauss Counter leads to a vial outside the playable floor - Build the Essence Extractor beside Blanchard’s door and insert the vial. Survive the approximately 90-second lockdown, collect Blanchard’s Life Essence and immediately carry it to Bioweapons Lab. Place the Gorgofex and essence in the left hood and hold interact to infuse Gorgofex N.
The essence carry drains health. Clear the route beforehand and avoid losing the vial; if you set it down, mark its exact position and recover it before leaving.
Paintings & the Aether Blade safe
- Return three loose paintings to the wall beside Director’s Office’s Arsenal. Carry one at a time: Reception’s small red teleporter side room (right wall slot), Sublevel 10 upper walkway near the small stairs/crate (middle), and Android Assembly’s outer balcony pillar beside the janitor cart (left). Each placement drops 500 Essence.
- After Pack-a-Punch, drive an ARC-XD through the small wall opening beneath the Forsaken chamber in Dark Entity Containment. Follow it to the hidden crystal and detonate. Shoot the crystals that appear around the chamber and collect the Safe Key from the last. With all paintings returned, deploy Mister Peeks Field Upgrade in front of the portrait behind Richtofen’s desk. Interact with the exposed safe, defeat the ambush and HVT Elder Disciple, then open it with the key for the Aether Blade and intel.
The key may not appear in the inventory display. Use the quest pickup confirmation rather than discarding the attempt.
Aetherella & upgraded C.A.S.T.E.R. turrets
- At Reception’s bathroom spawn barrier beside Rampage Inducer, use an emote-wheel spray on the nearest/left stall door. Fire a charged Gorgofex shot at the exposed Aetherella figure. Lead it to Sublevel 10 and jump into the accelerator beam; exit, then enter again and collide with the figure in the beam. It follows you and fires lasers for a limited time.
Later community references describe recharging it when the toy reappears in the beam. Look for the returned figure rather than assuming a fixed round duration.
- Use a C.A.S.T.E.R. turret until its memory-full announcement. Kill the marked zombie for its Hard Drive, place the drive in Quantum Computing Core’s brain-container device and defend the upload. Repeat the process to raise turret level from 1.0 through 4.0. Each level increases effectiveness and activation price.
Perks, Self-Revive & shooting rewards
- Look down Executive Suite’s central opening and shoot Mister Peeks on the structure below. Interact when he rises to your floor, then parachute after him through every ring down to Reception. Completing the descent awards a random perk.
- During the accelerator boost event, keep killing after the five quest Vermin. Quantum Vermin score 200 and ordinary zombies 10; push the displayed score beyond 2,000 before the timer ends for a random perk.
- At the Director’s Office wall ball rack, shoot the TOP yellow 1, then the other yellow 1 directly below, then the red 5. Collect the Self-Revive from the pool table. Shooting the lower 1 first can lock this reward for the match. Shoot the separate table balls for a small Essence bonus.
The two 1 balls are distinct targets. The reward also triggers the “Samantha’s Soul” remix.
- Outside Mutant Research Test Area, stand beside the white crates near the family tanks and aim at the training dummies by the launcher until you hear a confirmation. Turn toward the crane and shoot all five revealed cans without missing to receive Deadshot Daiquiri.
- After opening Pack-a-Punch, stand on Reception’s floor logo and shoot the Janus logo on the broken TV. Complete the short target sets for an Ammo Mod, then on later rounds an Aether Tool and an Aetherium Crystal. Shoot the final target on the desk to release each reward. One gallery can be completed per round; retry a failed gallery next round. Later rounds improve the upgrade rewards.
- In Sublevel 10, look up from the GobbleGum-machine side for a basketball lodged near the ceiling. Shoot it down during low gravity, then nudge/kick it up the steps into the zombie-spawn opening near that machine, beneath the accelerator-control area. Shoot the ball once it is inside to claim an Aetherium Crystal.
This later-discovered secret is separate from Reception’s three-round shooting gallery. Make small adjustments behind the ball so it travels toward the opening.
- Throw an LT-53 Kazimir toward the central sphere of Executive Suite’s Project Janus statue from the opposite balcony; aim slightly above the large circle, near its upward spike. When the sphere glows purple, kill enemies close to the statue until it drops a replacement Kazimir. Repeat on later rounds when you need another.
The first throw costs a Kazimir. Confirm the purple glow before spending a horde, and expect later rounds to require more souls.
Trash loot, vending, songs & small secrets
- Search bins in Reception, Executive Suite and Director’s Office. Four give loot; after finding those four, return to the gold-glowing spawn bin for its larger reward and “I’m a Real Girl” intel. Melee Android Assembly’s vending machine opposite Franken-Klaus for extra loot; a Melee Macchiato punch gives a larger payout but breaks it.
- Activate Mister Peeks headphones in Mutant Research Lab’s dead zombie hand, on the corpse beneath the Forsaken chamber in Dark Entity Containment, and inside the Director’s Office cupboard. All three trigger “Remember Us.” After Pack-a-Punch, run Reception’s metal detectors left → right → middle twice for “Samantha’s Peace”; repeat the phrase if the cue has not fired.
- For the chicken-bucket hat, grenade the bucket in Executive Office, collect all six scattered wings and interact with the fallen bucket. For Samuel’s jumpscare, use a magnified scope from Executive Suite’s launcher-side opening and aim at the distant picnic blanket beneath the hilltop trees.
Eight hidden power-ups
- Shoot the small power-up models to spawn their rewards. Save useful drops until needed. The Fire Sale model only appears after all other seven have been activated.
- Max Armor — rightmost armored vehicle’s turret outside Reception. Full Power — above Mutant Research Lab when looking from Deadshot.
- Double Points — rack above Quantum Computing Core’s central structure, viewed from its turret. Bonus Points — distant radio tower above Executive Suite’s launcher view.
- Max Ammo — cabinet top near Android Assembly’s ceiling, left of its launcher toward T1. Insta-Kill — servers inside Containment’s Employees Only window, right after the elevator.
- Nuke — above Sublevel 10’s blue pipe left of the crafting table. Fire Sale — Reception’s burning window left of Quick Revive.
Sources and review
Original route synthesis reviewed on 2026-10-02 against community research and illustrated walkthroughs. Screenshots credit COD Zombies Guides and r/CODZombies contributors; game imagery belongs to Activision / Treyarch. Match clues take precedence over example images. This revision has not been verified in a complete in-game run.
- r/CODZombies community guide ↗
- COD Zombies Guides illustrated walkthrough (2) ↗
- r/CODZombies community guide (3) ↗
- r/CODZombies community guide (4) ↗
- Game8 reference (5) ↗
- Steam Community walkthrough (6) ↗
- Steam Community walkthrough (7) ↗
- detonated.com reference (8) ↗
- margwa.net reference (9) ↗
- gameranx.com reference (10) ↗
- codzombieguides.com reference (11) ↗
- callofduty.fandom.com reference (12) ↗
Select any reference image to enlarge it. Screenshot and symbol sources are credited in the linked walkthroughs; this guide uses local copies for reliable access.