Key Features
Enter the Nexus & prepare for the Staff
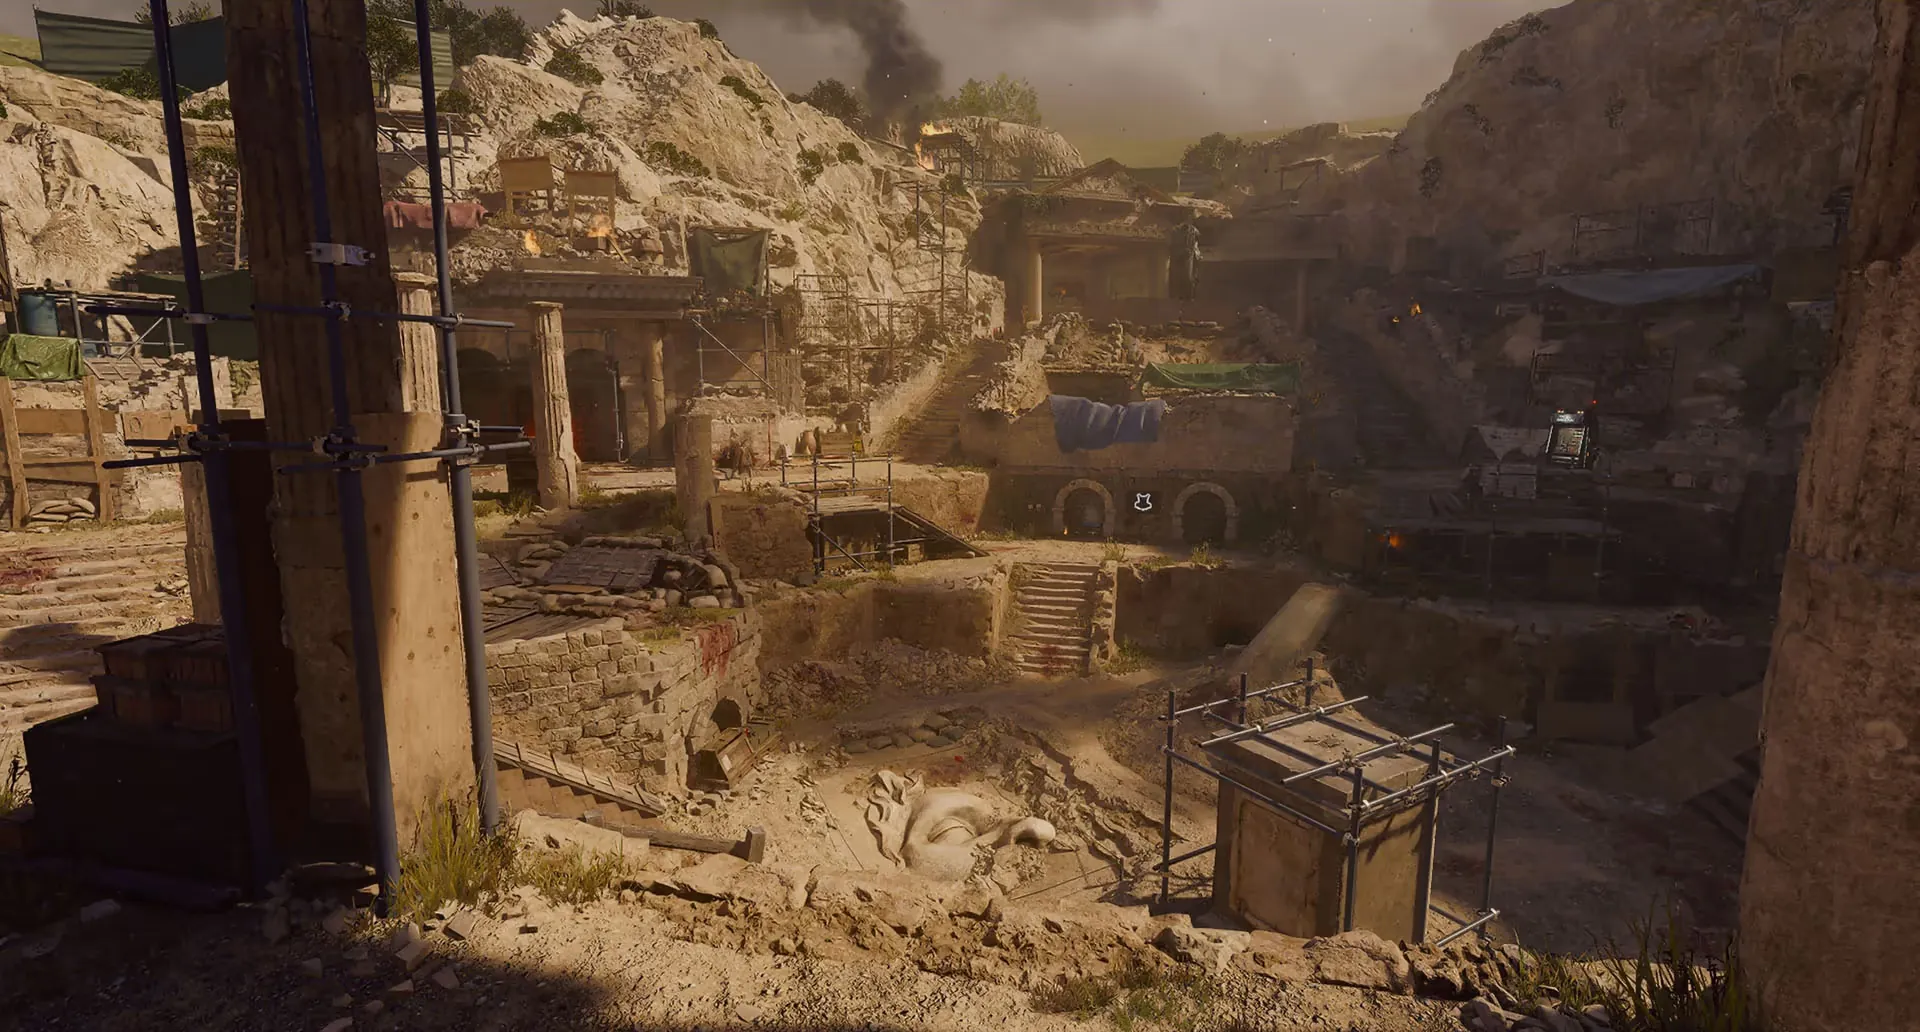
- Follow either underground route from Dig Site to Subterranean Temple. Interact with the crystal pedestal at the marked Door to Nowhere to place the amulet and open the Dark Aether Nexus gateway. Enter the Nexus to find Pack-a-Punch and unlock the rest of the quest.
You do not need a prior Citadelle completion on your account. The amulet interaction is part of this map’s setup.
- Buy armor and upgrade a dependable bullet weapon before beginning the Staff defenses. Pick up a shovel on your route for optional digging. Learn the Nexus portal links: blue to Dig Site, yellow to Shrine of the Hierophants, green to Ossuary and red to Subterranean Temple. Check map markers for Pack-a-Punch when it changes location between Nexus and Roman Mausoleum.
Use Standard mode for the full set of side quests. Keep the bullet weapon through the finale even if you also obtain the free Ray Gun.
Main Quest
Monocle, two constellations & Staff defense
- Kill the first Shock Mimic, normally on round 8, and pick up the Monocle it drops. You also need to have entered the Nexus. The Monocle lets you see the constellation symbols when the purple lantern is correctly positioned.
Collect the Monocle from the first Shock Mimic - In Tombs near Death Perception, move the purple Aetheric Lantern to the holder opposite the bull mural by shooting its current position. Wait for it to relocate before shooting again. With the mural illuminated, shoot its eight symbols in Roman-numeral order I → II → III → IV → V → VI → VII → VIII. Follow the purple orb’s combat stops and clear the five waves; collect the Staff piece at the mural.
IV is four, VI is six. The symbols are stylized Roman numerals, not random runes; identify the complete mark before firing.
Bull mural and illuminated numeral targets in Tombs Collect the Staff piece after the defense - In Neolithic Catacombs near Deadshot, shoot the purple lantern until it occupies the ceiling holder by the Crafting Table opposite the archer mural. Shoot all ten numerals in ascending order, I through X, then follow and finish its five combat waves. Pick up the Head Piece. Either constellation may be completed first.
Lanterns take time to respawn at the next holder. Stop firing once your mural lights. On a wrong numeral, inspect what remains lit and resume the accepted sequence; if the challenge fully resets, start again at I.
Position the lantern in front of the Catacombs crafting area Head Piece reward after the archer constellation defense - Bring the Monocle and both pieces to the central stone Staff altar in the Nexus. Interact to begin its defense. Prioritize the purple-eyed, smoking zombies that attack the forming Staff and the Parasites overhead; ordinary enemies can be trained while the objective attackers are removed. When the defense ends, claim the Staff of Ice.
If its health is depleted, wait until the next round and retry at the altar. A Staff obtained from the Mystery Box skips construction, but still needs the upgrade quest below.
The central Nexus altar assembles the Staff
Ull’s Arrow — lantern sprint, three glyphs & escort
- Move three lanterns into convenient positions with a bullet weapon first. A useful route is Subterranean Temple → Ossuary → Neolithic Catacombs; the opposite Tombs → Shrine → Temple route also works. Then shoot one lantern in each of the three different areas with the Ice Staff within ten seconds. Archibald’s dialogue confirms the challenge.
Repositioning and freezing are different actions: bullets move lanterns, Staff shots freeze them. Rehearse the run before starting the timer; if it fails, reset the positions and retry.
Convenient Subterranean Temple lantern position Convenient Ossuary lantern position Convenient Catacombs lantern position - Return to the Nexus and look up for the three floating rocks bearing purple glyphs. Shoot each marked rock with the Ice Staff to lower it. Record the three exact shapes in the helper below. Only three of the eight possible rocks are marked in a match.
Lower the marked rock with the Staff to read its glyph clearly - Leave through an open gateway, then find the closed gateway on the excavation side. Shoot the three glyphs matching your rocks with the Ice Staff; order does not matter. Check for the successful symbols on the ground below the gateway before entering. A correct door leads to a floating platform with a purple orb.
A door can reopen after incorrect input and drop you when entered. Do not treat “open” as confirmation. A failed input requires another attempt at the newly closed gateway on the next round.
The blocked gateway presents eight possible glyphs - Gather every player and activate the purple orb on the platform. Follow it closely around the Nexus while killing enemies near it. Do not split up for errands: any player falling behind can fail the escort. Once it returns to the central altar, interact there with the Staff to upgrade it into Ull’s Arrow.
On failure, advance a round, find the newly blocked gateway and repeat its glyph entry and escort. Completed Staff construction does not need to be repeated.
Interact with the purple orb on the safe platform Interact at the Staff altar after the escort to receive Ull’s Arrow
Ice Staff — rock glyphs to gateway Open helper
Freeze three lanterns within ten seconds, then use the Ice Staff to lower the three marked rocks in the Nexus. Select the three glyphs you actually see. Names below are visual memory aids.
Choose the three symbols actually visible on your rocks (0/3).
Rock map and gateway reference
Reference numbers identify rocks; they are not an order to shoot. Only the three marked rocks in your game determine your selection.
Earlier Staff build: Roman numeral reminder
Tombs / bull mural: I through VIII. Catacombs / archer mural: I through X. Shoot in ascending order. A stroke before V or X subtracts one: IV = 4; IX = 9.
Saved on this device; inline and full-page helpers share observations. Reference images: COD Zombies Guides.
The four statue trials & fragile return charges
- Toggle Ull’s Arrow to Sekhmet’s Vigor, its revive/healing shot. Shoot the crystal on the next creature statue in the Nexus, collect the released energy and place it in that creature’s matching statue outside. Complete the trial, pick the refined charge back up and return it to the original Nexus statue. Follow Vermin → Parasite → Doppelghast → Amalgam.
These interactions do not advance during special enemy rounds. The return energy has its own meter and can be lost after very few hits. Only one gateway remains available on return; identify that exit before lifting the charge, and have teammates clear the route.
- Release the Vermin energy from the Nexus statue near the central altar and take it to the Dig Site Vermin statue. Start its timed defense and kill the Vermin; charged Staff shots cover the floor well. Collect the refined energy and return through the available portal to the Nexus Vermin statue.
Nexus Vermin statue: use the healing shot on its crystal Dig Site Vermin statue for the outside defense - Take Parasite energy from its Nexus statue to the matching Shrine of the Hierophants statue. During the timed trial, shoot the purple-glowing Parasites, collect their dropped energy orbs and carry those orbs into the statue. Kills alone do not fill it. When complete, collect the refined charge and return it to the Nexus Parasite statue.
Shrine of the Hierophants Parasite statue Collect the dropped Parasite energy and deposit it - Activate the Nexus Doppelghast statue and carry its energy to the Ossuary counterpart. Kill the spawned Doppelghasts while avoiding the marked ground circles that erupt into spikes. Collect the refined charge only when you are ready to move and deliver it to the original Nexus statue.
Ossuary Doppelghast statue - Carry the final energy to the Amalgam statue in Deep Excavation, near the Subterranean Temple area. Damage the HVT Amalgam. When it shields itself, kill the zombies linked to it by energy tethers, then resume shooting the Amalgam. Defeat it and return the refined charge to the Nexus Amalgam statue.
Deep Excavation Amalgam statue - If you lose a refined charge on the return route, go back to its outside statue and collect another charge; you do not need to replay a successfully completed defense. Use decoys, Staff crowd control and a ready movement/defensive field upgrade before carrying it. Confirm the Nexus statue accepts each deposit and its beam activates.
Do not count a completed outside fight as a finished statue. The return deposit is a separate required action.
Sentinel Artifact — damage windows, HVTs & final burst
- After all four deposits, activate the Nexus pedestal that forms the bridge to the boss arena. Before starting, reach legendary rarity and Pack-a-Punch III on your bullet weapon, refill ammunition and armor, buy core perks and prepare a self-revive and charged Aether Shroud or other survival field upgrade. The Staff handles adds; the bullet weapon damages the artifact.
Ray Gun explosions, explosive PaP weapons and Staff attacks are poor substitutes for the required bullet damage. Bring a weapon with a usable magazine and reload speed for the short vulnerability windows.
Activate the bridge pedestal after all four statue charges Interact in the arena only after everyone is ready - Start the fight at the Sentinel Artifact. While it glows orange and sweeps lasers, evade and clear space. When it stops and glows purple, immediately focus bullet fire on it. As it splits into multiple artifacts, repeat the same cycle; move between levels and use the arena’s geometry to avoid crossing active beams.
Keep your magazine ready as the beams stop. Use crowd control before the window opens so zombies do not force you to waste the opening.
Avoid the sweeping orange beams Shoot during the purple vulnerability window - Later waves attach the real orange artifact to an empowered enemy: first a heavy zombie, then a Doppelghast, Shock Mimic and Amalgam. Focus the carrier of the orange artifact; later duplicate carriers can have a pale decoy. Kill the correct HVT, then shoot the exposed artifact it drops during the brief damage opportunity.
HVT melee damage is severe. Slow and separate enemies with Staff shots, keep moving, and spend defensive resources before you get cornered. Collect the Max Ammo rewards between successful stages.
An empowered enemy carries the target artifact The Amalgam carrier is a major late-fight threat - At the final low-health sequence, listen for the bell and find the artifact moving to the back wall. Immediately unload your bullet weapon into it until the final health is gone. This is a damage check: delaying until the wipe attack finishes can end the run. Interact with the artifact when prompted after the victory to finish the ending.
Save a full magazine, ammunition and a damage/survival window for this finish. The game’s actual glow and carrier transitions are more useful than guide phase numbers, which different sources group differently.
Locate the final artifact at the back of the arena and finish its damage check
Side Quests
Golden Armor — both Blood Sacrifices
- Melee open two wooden boxes in the Nexus: one beside Jugger-Nog and one beside the green gateway. Collect both stone heads, then return them to the headless statues in the Dig Site area: near PhD Flopper and in Roman Mausoleum near the blue gateway.
Statue-head crate beside Jugger-Nog Statue-head crate beside the green Nexus gateway Mausoleum statue near the blue gateway Dig Site statue near PhD Flopper - Prepare upgraded weapons, full armor and a defensive field upgrade. Activate one restored statue to start its Blood Sacrifice: your health is reduced to one and scorestreaks are disabled. The Mausoleum/blue-gateway statue summons three HVT Doppelghasts; the PhD-side statue summons three HVT Shock Mimics. Defeat the full group, resupply, then complete the other statue.
Use the upgraded Staff to slow enemies and create firing space. If survival collapses, leave the ritual area to cancel it and recover before retrying. Do not rely on old pre-activation Mutant Injection exploits.
- After both sacrifices, claim the free Golden Armor wall-buy at Roman Mausoleum near the bull statues. Every player can collect it. Its plates regenerate over time after avoiding damage, making it valuable for long runs and the boss.
It is optional and its acquisition fights are dangerous. A first main-quest attempt can use ordinary fully upgraded armor instead.
Golden Armor wall-buy in Roman Mausoleum
All four shovels, dig loot & free Ray Gun
- Hold interact on one shovel; each player needs their own. Check the broken pillar beside the Tombs stairs, the Ossuary skull pile between its two rooms, the ledge left of the central waterfall arch in Subterranean Temple/Deep Excavation, and the ground right of Quick Revive.
Dig the mounds of dirt, skulls and bones for loot. Depleted piles return after later rounds; shovel ownership alone does not guarantee a gem.
- With Death Perception active, dig until you collect three Ancient Gems. Offer all three to the ancient statue beside the bull mural in Tombs, near Death Perception. Kill every Doppelghast it summons and wait for the reward animation, then take the free Ray Gun and essence.
The Ray Gun is useful for survival. Keep a separate strong bullet weapon for the Sentinel Artifact’s damage windows.
Look for a bone-and-dirt dig mound Collect three of these Ancient Gems Offer the gems to the statue beside the Tombs bull mural
Ten vases — free Self-Revive & Light Mend
- Shoot all ten small quest vases. The final vase releases a Self-Revive Kit and Light Mend ammo-mod reward. Use a precise bullet weapon for the high ledges and follow the photographed locations below.
- Dig Site: Scaffolding above the Rampage Inducer. Aim at the small vase on the pictured ledge; ordinary decorative pots do not count.
Vase 1: Dig Site — Scaffolding above the Rampage Inducer - Dig Site: Above the Neolithic Catacombs doorway. Aim at the small vase on the pictured ledge; ordinary decorative pots do not count.
Vase 2: Dig Site — Above the Neolithic Catacombs doorway - Roman Mausoleum / Dig Site: Above the blue Nexus gateway. Aim at the small vase on the pictured ledge; ordinary decorative pots do not count.
Vase 3: Roman Mausoleum / Dig Site — Above the blue Nexus gateway - Tombs: Ledge right of the Shrine of the Hierophants doorway. Aim at the small vase on the pictured ledge; ordinary decorative pots do not count.
Vase 4: Tombs — Ledge right of the Shrine of the Hierophants doorway - Shrine of the Hierophants: High window above Stamin-Up. Aim at the small vase on the pictured ledge; ordinary decorative pots do not count.
Vase 5: Shrine of the Hierophants — High window above Stamin-Up - Subterranean Temple: Above the red Nexus gateway. Aim at the small vase on the pictured ledge; ordinary decorative pots do not count.
Vase 6: Subterranean Temple — Above the red Nexus gateway - Subterranean Temple: Rim of the ceiling opening with the shaft of light. Aim at the small vase on the pictured ledge; ordinary decorative pots do not count.
Vase 7: Subterranean Temple — Rim of the ceiling opening with the shaft of light - Deep Excavation: Distant rock ledge left of Quick Revive. Aim at the small vase on the pictured ledge; ordinary decorative pots do not count.
Vase 8: Deep Excavation — Distant rock ledge left of Quick Revive - Neolithic Catacombs: Beyond the zombie window behind the Mystery Box. Aim at the small vase on the pictured ledge; ordinary decorative pots do not count.
Vase 9: Neolithic Catacombs — Beyond the zombie window behind the Mystery Box - Ossuary: Above the left doorway when entering from Catacombs. Aim at the small vase on the pictured ledge; ordinary decorative pots do not count.
Vase 10: Ossuary — Above the left doorway when entering from Catacombs
Free rarity tool, Pack-a-Punch crystal & ammo mods
- Use Cryofreeze or the Staff of Ice to freeze both waterfalls in the Nexus. Collect the Aether Tool in the central ruined structure. The reward improves with the round: rare before round 11, epic from 11–20 and legendary from 21 onward.
- Find the small sparking rock circling the Nexus and shoot it. Rapidly shoot the additional rocks that appear around the area until the challenge finishes. Collect the Raw Aetherium Crystal at the central altar and the Cryofreeze mod drops. This rock challenge is separate from the three marked upgrade rocks.
- In Tombs, find the alcove with nine upright statues and one fallen statue. Shoot the fallen one to begin a memory sequence. Watch the heads light up; only after the display ends, shoot the upright heads in the same order. Collect the loot and Brain Rot mod.
Number the grid positions in your own notes before starting if needed. Watch the complete sequence; random shooting can reset the attempt.
- In the Speed Cola room of Ossuary, ignite all six stone braziers, two by each entrance. Use Napalm Burst bullets or Molotovs; lit braziers drop replacement Molotovs. Once all six burn, collect the random perk in the room.
- Equip Dead Wire and shoot both Dig Site generators. Collect the Full Power, armor and essence rewards on the fallen column. For renewable minor loot, melee the Nexus fungi to release insects, then shoot the insects; simply shooting the fungi mainly yields salvage.
Zombie soldiers, jumpscare & two songs
- With Brain Rot equipped, quickly shoot the four X-marked skulls in Ossuary in this order: low on the north wall by the sacrificial-table room; floor between its spike traps; floor beside the green gateway; then the skull pile at the Doppelghast statue. This triggers the undead soldier event and releases the “Potts and Pains Pt 4” intel.
- Aim at the distant woman statue until it turns toward you with red eyes. Check above Quick Revive on the tall rock pillar, outside the Deadshot room’s zombie window, and beyond the Catacombs Mystery Box window. Whispering signals that the later sudden face/scream effect has been triggered.
This is a cosmetic scare, not a required quest step or a guaranteed loot reward.
- Interact with the three Peeks headphones: Shrine of the Hierophants below the ledge left of Stamin-Up; Ossuary on a ledge beside the stairs toward the green gateway; Nexus along the southeast outer edge beside the glowing plant. All three activate “Dig.”
- After obtaining the Staff, rapidly shoot I, I, V on the Tombs bull mural and repeat I, I, V on the Catacombs archer mural. Completing both plays “Aether — The Tomb Mix.”
All eight hidden power-ups
- Shoot each miniature model to call its power-up to your position. The Fire Sale appears only after the seven other hidden rewards are collected.
- Bonus Points: small wall hole left of the blue Nexus gateway. Double Points: Nexus trench between the red and green gateways, above the mushroom opposite the ammo cache.
- Full Power: opening left of the Shrine Crafting Table. Max Ammo: ledge above the floodlight at the Shrine–Temple arrow-trap passage.
- Max Armor: wall alcove right of Speed Cola in Ossuary. Nuke: distant rock behind the Catacombs Mystery Box position.
- Insta-Kill: distant Deep Excavation rock formation, below/right of the vase. Fire Sale: fire above the red light between PhD Flopper and the Rampage Inducer in Dig Site.
Map services & travel reminders
- Dig Site and Deep Excavation contain Arsenals; Dig Site sells a two-plate vest and Deep Excavation a three-plate vest. Perks: PhD at Dig Site, Death Perception in Tombs, Stamin-Up in Shrine, Deadshot in Catacombs, Speed Cola in Ossuary, Quick Revive in Deep Excavation and Jugger-Nog in Nexus. Portals are the quickest way across the excavation once all routes are open.
During trial returns, normal portal access changes. Follow the portal actually left open for the charge rather than assuming your usual shortcut still works.
Sources and review
Walkthrough adapted from the linked community, illustrated and specialist guides, with AI-assisted source checks on 2026-10-02. Gameplay screenshots and reference sheets are credited to COD Zombies Guides and its listed contributors; Raven antiquity photographs are by Kristina Ebanez / Destructoid. Game imagery belongs to Activision / Treyarch. Select an image to enlarge it. This revision has not been verified in a full in-game run.
- r/CODZombies community guide ↗
- COD Zombies Guides illustrated walkthrough (2) ↗
- r/CODZombies community guide (3) ↗
- gameranx.com reference (4) ↗
- GameSpot walkthrough (5) ↗
- Game8 reference (6) ↗
- COD Zombies Guides illustrated walkthrough (7) ↗
- COD Zombies Guides illustrated walkthrough (8) ↗
- COD Zombies Guides illustrated walkthrough (9) ↗
- COD Zombies Guides illustrated walkthrough (10) ↗
- gameranx.com reference (11) ↗
- Game8 reference (12) ↗
- callofduty.fandom.com reference (13) ↗
- Official Call of Duty guide (14) ↗
Select any reference image to enlarge it. Screenshot and symbol sources are credited in the linked walkthroughs; this guide uses local copies for reliable access.