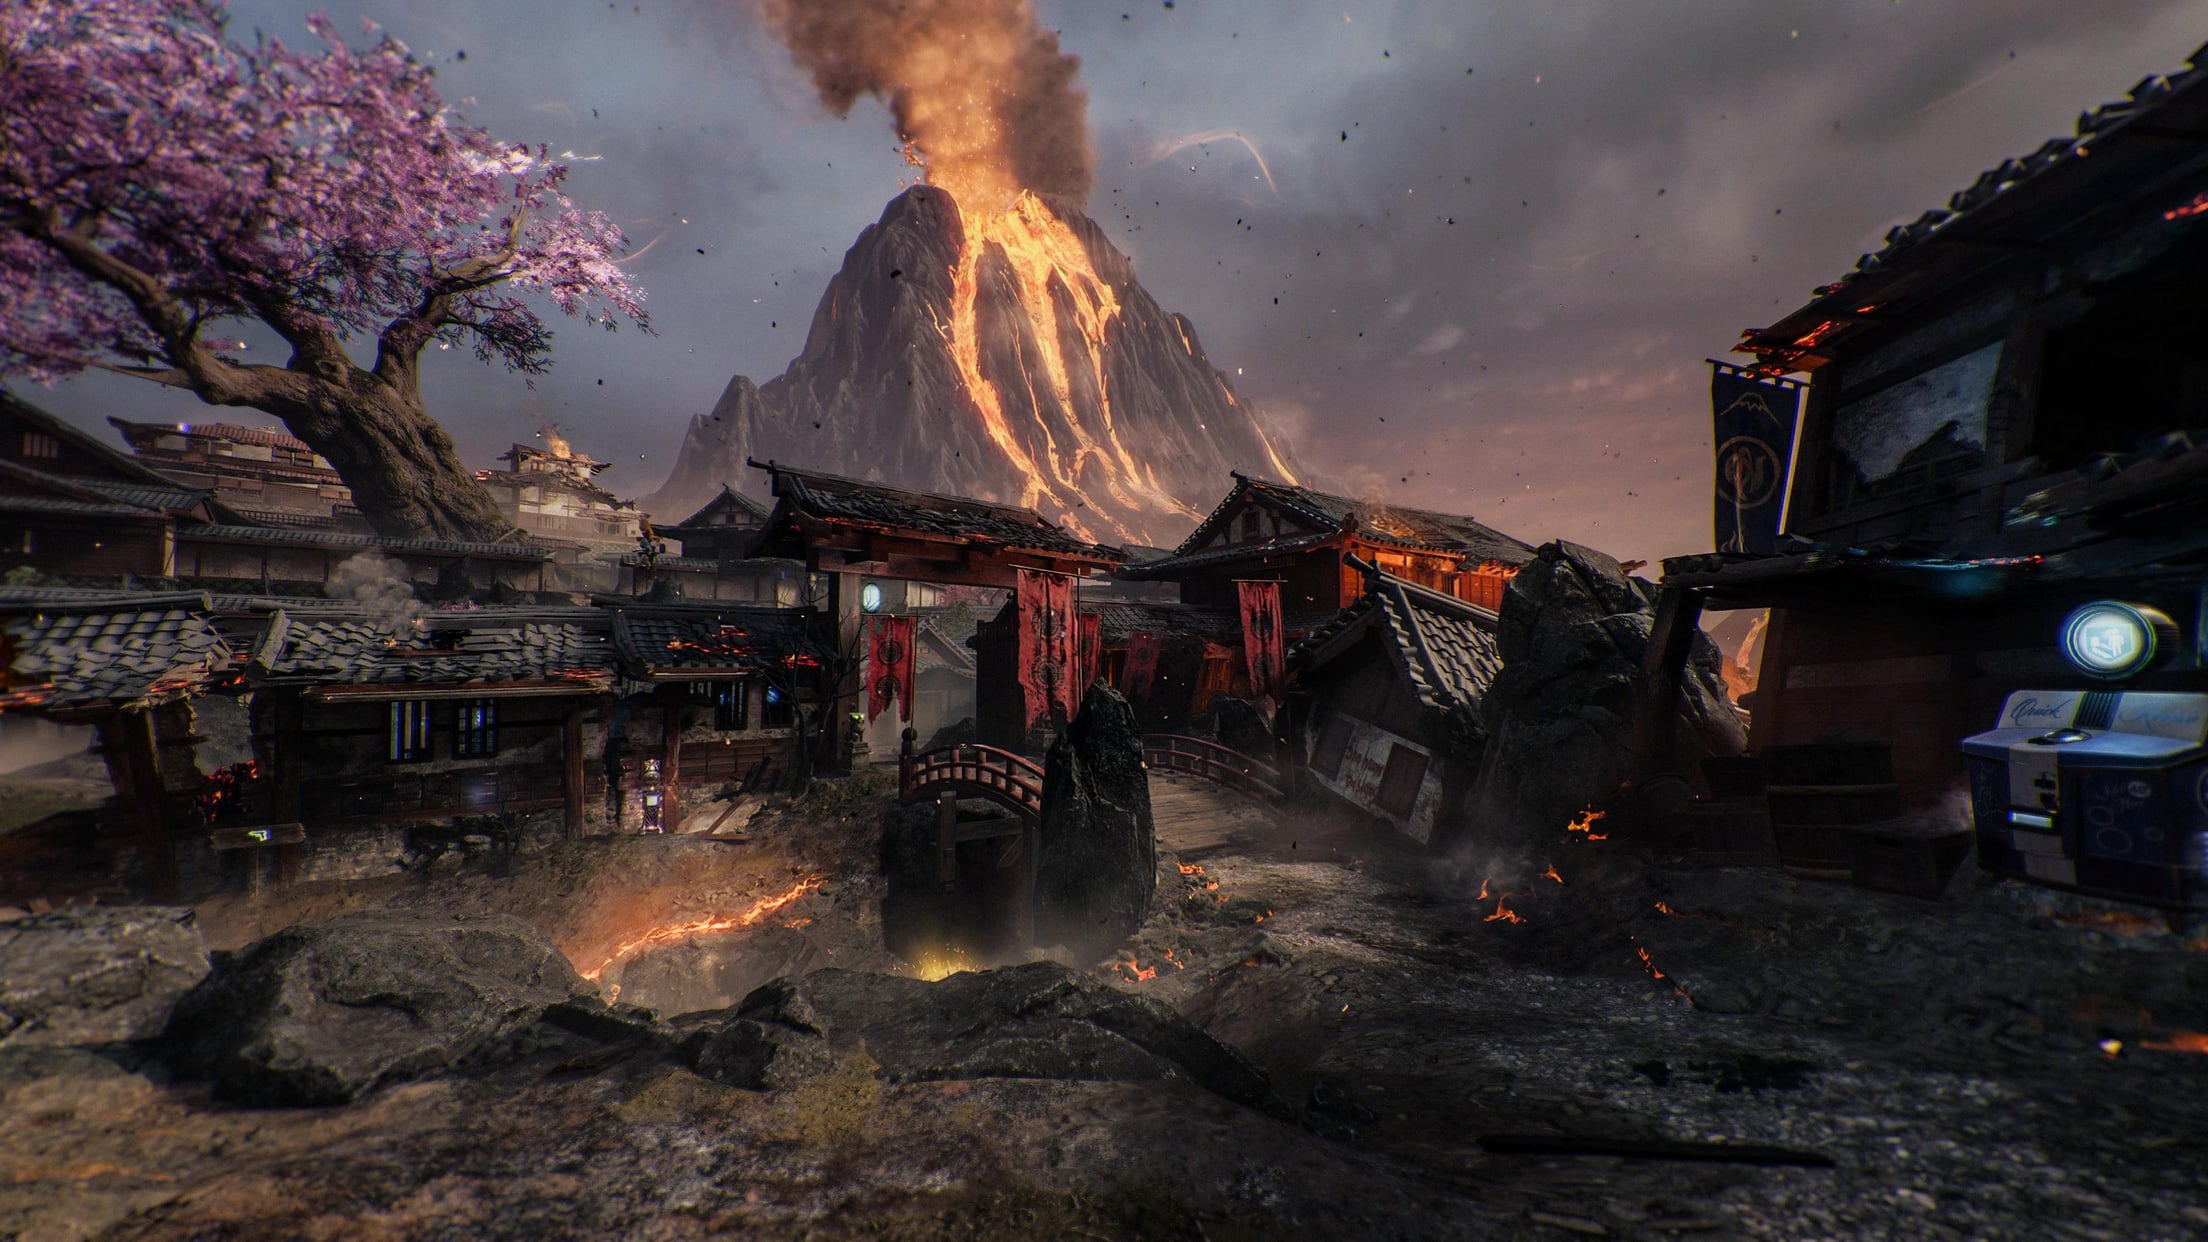
On the fractured slopes of a volcanic landscape, a castle harbors a smouldering mystery. Face the Dragon's undead army, investigate the Shogun's fate, and expose the curse that blackened Takeo's soul.
Key Features
This is a walkthrough of the key features of the map, such as Pack-a-Punch, Wonder Weapons, etc.
- Build the Maneki-Neko at the bench near Vulture Aid in Workshop.
- Cat Statue — Kitchens or Gatehouse.
- Bell — Sinking House in Stables or hanging above the Warden wallbuy.
- Robot Figurine — Storage/Workshop.
- With PhD Flopper equipped, dive to prone below the suspended cage at Tenshu Entrance to drop it.
- Pick up the cage and throw it into lava, the cage should melt and a Nekomata will run away.
- Get a kill at the entrance of one of the doorways until glowing paw prints spawn on the ground.
- Entrance of Flower Garden going into Kitchens
- Entrance of Kitchens going into Central Courtyard
- Entrance of Stables going into Staging Area
- Entrance of Training Area going into Stables
- The paws will point towards a direction, walk a few steps in that direction get another kill. If done correctly, a new set of paws will appear on the ground.
- Repeat the step until you find a triangular shape made of paw prints.
- Throw the Maneki-Neko in the middle of the shape. If done correctly, the Nekomata will jump out of the lava. Note: the lava must not be cooled during that step.
- An Abomination will spawn and eat the Nekomata. Kill the Abomination to free it.
- Wait the next round, and the Nekomata will appear somewhere near the creaky floorboards in either Kitchens or Training Area. The cat will be sleeping and purring.
- Sneak on the Nekomata by avoiding the floorboards, which will be highlighted if Death Perception is equipped, and pick it up.
- Bring the Nekomata to the World Seed next to the Pack-a-Punch machine. If done correctly, it will jump on the seed.
- Wait until the seed traps the Nekomata and pulses red. Each pulsation will push you back and damage you. Keep rushing and meleeing the seed fast enough until the Nekomata is freed.
- If done correctly, the Nekomata will jump on the floor and can be picked up as the Nekomancer.
Main Quest
① Setup
- Build & upgrade the Maneki-Neko, obtain the Nekomancer.
- Lantern Step: shoot 11 lanterns (timed!) → spirit corpse in War Room → Ceramic Shards.
- Mask Step: Ninja Kite → Fox Mask → Simon Says ×3 → blue mask.
② Evidences — 🎭 Suspect 🤝 Accomplice
- Suspect: hide-and-seek mask → 3 items (Pipe, Comb, Case) → Meditation Room shelves.
- Accomplice — Merchant: Coin Purse at spawn → apple zombie → kill at merchant window → Abacus.
- Gardener: fill Bucket (3 waters!) → water 3 plants → shoot glowing flowers → Shears.
- Noble: 3 decoys at windows → reflect grenades → Hat.
③ Evidences — ☠️ Poison
- Monkshood: Empty Pouch → Plant + Volcanic Ash (fissure) → pot + tornado → flower.
- Plum Pit: punch fruit in Kitchens → jump until gold seed.
- Pufferfish: need Pestle → kitchen bowl soul box → ghost → fish.
④ Evidences — 📍 Location 🗡️ Motive
- Location (need Saka Cup): 3 soul boxes → War Room, Collapse Study, Tea Garden (chase dog).
- Motive: Netsuke of Brothers (Stables statue) + Hanko (first Oni).
- Clock Puzzle: storage clock ×4 → assault wave → Japanese numbers → flags into bamboo shoots → final evidence.
Clock & Flags Solver Open helper
Open full-page tool ↗Enter the four clock numbers in order, then count your available flags. Each area holds at most two flags.
Flag inventory · how many of each value?
Record all four clock numbers (1–12).
Saved on this device
⑤ Key Items & Murder Puzzle
- Saka Cup: repair ceramic shards at Tea Garden table.
- Pestle: scroll pattern in Storage Rooms → Doctor's Note.
- Paintings 1–5: place matching evidence by each painting; use trap ghost (accomplice), Doctor's Note + dial (poison), background match (location).
Witness Testimony & Zodiac Dial are part of the murder puzzle — full details in the Painting steps below.
⑥ Endgame
- Purify World Seed: follow light → mini-boss → dragon takes seed. (Perfect run → Katana in PaP room.)
- Expel the Onryo: incense bowls → glowing orb → Shogun's Sanctum → World Seed → Onryo fight (shoot its masks to break immunity).
- Nyxara: 3 fishes on pole in PaP room → fast travel → volcano boss.
Lantern Step
- With the Nekomancer shoot at 11 lanterns located around the map. Note: There is a timer to complete this step. (Easiest to start from Kitchens and do a circle.)
- Tensu — Near Bath entrance
- Central Courtyard — Left side of the tree
- Central Courtyard — Near Kitchen entrance
- Kitchen — Near stairs
- Flower Garden — Near Gobblegum machine
- Gatehouse — Near Speed Cola
- Outer Ward — Near Mystery Box spawn
- Staging Area — Near hillside to Central Courtyard
- Stables — Near Gobblegum machine
- Training Area — Out of bounds near Melee Macchiato
- Tea Garden — Near Mystery Box spawn
- If done correctly, a spirit corpse with a katana embedded in it will spawn in War Room. Interact with it to trigger a short in-game cinematic.
- Pick up the Ceramic Shards from where the spirit corpse was.
Mask Step
- Use the Ninja Kite (glider above where you crafted the Maneki-Neko), hold to the right and use the interact button to pick up the Fox Mask hanging from the end of one of the roof edges.
- Bring the Fox Mask to the wall with the other masks in Storage Rooms.
- Interact with the wall to start a Simon Says-like game. Some of the masks will glow one by one then zombies wearing the same masks will appear. Kill the zombies in the same order as the masks glowed.
- Repeat the process 3 times. If done correctly, the Fox Mask will turn blue and interacting with it will trigger an in-game cinematic.
The Fox Mask will move and hide around the map (Hide and Seek Mask Step). Shoot the mask to drop an evidence and pick each one:
- Takeshi's Pipe: Bottom shelf beside the Workshop stairs.
- Mitsuhime's Comb: Wunderfizz ceiling.
- Takeo's Case: Far-left Elemental Pop window.
Place all three items on the shelves in Meditation Room. If done correctly, the painting of a person wearing the fox mask will appear on the other side of the room.
- Find the Mystery Box location with the gold Japanese plaque at its base. If the Mystery Box isn't there, keep moving it until it spawns (Fire Sale helps).
- Place the Maneki-Neko by the side of the Mystery Box near the symbol and use the box (spin for a gun — it will give you the Coin Purse instead).
- Pick up the Coin Purse.
- Go to Outer Ward (spawn) and place the Coin Purse on the right of Rampage Inducer, then interact with it again to trigger a short in-game cinematic. (Must activate the Coin Purse at spawn before proceeding!)
- In Kitchens, punch the apple in the basket so it falls onto the floor. Leave it there.
- Within 1–2 rounds a zombie will spawn eating the apple. Lead it to the merchant window in the Staging Area.
- Knife the zombie in front of the bloody window with the Nekomancer Wonder Weapon.
- The Merchant will appear. Kill him quickly and collect the Abacus evidence + note.
- Collect the Bucket from:
- Inside a cupboard in Tea Garden
- Top floor of Onsen Baths
- Interact with either pool to fill the Bucket. Note: The Bucket contains 3 parts of water. Running, sprinting, getting hit will remove one part each time.
- Water the three sprouted plants that appear on the gravel path in Flower Garden. They only appear after completing the Coin Purse step.
- Hold interact on each patch.
- A Gardener zombie will spawn. He is immune until he waters all three plants.
- Two flowers will begin glowing — shoot the glowing flowers with a charged Nekomancer shot to remove his immunity.
- Kill the Gardener and collect the Gardening Shears evidence + note.
- Go to the Training Area. Above the entrance to the Tea Garden there are 3 windows with shutter boards.
- Throw 3 decoys at the window — a noble zombie will spawn in the window throwing grenades.
- Reflect the grenades back at the noble to kill him. Strategy: hold the grenade to cook it and time your throw to hit him.
- Once dead, he will drop the Noble's Hat evidence + note.
- Go to the room next to Melee Macchiato with the crafting table and ammo box. Shoot the top section of the broken doorway (facing the large tree) with a charged Nekomancer shot. Collect the Empty Pouch.
- Find the Plant beside the broken bridge near the crafting table — look in the cracks on the right-hand side of the rocks.
- When a Fissure becomes active on the map, stay near it and use the Empty Pouch to collect Volcanic Ash.
- Plant the Plant in the pot near the Exfil entrance in Tenshu Entrance. Pour the Volcanic Ash onto the planted plant.
- Punch a cherry blossom tree three times to gain the glowing effect, then return to the pot and spin around in a circle until a small tornado appears.
- If done correctly, the Monkshood Flower evidence can be picked up.
🔨 Pestle key item tap to expand▸
- Go to the Storage Rooms. Scrolls are hanging out of a box on the inside wall.
- Hit the scrolls in a certain pattern for them all to go into the wall — or use the .
Pestle Scroll Solver Open helper
Open full-page tool ↗Match the scrolls sticking OUT of the wall. The highlighted cells below are the scrolls to shoot.
Shoot 5 scrolls · any orderTop left → Top right → Center → Bottom left → Bottom right
Each shot toggles that scroll and its horizontal/vertical neighbours. “Follow moves” simulates shots; you can also read the complete answer without tracking each shot.
Saved on this device - A scroll will pop onto the floor and unroll, revealing a Doctor's Note (used later in the painting puzzle).
- Collect the Pestle key item.
- Obtain the Pestle key item first (expand the card above).
- Go to the Kitchen, and on the stove area there is a bowl. Interact with it — a green liquid will start stirring, beginning a soul box.
- Kill zombies until the soul box is filled.
- When complete, a light will flash to show a ghost cutscene.
- Once the ghost is finished walking, the Pufferfish evidence will spawn near the creaky floorboards behind you.
- Place the Pufferfish evidence in the evidence room.
All require the Saka Cup key item (expand the card below). If failed, the evidence turns back to ceramic shards — return to tea garden table to repair Saka Cup and flip around to try again.
🥛 Saka Cup key item tap to expand▸
- Broken ceramic shards are found near the pool of blood by the Pack-a-Punch stairs.
- Once the Poison evidence has been completed, the final shard will spawn on the painting in the evidence room.
- Take the shards to the Tea Garden table to repair them into the Saka Cup.
- The Saka Cup will glow to start a ghost cutscene when ready.
- You may need to flip the cup around if unable to pick it up.
- Kill the first regular Oni that spawns (this is the Hanko Oni — not the Onryo boss from the endgame).
- Collect the Shogun's Hanko evidence that drops.
- Make sure all previous evidence is placed in the evidence room.
- Go to the Storage Rooms — left of the entrance by the rubble you will see a clock.
- Interact with the clock 4 times to get it to spin, revealing a 4-digit code.
- This triggers an assault wave — complete it as normal.
- 4 blue numbers will appear around the map in Japanese for the code order:
- 一 (1) — Stables
- 二 (2) — Flower Garden
- 三 (3) — Central Courtyard
- 四 (4) — Spawn / Outer Ward
- Around the map where the bamboo shoots were, flags have spawned with symbols (e.g., 3 diamonds, 4 squares). Pick up the flags to create your number. (Example: if your first number is 6, find 2 flags with 3 symbols each, or a flag with 4 symbols and a flag with 2 symbols.)
- There are bamboo shoots in each area with no flag — place your flags in these shoots.
- Go back to the clock and interact. If done correctly, it will open to give you the last piece of motive evidence.
Clock & Flags Solver Open helper
Enter the four clock numbers in order, then count your available flags. Each area holds at most two flags.
Flag inventory · how many of each value?
Record all four clock numbers (1–12).
Both key items are picked up inside their evidence steps — jump to the step that needs them:
- Saka Cup — collect it in the #4 — Location Evidences step (collapsible card at its start).
- Pestle — collect it in the #3 — Poison Evidences step, Pufferfish (collapsible card at its start).
Collect all the evidence and go to the evidence room. Make sure all the evidence is input. Using all the notes you will find which evidence should be placed by the correct painting. Two of the paintings have sub-steps — the Witness Testimony (Painting 2) and the Zodiac Dial (Painting 3) — which are covered below.
Murder Mystery Solver Open helper
Match the clues from your game. Your evidence placements and zodiac dial update as you go.
What did you find?
Place beneath the paintings
Left to right in the Meditation Room
- 1
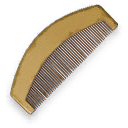 Comb
Comb - 2Choose accomplice
- 3Choose accomplice + symptom
- 4Choose painting
- 5
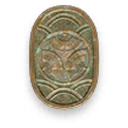 Crest Medallion
Set the time clues
 Rat
Rat Ox
Ox Tiger
Tiger Hare
Hare Dragon
 Snake
Snake Horse
Horse Goat
Goat Monkey
 Rooster
 Dog
Dog BoarChoose animal
and delay
Choose the animal from the Doctor’s Record and the delay from the Toxin Note.
Where to find the clues
Get kills with a Ghostly Rifleman trap, then speak to the ghost witness. The accomplice and the Doctor’s Record symptom together identify the poison. The same record gives the death-time animal; the Toxin Note gives the delay. The fourth painting’s background selects its evidence item.
Combination reference: Margwa’s Murder Case Solver. Unknown combinations stay unresolved.
Painting 1 (Leftmost) — Place the Comb in front of the first painting.
Painting 2 (Accomplice) — Whichever ghost you identify through the Witness Testimony (Gardener, Merchant, or Noble) determines which evidence you place. Put that evidence in front of the second painting.
Witness Testimony
This identifies the accomplice for Painting 2. Go to one of the Ghostly Riflemen Traps and activate it. After about 10 to 20 kills, a Ghostly Fireman will appear:
- Entrance between Outer Ward and Gatehouse; the Ghostly Rifleman will be behind the trap near the house against the wall.
- Entrance between Flower Garden and Kitchens; the Ghostly Rifleman will be in Kitchens in the upper room near the window.
- Entrance between Central Courtyard and Tenshu Entrance; the Ghostly Rifleman will be behind the trap near the door.
While the trap is active, approach the Ghostly Fireman so he can talk and reveal the accomplice:
- "That merchant from the market was hanging around..."
However, if the Ghostly Fireman doesn't mention anyone, that means another trap needs to be activated. The ghost you see confirms which accomplice evidence to use.
Painting 3 (Poison) — Combine the accomplice named by the ghost witness with the symptom in the Doctor's Record (from the Pestle step) to identify the poison. Use the Murder Mystery Solver above to find the matching item. The Doctor's Record also gives the death-time animal; subtract the delay from the Toxin Note to set the Zodiac Dial:
Zodiac Dial
- Check the Death Records and note the "Time of Death" which will display the name of a Zodiac animal as "Hour of the [Animal]".
- Note: All possible animals are Dog, Boar, Rat, Ox, Tiger and Hare.
- Check the note with the poison list and note the time it takes for the corresponding item on the cloth to kill someone.
- Place the dial hand on the animal from the Death Records, then, like a normal clock, remove the time from poison list.
- Example: If the Time of Death is "Hour of the Hare" and the time from the poison is "3 hours", place the hand on the hare then move it by 3 cases anti-clockwise (from right to left) which should correspond to the rat.
Painting 4 (Location) — There is a painting hanging nearby (fish, mountain, etc.) which will match with the background of the 4th painting. Whatever evidence you found in that area is the one you place.
Painting 5 (Rightmost) — Place the Clock Seal in front of the fifth painting.
If done correctly a glowing light will spawn that you have to follow.
- Follow the glowing light to the World Seed.
- Interact with it to purify it — this takes you to a mini-boss fight arena.
- Defeat the mini-boss and you will be taken back to the map.
- The dragon will spawn in and take the World Seed away.
- Note: If you complete the evidence steps correctly on the first attempt, a Katana will spawn in the Pack-a-Punch room. If you fail and have to redo, it will not appear.
- Interact with the incense bowls on either side of the paintings. If done correctly, a glowing orb will appear.
- Kill zombies near the orb until it moves to Shogun's Sanctum.
- Interact with the World Seed to start the fight against the Onryo.
- After being teleported to the Central Courtyard a special Oni will appear as the Onryo. Periodically, the Onryo will become immune and shooting its masks will remove that immunity.
- Once the Onryo is killed, a fast travel will appear in Shogun's Sanctum to travel to the Volcano and fight Nyxara.
- Additionally, if the mystery was solved without any mistake, an Ultra-rarity Path of Sorrows will drop in the room and can be picked up for the Melee slot.
- Reach the boss arena in two ways: walk towards the three fishes on the pole in the Pack-a-Punch room for a fast travel, or use the fast travel that appears in Shogun's Sanctum after the Onryo is defeated.
- Nyxara fight details TBD.
Side Quests and Easter Eggs
The Maneki-Neko can be upgraded in two stages at the bench in Workshop. Both start with the White Powder obtained from the Ghostly Riflemen trap in Central Courtyard.
- Obtain the Combat Bow and activate the Ghostly Riflemen trap in front of Central Courtyard.
- A blue target should appear when looking through one of the holes in the wall.
- Shoot at it with the Combat Bow, if done correctly another target should appear.
- Rapidly shoot all the targets then return to the wall and pick up the White Powder on the ground.
- Return to the bench in Workshop to upgrade the Maneki-Neko (Stage 1).
Stage 2 — Maneki-Bomb: collect three items, note that neither of them will appear on the HUD or inventory:
- The White Powder from Stage 1 (or re-acquire it by activating the Ghostly Riflemen Trap in Central Courtyard and standing behind the right-most hole while reloading your weapon).
- Matches found at the bottom of a shelf in Kitchens across Double Tap Root Beer.
- A piece of charcoal found in the left entrance at the bottom of the cubic kamado stove on the side facing away from the Mystery Box location in Kitchens.
Return to the bench in Workshop to craft the Maneki-Bomb, re-purchasable for 1500 Salvage.
The Maneki-Bomb is a Tactical Equipment that will create a shield bubble for around 15 seconds around the equipment preventing any zombie or enemy from entering the area, and stopping projectiles.
- Within Flower Garden, several rocks can be seen floating in the river of lava in the middle of the area or at the right of Wisp Tea.
- Shoot at the rocks to drop either a robot arm, robot leg or robot torso.
- Once all 5 parts are collected, a UBER Klaus Core will spawn and move through the area before exploding and crashing on the ground.
- Interacting with the Klaus Core corpse will send you to a mini-boss fight arena as a Rhino and you will need to eliminate a Zursa and an Abomination.
- Once done, a new Remote Robot support can be purchased from the Klaus Core corpse for 1750 Salvage.
The Remote Robot is a Rhino with a samurai helmet.
- Starting from Round 9, jump on the floating rock that will appear behind Melee Macchiato in Training Area.
- Continue to drift on the rock until it reaches the roof of a sunken house. This will trigger an obstacle course.
- Complete the obstacle course.
- If done correctly, four statues will spawn and one of them will have the Ray Gun in its mouth which can be picked up.
- Collect 4 carrots:
- In a basket left of Quick Revive in Outer Ward.
- Inside the cabbage stand in Kitchens, near the fire pit.
- Sticking out of the ground next to the Exfil phonebooth in Flower Garden.
- In a basket inside Workshop.
- If done correctly the four carrots should appear inside a bucket left of the Mystery Box in the Stables.
- Make sure to open all the doors on the map. Once all of them are opened, an origami horse should be floating above the bucket. Interact with the horse to start the race.
- The race will feature massive balls chasing you, sushi platforms above lava, koi carps jumping in and out of lava, and koi carps falling out of the sky creating plume of fire.
- Finish the race back at the Stables and collect the reward. The faster the completion the better rewards. The race can be repeated.
There are 7 Power-Up statues around Kowakujō giving out the corresponding Power-Ups when shooting them, with two additional statues appearing after the first 7 are activated.
- Bonus Point: In the exterior corner of Kitchens, on the other side of the Novaline 34 Wall-Buy.
- Insta-Kill: Behind the drawer doors at the bottom of the desk where the Karakuri figure for the Maneki-Neko can be found in Storage Rooms.
- Double Points: Between the two branches of the massive cherry blossom tree in Central Courtyard.
- Nuke: In the lava, against the cliff opposite of Melee Macchiato in Training Area.
- Full Power: Inside the roof of a sunken house outside of Flower Garden behind the Exfil phonebooth.
- Max Armor: On the ground between a crate and a chest inside an out-of-bounds room near Vulture Aid in Workshop. Note: Requires to jump to see it.
- Max Ammo: At the bottom of a shelf near a lamp in the out-of-bounds room in Training Area.
- Fire Sale: Underwater in Onsen Baths, beneath the tiles. Only available after all the others have been activated.
- Random Perk: Inside a golden vase on a shelf near the fire pit in Kitchens. Only available after all the others have been activated.
Find three Mr Peeks headphones around the map:
- At Stables
- At Kitchen
- At Onsen Baths
"Evencry" by Kevin Sherwood, Malukah and Cole Rolland
- Travel to Central Courtyard.
- Find the TK symbol on ground next to the cherry blossom tree.
- Crouch in front of the symbol and look up the tree, then wait a few seconds.
- If done correctly, the screen will glow and the music starts before a quote from Tom Kane's Takeo is played.
"When The Stars Go Dark (A Tribute to Tom Kane)" by Brian Tuey
- Play as Takeo Masaki and obtain a Psych Grenade.
- Throw a Psych Grenade inside the War Room near the stairs leading to the Pack-a-Punch machine.
- Another Takeo should appear; walk towards him and he will disappear leaving his Katana behind. Interact with the Katana to start the quest.
- Progress through the forest and eliminate the Hellhounds, then the Scorched Zombies, and finally the Heavy Zombies.
- Once done, Takeshi will spawn. Eliminate Takeshi to complete the quest and return to the map.
- A Rare Katana will be available as a reward, alongside an Aether Tool whose rarity will depend on the completion round.
Collect three different items:
- Maneki-neko (Cat figure):
- On a crate in Gatehouse
- On a barrel in Kitchens near Double Tap Root Beer
- On a barrel in Kitchens
- Furin (Wind chime):
- Hanging above the passage to the red flag in Staging Area
- Hanging above the Warden 308 wall-buy in Training Area
- Hanging above the doorway of the half sunken house in Stables
- Karakuri (Man figure):
- On the floor in Storage Rooms on the same floor as PhD Flopper
- On a desk in Storage Rooms
- Next to a wicker vase in Workshop
Craft the Maneki-Neko from the bench next to Vulture Aid in Workshop which can be re-purchased at the bench for 500 Salvage.
The Maneki-Neko is a Tactical Equipment that will repel zombies and enemies when thrown.
- Collect 5 different rat toys across 8 possible locations.
- Shoot at 5 different cats to scare them away, across 8 possible locations.
- Only one cat will be available at a time, and the next cat will not appear after 3 or 4 rounds from scaring away the previous cat.
- Every time a cat is scared away, it will appear on top of the roof of the small house in Tea Garden.
- Once all the rat toys are collected and all the cats are on the roof, the screen will turn white and a Random Perk will appear as a reward.
- Within the small house, several cat houses will appear with the cats playing on them alongside paintings of cats. Additionally, two Mystery Perk cans can be found on the table within the house.
- Wait for a Fissure to become active in Kitchens.
- Note: Getting the cherry blossom tree buff can be useful to reduce the damage taken from the Fissure.
- In one of the outdoor corners, near the cherry blossom tree, there should be a gacha machine.
- Melee the machine to spawn a glowing orb. Run into the orb to spawn the next one, repeat the process for a total of 8 times with the final one closing the Fissure.
- If done correctly, the machine will remain permanently in Kitchens. The machine can be interacted with for 500 Essence.
There are 4 possible charms that can be acquired from the machine:
- Pufferfish: With the Pufferfish Charm equipped, zombies will drop Plant Food replenishing health by 50 points.
- Kite: TBD
- Karakuri: TBD
- Maneki-neko: TBD
Note: Equipping the charm will remove the Pack-a-Punch level damage from the weapon, it is unclear if it's intentional or a glitch.
Relics
There are 6 Relics that can be unlocked from playing Kowakujō, those Relics are then used as gameplay modifiers for Cursed mode.
The Relics are divided into three groups: Grim, Sinister, and Wicked. Each group fill the Cursed Tier bar differently with the Grim Relics filling up a third of the bar, the Sinister Relics filling up two thirds, and the Wicked Relics filling up the entire bar. As such you will need to apply different Relics to reach the desired Tier level.
- Tier I: Any 3 Grim — Unlocks Golden Armor (45,000 Essence)
- Tier II: 2 Sinister + 2 Grim (example loadout) — Unlocks Ultra Rarity (8,000 Salvage or 17,500 Salvage from default rarity)
- Tier III: 3 Grim + 2 Sinister + 1 Wicked (example) — Unlocks Pack-a-Punch IV (100,000 Essence)
Make sure to scroll sideways to see the steps. Higher tiers just need the total difficulty value to match the target fill; swap relics as you discover them.
Grim Relics
- Pick up 2 drum sticks — one in the Gatehouse (to the left of the Lucky Cat spawn) and one in the Workshop.
- Go to the drums in the stairs from Flower Garden inside the Kitchen — melee both drums, then press interact on them to start Simon Says.
- Play Simon Says: shoot or melee the drums in the order shown to you. You must do this 3 times before the portal opens.
- Survive until round 20 without taking damage from zombies.
- Walking in lava is fine — you just cannot get hit by zombies (similar to the Social Distancing Dark Ops, but slightly different).
- Cheese (until patched): play a Squad No-Fill game and invite a player on round 19, then reach round 20. Solo: beat the boss, save & quit as soon as you return from the boss fight, then reload the save.
Sinister Relics
- Get 4 broken pieces by getting kills with the upgraded Maneki-Neko and the wonder weapon — kill a lot of zombies while inside the upgraded Maneki-Neko with the charged WW shot. The shard spawns where the Maneki was (or near it); they glow faint orange and are very small / easy to miss.
- Put the 4 broken pieces in the fireplace in the Kitchen and throw a Molotov to reassemble them.
- Open the Cat Cafe side EE and get the Catnip on one of the cat trees — guide.
- Put the bowl with Catnip on the flat rock next to the big tree.
- Fail both assault phases on Flower Garden and Training Area — the next assault phase will be at the Castle Trap. (You can force an assault phase by doing the Clock step for the 4th poster of the EE — might shave off some rounds.)
- Kill ~50 zombies with the wonder weapon during the assault phase in the big tree area — souls get sucked by the bowl (radius is the whole area). You can fail the first defense step if you need more time / more zombies.
- Pack-a-Punch 10 different unique weapons — the Pack-a-Punch machine and crystals both work. (The multi-pack Augment for Mule Kick is unconfirmed; gobblegums have mixed reports.)
- "Unique" means no duplicates — in co-op the whole team cannot pack the same weapons; it needs 10 completely different weapons total to trigger the portal.
- Sam's drawing apparently also works but will likely be patched — it must still be 10 different weapons.
Wicked Relics
- Complete the Path of Torment part of the main EE to get Takeo's Sword — do the main EE up until the boss fight.
- You MUST correctly solve the Murder Mystery step on the first try (use the solver).
- 3 symbols spawn around the map — transfer energy from the Oni using the sword's parry, then melee the symbol. The symbol turns red when you have it right.
- Hit the symbols in this order to spawn the portal: 姿 (1) → を (2) → 見世 (3)
- Reach round 60 in Tier II or higher without failing the Attack Waves — trap statues seem fine to fail, but failing the flag defense fails the relic.
Wall-Buys and Perk-a-Colas
- Jäger 45 — Outer Ward
- Echo 12 — Staging Area
- MPC-25 — Stables
- Warden .308 — Training Area
- M10 Breacher — Gatehouse
- Ryden 45K — Flower Garden
- M34 Novaline — Kitchens
- Peacekeeper Mk1 — Central Courtyard
- M15 Mod 0 — Tenshu Entrance
- MK.78 — Storage Rooms
- XM325 — Onsen Baths
- XR-3 Ion — Shogun's Sanctum
Mister Peeks · Cursed mode: Check his possible spawn locations. Shoot him when he appears to drop an egg that can contain perks and other loot.
Note: Der Wunderfizz appears after purchasing 4 Perk-a-Colas or after reaching Round 20.
- Quick Revive — Outer Ward
- Stamin-Up — Staging Area
- Speed Cola — Gatehouse
- Death Perception — Stables
- Melee Macchiato — Training Area
- Wisp Tea — Flower Garden
- Double Tap Root Beer — Kitchen
- Juggernog — Central Courtyard
- PhD Flopper — Storage Rooms
- Mule Kick — Tenshu Entrance
- Elemental Pop — Onsen Baths
- Vulture Aid — Workshop
- Der Wunderfizz — Collapsed Study