Key Features
Before you enter
- For your first portal unlock, complete the named story mission for its gold relic, collect the other three relics, upgrade them to gold and perform the four-item pedestal ritual. The sections below follow that order. Once the portal is permanently unlocked, skip to Repeat visits. Joining another squad’s portal does not establish your personal unlock.
- Prepare upgraded rarity AND Pack-a-Punch, armour, useful perks, spare self-revives, ammunition and crowd-control tacticals. Make room for relics/plans before entry. Carry a mask for gas areas and coordinate revive/crowd-control roles. Prepare the next objective rather than relying on a fixed release-era best-gun recommendation.
- Repeat ordinary entry uses a triangular Sigil and a 30-minute timer; Elder entry uses an Elder Sigil and a 15-minute timer. Find the corresponding interaction side, confirm its variant and accept the squad travel vote. Ordinary rewards are acquisitions/Elder Sigil opportunities; Elder visits provide schematic opportunities; check each Reward Rift for the actual loot. The 2024 temporary ordinary-entry waiver is historical; follow the current item prompt.
- You can collect the relics over several deployments. Keep each item in your rucksack through a successful exfil, then bring it back when you are ready to upgrade or place it. Losing carried relics after your permanent portal ritual is complete does not remove the unlock.
Main Quest
Bad Signal: four seals and Gorm’gant
- If the gold Locked Diary is already safely owned, skip repeating this mission for the unlock route. Otherwise select Bad Signal and use its NAMED coastal portal beside the seasonal island, then confirm the squad vote. A Sigil contract entry does not run Bad Signal.
- Follow the four seal markers. Activate each and kill zombies nearby until its collection bar completes and the seal breaks. The revealed relic imagery previews the later unlock items; it does not provide all four gold items in this mission.
- When told to exit, approach the southern beach portal to trigger Gorm’gant. Damage its glowing mouth/body weakpoints, shoot tracking purple orbs before they reach you and sidestep its rising beam and head slam. Maintain armour/ammo with the beach supply and available drops. If swallowed, prepare to parachute as it spits you out.
- Open the boss Reward Rift, take the GOLD Locked Diary and use the mission exit. The Diary is already attuned. Extracting the mission and keeping this item complete the story/relic goal; starting a seal is insufficient.
Acquire the three purple Urzikstan relics
- With Brain Rot equipped, shoot an Aether Nest/infested-stronghold cyst only until it turns green. Interact BEFORE destroying it to recover the purple Pill Bottle. Clear nearby enemies to protect the interaction; a destroyed ordinary cyst cannot be used afterward.
- Use a Dead Wire-equipped weapon on a Harvester Orb until it changes and is destroyed. Collect the purple Surveillance Camera from its drops. Follow the orb’s movement; an ordinary non-quest orb kill is not the attuned camera.
- Put one Rotten Flesh/Chunk of Flesh and a Molotov into an available doghouse. Defeat the hostile Hellhound it releases and take the purple Dog Collar. This is the quest-hound recipe, distinct from feeding flesh for a friendly pet.
Upgrade each purple relic through its sky portal
- Carry the purple Pill Bottle through an Aether Tear, parachute into its GREEN floating portal and follow the special purple bounty. Defeat its marked target and collect the gold Bottle from the Reward Rift.
- Repeat with the purple Surveillance Camera, choosing the ORANGE sky portal. Complete its special bounty and take the gold Camera. Do not mark attunement merely for entering the tear.
- Repeat with the purple Dog Collar via the RED sky portal into the high-threat bounty. Prepare before this route; kill the marked target and collect the gold Collar. Gold Diary requires no additional upgrade. If a required item is missing, recover/extract it rather than placing a purple substitute.
Establish personal Al Bagra portal access
- Bring all four GOLD relics to the island tornado near Bad Signal. Match the engraving: Pill Bottle to Brain Rot, Camera to Dead Wire, Dog Collar to Napalm Burst and Locked Diary to Cryo Freeze. Each pedestal must receive its correct gold item.
- After the portal ritual, defeat its Mega Abomination gate boss and collect the access/Sigil reward. Record permanent access only once the ritual is complete. Later visits use Sigils and do not require re-collecting these four relics.
Repeat visits: three Mister Peeks contracts
- Use the prepared Sigil side for ordinary or Elder. Before starting, note the roof and underground exit references below and keep an extraction margin, especially on Elder’s shorter timer. Three Peeks starters correspond to Extractors, Escort and Outlast; contract order can be chosen for the squad.
- Take the Aether Extractors starter at the east-side rampart/H4 reference. Travel to its marked devices, distract the horde and hold every panel interaction uninterrupted. Move on only after each charge is registered; an interrupted hold does not destroy the device.
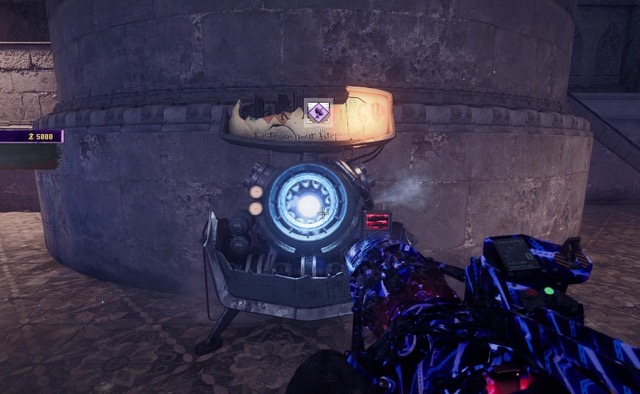
Al Bagra Aether Extractors contract starter referenceWZHUB; individual screenshot creator not identified · Source ↗ - Take Escort’s west-side E4 Peeks starter and reach its ACV. Stay nearby to move it and protect its health at every anomaly stop. Crowd control and an optional packed V-R11 repair can preserve the vehicle; destruction fails the contract.
Al Bagra Escort Peeks contract starterWZHUB; individual screenshot creator not identified · Source ↗ - Take the E6 Outlast starter and activate the PND in the fortress interior above Pack-a-Punch. Remain inside its objective area, clear pressure and finish analysis before leaving to claim the rift.
Al Bagra Outlast Peeks starterWZHUB; individual screenshot creator not identified · Source ↗ - Loot each completed contract. Ordinary runs offer acquisitions and possible Elder Sigils. In Elder, Season 1’s schematic progression follows contracts completed: Dog Bone first, Golden Armor Plate second and Aether Blade third. Completing all three in Elder also supplies the Geode MCW blueprint objective. Check each actual reward and carry plans to extraction; later seasons use different/random schematic behavior.
Optional fortress keys and equipment rooms
Eight documented key opportunities lead to named rooms. Inspect each actual key and visible door; loot contents are variable.
- Officers Quarters keys: inspect the right-hand ticket booth at the main gate/F4; then reach the tower key via the floating excavator route. The two Quarters doors are above the Outlast hall: take its stairs up to the higher walkway. Each door consumes its own matching key.
- Munitions keys: inspect the desk in the small western B4 building beside the warehouse/ACV area; and continue the floating-vehicle route over the ambulance/flatbed to its tower key. Match them to the two ground-floor Munitions doors around E5. A found weapon case is loot, not a guaranteed Scorcher.
- Barracks: inspect the H5 apartment dining/kitchen table and use the matching key at its fortress-side Barracks door. Antiquities: descend via the south gate/rope beneath the fortress and inspect the box at the rope’s bottom; its office door lies up the stairs on the Outlast hall’s side opposite Pack-a-Punch.
Apartment Barracks keyWZHUB; individual screenshot creator not identified · Source ↗ Barracks doorWZHUB; individual screenshot creator not identified · Source ↗ Underground Antiquities keyWZHUB; individual screenshot creator not identified · Source ↗ Antiquities office doorWZHUB; individual screenshot creator not identified · Source ↗ - Two further key opportunities are conditional: feed at least three flesh chunks to the C3 dock doghouse, and clear the underground courtyard/F4 infested nest’s cysts. Inspect the actual dropped key name. The release-era reference reported variable/broken labels here; do not promise a specific bedroom key. If you obtain South Al Bagra Top Floor Bedroom access, use its named third-floor eastern apartment door.
Optional loot route: prioritize a safe exit over unfinished key searches on Elder’s short timer.
Use the appropriate exit and retain plans
Sources and review
Illustrated instructions from the references below, source-reviewed on 8 October 2026 and reorganized on 9 October 2026. The guide links, saved-progress compatibility and page behavior have software checks. These walkthroughs have not been verified in a complete in-game playthrough. Gameplay-image and chart creators are credited with each illustration.
- Official Call of Duty guide ↗
- gameranx.com reference (2) ↗
- gameranx.com reference (3) ↗
- wzhub.gg reference (4) ↗
Select any reference image to enlarge it. Screenshot and symbol sources are credited in the linked walkthroughs; this guide uses local copies for reliable access.