Key Features
Before you enter
- For your first portal unlock, complete the named story mission for its gold relic, collect the other three relics, upgrade them to gold and perform the four-item pedestal ritual. The sections below follow that order. Once the portal is permanently unlocked, skip to Repeat visits. Joining another squad’s portal does not establish your personal unlock.
- Prepare upgraded rarity AND Pack-a-Punch, armour, useful perks, spare self-revives, ammunition and crowd-control tacticals. Make room for relics/plans before entry. Carry a mask for gas areas and coordinate revive/crowd-control roles. Prepare the next objective rather than relying on a fixed release-era best-gun recommendation.
- Repeat ordinary entry uses a triangular Sigil and a 30-minute timer; Elder entry uses an Elder Sigil and a 15-minute timer. Find the corresponding interaction side, confirm its variant and accept the squad travel vote. Ordinary rewards are acquisitions/Elder Sigil opportunities; Elder visits provide schematic opportunities; check each Reward Rift for the actual loot. The 2024 temporary ordinary-entry waiver is historical; follow the current item prompt.
- You can collect the relics over several deployments. Keep each item in your rucksack through a successful exfil, then bring it back when you are ready to upgrade or place it. Losing carried relics after your permanent portal ritual is complete does not remove the unlock.
Main Quest
Countermeasures: story vehicle, mall and Krawvir
- Use the named Countermeasures mission portal and confirm the squad vote. If the gold Drum is already owned, only repeat the mission for missing purple offerings. The three hidden obelisks are available in this STORY version, not ordinary/Elder contract visits.
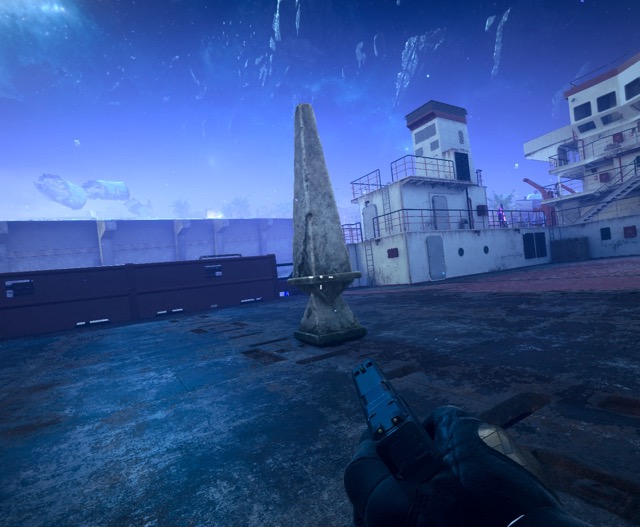
- For first unlock, collect the ship-deck MMA Gloves near spawn before leaving: climb around the back of the ship onto its deck, start the obelisk and use its supplied Insta-Kill to make fist/melee kills INSIDE the ritual circle. Stow the purple Gloves from the Reward Rift. Skip this detour if you already own them.
- Meet the nearby soldiers in the warehouse and return to the story ACV. Stay near it to advance the route. This mission vehicle has no ordinary Escort health meter to protect; defend yourself and the squad while it moves. At the gas-station/carnival halt, kill the EMP Mimic blocking progress, then stay near the vehicle through its neutralizer-part pickup.
- During the part-retrieval pause, first-unlock players can collect the I8 foggy riverbed Mirror. Start its obelisk, read the element on the ritual circle’s BOUNDARY, equip the supplied matching mod and make the requested kills inside it. Complete each element and stow the purple Mirror. Wrong mod: leave until the ritual is abandoned, then retry. If loose loot covers a mod, stow/move it to reveal the prompt.
Foggy riverbed Pristine Mirror obeliskWZHUB; individual screenshot creator not identified · Source ↗ - At the mall stop, enter and destroy all cysts across its lower wings and upper rooms. Use the gas-mask/ammo supplies and clear one section at a time. When the final cyst registers, regroup at the ACV and follow it toward the stadium stage.
- Before starting the final stadium defense, first-unlock players can visit the E3/E4 crossroads Target obelisk. Make headshot/critical kills within its ritual area and collect the purple Perforated Target. Skip an already-owned offering and return to the story vehicle/stage.
Crossroads Perforated Target obeliskWZHUB; individual screenshot creator not identified · Source ↗ - Activate and finish the stadium Outlast defense. After the betrayal/portal event, defeat Krawvir, the EMP Mangler: avoid its cannon, manage the EMP disruption and damage its exposed head. Open the reward for the GOLD Drum, verify carried purple offerings if unlocking, then use the story exit.
Check or recover missing story offerings
- Before leaving Countermeasures, verify the three optional obelisk rewards are carried: Tattered MMA Gloves, Pristine Mirror and Perforated Target. Their conditions are fist kills, matching boundary-element kills and headshots respectively. The gold Drum comes from Krawvir’s reward. If one is missing after extraction, repeat only the required story collection; already-gold items need no repeat attunement.
Upgrade Mirror, Gloves and Target in Urzikstan
- Carry the purple Mirror to I3’s graveyard offering pedestal. Offer it, identify the spawned zombie’s element and take the matching mod from the nearby rooftop tower. Kill the marked elemental zombie(s) with that mod and collect the GOLD Mirror; co-op can require multiple marked spawns.
- At F8’s boxing gym, offer the purple Gloves in the ring. Melee the three punching bags LEFT to RIGHT, then melee-kill the marked spawned zombie. Collect the gold Gloves before leaving.
- Offer the purple Target at H8’s firing range. Shoot all eight appearing targets, then headshot the marked zombie that spawns. Take the gold Target from its reward. An ordinary bodyshot kill is not the requested critical-hit finish.
Unlock the Nahr hill portal once
- Bring the GOLD Drum, Mirror, Gloves and Target to the hill/tower tornado above Nahr Bathhouse. Match their pedestal engravings, including the pedestal set slightly away from the others. Do not substitute a purple item.
- Defeat the gate EMP Mimic and take the access reward. This establishes the personal portal; later trips use the intended Sigil prompt. If the interaction seems absent, clear nearby enemies and inspect both sides/positions for its small prompt before assuming the ritual failed.
Repeat visits: Bounty, Outlast and Extractors
- Near the northwest spawn ship/C5 reference, take the Bounty starter and kill the marked special. Its identity can vary, including a Mega Abomination; read the actual target. Keep adds occupied, use its critical areas and check the reward safely. If desired, do Extractors first and leave this combat-heavy target last.
- Take the restaurant-area Outlast starter around E7 and activate its marked PND. Stay in the restaurant objective, manage Manglers/hellhounds and keep analysis progressing. Mantle counters/barriers if you need room; return inside after repositioning.
Sa’id City Outlast starter at the restaurant areaWZHUB; individual screenshot creator not identified · Source ↗ - Reach the Extractors starter on the mall’s highest roof/I6 reference. Use the external staircase/nearby mantle ledge or loading-dock crates and shelving rather than spending unnecessary time in gas. Follow the marked devices, distract enemies BEFORE entering the tight alley and finish uninterrupted panel holds; the last western site is more open.
- There is no seasonal Escort contract here. Ordinary rewards include acquisitions/Elder Sigil opportunities. Elder contracts can award Mags of Holding, Blood Burner Keys and V-R11 plans, but duplicates can occur and completing all three does not guarantee the whole set. Retain obtained plans through extraction.
Optional stadium music and navigation
Optional detour: keep the current objective/timer in view before crossing to the stadium or floating vendor.
- Interact with three song stones around the stadium: the southern opening with no stands, the field a little east of centre, and the announcer booth in the northernmost stands. This optional music route is separate from a contract reward or portal unlock.
- Wunderfizz floats above the restaurant. Use an available Aether Tear (the source references G6 and I7) or your own safe movement equipment to reach it. Pack-a-Punch can occupy several documented sites; look for its current marker instead of relying on one guaranteed location.
One documented Sa’id City Pack-a-Punch positionWZHUB; individual screenshot creator not identified · Source ↗
Choose one of the four contract exits
- Story runs leave through the mission’s final portal after Krawvir. Repeat visits have documented exits at I7, G4, D9 and C6; choose a reachable currently available exit before the timer runs low. Use the actual portal prompt and verify the post-match retained plans.
Sa’id City southern D9 exit referenceWZHUB; individual screenshot creator not identified · Source ↗
Sources and review
Illustrated instructions from the references below, source-reviewed on 8 October 2026 and reorganized on 9 October 2026. The guide links, saved-progress compatibility and page behavior have software checks. These walkthroughs have not been verified in a complete in-game playthrough. Gameplay-image and chart creators are credited with each illustration.
- Official Call of Duty guide ↗
- r/CODZombies community guide (2) ↗
- r/CODZombies community guide (3) ↗
- GameSpot walkthrough (4) ↗
- wzhub.gg reference (5) ↗
Select any reference image to enlarge it. Screenshot and symbol sources are credited in the linked walkthroughs; this guide uses local copies for reliable access.