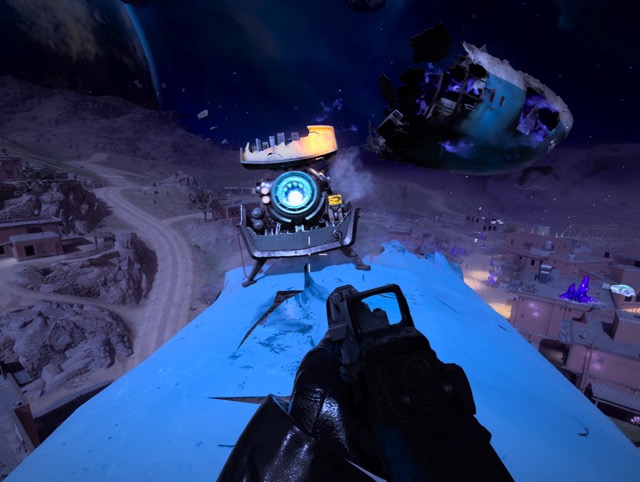
Key Features
Before you enter
- For your first portal unlock, complete the named story mission for its gold relic, collect the other three relics, upgrade them to gold and perform the four-item pedestal ritual. The sections below follow that order. Once the portal is permanently unlocked, skip to Repeat visits. Joining another squad’s portal does not establish your personal unlock.
- Prepare upgraded rarity AND Pack-a-Punch, armour, useful perks, spare self-revives, ammunition and crowd-control tacticals. Make room for relics/plans before entry. Carry a mask for gas areas and coordinate revive/crowd-control roles. Prepare the next objective rather than relying on a fixed release-era best-gun recommendation.
- Repeat ordinary entry uses a triangular Sigil and a 30-minute timer; Elder entry uses an Elder Sigil and a 15-minute timer. Find the corresponding interaction side, confirm its variant and accept the squad travel vote. Ordinary rewards are acquisitions/Elder Sigil opportunities; Elder visits provide schematic opportunities; check each Reward Rift for the actual loot. The 2024 temporary ordinary-entry waiver is historical; follow the current item prompt.
- You can collect the relics over several deployments. Keep each item in your rucksack through a successful exfil, then bring it back when you are ready to upgrade or place it. Losing carried relics after your permanent portal ritual is complete does not remove the unlock.
Main Quest
Union: follow Ava and stop the two orbs
- Select Union and use its named high-threat island story portal. If you already own the gold Giraffe Toy, skip repeating the story for first unlock. Follow Ava/Ravenov until Ava enters the tornado and the two orb markers appear.
- Shoot each floating orb until it reaches its crystal site. One site is by the water tower/warehouses, the other among apartment buildings. Interact with a formed crystal to release its three white wisps and reveal its ordered rune display.
Read and shoot both three-rune sequences
- Record Crystal A’s three displayed shapes LEFT to RIGHT. Follow its wisps and listen for the rune audio in the nearby warehouse/water-tower area. Find each matching wall sign and shoot them in the DISPLAYED order. A correctly completed crystal turns red and becomes destructible; break it.
- Keep Crystal B’s apartment-site record separate. Search its building floors and surrounding signs while listening for the same audio cues, then shoot its displayed three shapes in order. Preserve/correct your observations after a wrong shot; do not reuse Crystal A’s order. Break B once it turns red.
- Return to the tornado and interact with Ava’s unconscious body. Activate the three marked cleansing obelisks and feed each nearby zombie kills until its bar fills and the relic is released. Their revealed items preview the later unlock route. Once all three are cleansed, use the final obelisk before the Entity to start Taoxla.
- Taoxla is a powerful Disciple. When its health bar is grey, kill its marked elite Minions first; they protect it from damage. Avoid its drain beam, clear adds and damage its head weakpoint during each vulnerable period. Repeat as new minions appear.
- Take the GOLD Giraffe Toy from Taoxla’s Reward Rift. Wake Ava, escort her to the marked exit and defend until it opens/she leaves; then extract. A defeated boss without the escort/exfil is not a finished Union mission.
Collect the three purple Urzikstan relics
- Summon a friendly Hellhound through a normal flesh-fed doghouse or an available Dog Bone. Let that dog kill a mercenary SERGEANT, identified by the red beret, at a camp/stronghold or relevant mercenary objective. The dog must make the qualifying kill. Collect the purple Laptop With Stickers from the resulting rift.
- Enter this deployment’s Aether Storm with mask, damage and crowd-control preparation. Kill the required storm zombies (the documented route specifies fifty) and collect the purple Science Journal when its Reward Rift appears. Watch the Stormcaller and boosted enemies; killing the Stormcaller is not the journal requirement.
- At Zohoor Ranch around I7, enter the main building, go upstairs and interact with the container UNDER the bed. Wait for the voice line and collect the purple Imaginary Friend Drawing from the bed’s reward rift.
Perform each item’s Tier 3 summoning
- Carry the item being upgraded. At its matching triangle, shoot the three nearby runes, stand at the viewpoint that aligns the glowing fragments into a triangle and use PERFORM THE SUMMONING. Kill glowing enemies within the resulting ring, defeat its special HVT and take the gold item. An ordinary triangle loot reward is not an item upgrade.
- Laptop: use the alley northwest of Opal Palace’s crumbling walls/F5 reference. The runes face the surrounding roof/wall/scaffolding. From the roof at the foot of the Palace stairs, stand in its stairwell doorway and face the alley to align the markings. Offer the Laptop, charge its ring and defeat the Mimic for the GOLD Laptop.
Find the Laptop triangle on the Urzikstan map ↗
Opal Palace-side triangle alignment viewpoint referenceWZHUB; individual screenshot creator not identified · Source ↗ - Drawing: use the triangle by the destroyed northeast-facing Palace wall, above the stairway. Activate the surrounding wall runes, climb the broken wall and cross its gap for the alignment viewpoint. Perform its Drawing summoning, finish ring kills and defeat the Mangler for the GOLD Drawing.
- Journal: use the triangle near the northwest island/portal circle, by the east-facing bridge. Its runes are beside the bridge, on the southern building wall and on the circle’s arch. Align from the northeast end of the arch in front of Nahr Bathhouse, offer the Journal, charge the ring and defeat the enhanced Hellhound for the GOLD Journal.
Unlock the northwest island portal
- Bring the GOLD Giraffe Toy, Laptop, Drawing and Journal to the tornado on Tier 3’s northwest island. Match each pedestal engraving to its relic. Source grids straddle E3/E4; use the island circle and marked interaction rather than treating one grid label as an exact pin.
- Defeat the gate Disciple by eliminating its protective Minions when its bar is invulnerable, then damaging the main target. Collect the access/Sigil reward and record the completed permanent portal ritual. Future trips use ordinary or Elder entry items.
Three obelisks and carried temporary buffs
- Find the gold beam to the G6 roof Escort obelisk. Take Atomic Hunter and keep it carried: marked green special enemies can provide a Nuke when killed by its carrier. Protect the ACV at all four stops and use crowd control or optional packed V-R11 repairs to preserve its health.
- At the I3 Outlast obelisk, collect Numb Foot and keep it carried for its movement boost. Activate the PND and remain in the analysis zone until complete. Use the extra movement to escape pressure, then return to the zone rather than letting analysis stall.
- At the northern F1 Bounty obelisk, collect Mind-Blowing Revelation: headshot-marked enemies can explode on death while the item is carried. Fight the marked bounty using its critical areas and clear surrounding pressure. Contract order is flexible; Escort → Outlast → Bounty is one useful route for obtaining the buffs in that order.
- These three buffs occupy rucksack slots and are temporary, not permanent account perks. Ordinary visits offer acquisitions/Elder Sigil opportunities. Elder rewards can include Dead Wire Detonators, Golden Mask Filter and Sergeant’s Beret schematics; they may repeat. Claim the rifts and preserve the actual plans until extraction.
Optional Gyanxi and Smoke Signals blueprint
Optional boss commitment: do not start the Rift Heart with too little time to fight and extract.
- Complete ALL THREE contracts in this visit before this optional boss. Reserve enough time, damage, revives and an exit margin. Both ordinary and Elder variants can award Smoke Signals; ordinary provides the longer window and the blueprint is distinct from Elder schematic rewards.
- Go to the central island and destroy its WEST, NORTH and EAST spores. After all three, destroy the large central Rift Heart to summon Gyanxi. These island boss spores are separate from a Spore Control contract.
One island boss-spore reference; destroy the three outer spores before the central HeartWZHUB; individual screenshot creator not identified · Source ↗ - Gyanxi is protected whenever its elite Minions are alive. Remove them first, then damage its head while vulnerability returns; repeat each new wave of protective minions. Claim the Smoke Signals RAM-7 unlock cue, loot safely and use the available exit before the visit’s timer ends.
Leave with the current rewards
- Union uses Ava’s mission exit after the story escort. Repeat visits use the red portal near the southeast end of the central island (the source references G4/G5). Locate its actual marker/prompt before the timer runs low. Confirm your retained relics/plans and separate the optional blueprint unlock from owned schematics.
Sources and review
Illustrated instructions from the references below, source-reviewed on 8 October 2026 and reorganized on 9 October 2026. The guide links, saved-progress compatibility and page behavior have software checks. These walkthroughs have not been verified in a complete in-game playthrough. Gameplay-image and chart creators are credited with each illustration.
- Official Call of Duty guide ↗
- gameranx.com reference (2) ↗
- gameranx.com reference (3) ↗
- gameranx.com reference (4) ↗
- detonated.com reference (5) ↗
- wzhub.gg reference (6) ↗
Select any reference image to enlarge it. Screenshot and symbol sources are credited in the linked walkthroughs; this guide uses local copies for reliable access.