Key Features
Prepare for a five-phase combat commitment
- Prepare crowd-control and boss damage, self-revives and a coordinated squad recovery plan. Acquire the ammo mods needed for the obelisks and leave inventory room for arena supplies. Choose equipment that supports repeated waves rather than a fixed 2024 weapon-meta claim.
- This is a wave arena, not a conventional thirty-minute seasonal contract visit. Entering commits the squad to five phases. Watch the in-game phase counter and objective prompts; do not start a separate countdown based on this page.
Main Quest
Complete three current ammo-mod obelisks
- Search for currently spawned Urzikstan obelisks. Their possible sites vary and a photographed candidate does not guarantee a live altar. Read the sculpted ammo icon before spending the activation.
Browse possible Urzikstan obelisks on the Urzikstan map ↗
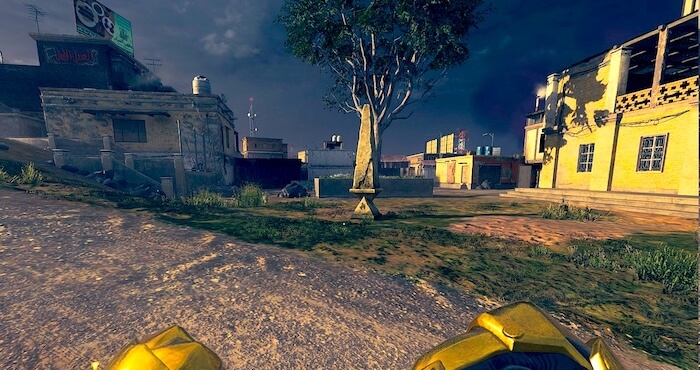
One possible Urzikstan Unstable Rift obelisk site; not a guaranteed live spawnWZHUB; individual screenshot creator not identified · Source ↗ - Equip the displayed mod and activate the obelisk. Make its required zombie kills INSIDE the circle until the collection/success cue registers. Repeat at three completed altars, reading each current icon rather than assuming one fixed order.
- Flame icon: Napalm Burst.
- Frost/snowflake icon: Cryo Freeze.
- Electrical icon: Dead Wire.
- Toxic/skull icon: Brain Rot.
Use the spawned public Rift
- After the required altar completions, locate the spawned Rift’s actual Tac-Map marker and interaction. Its position can vary and another squad can claim a public Rift; three website checks do not reserve it. Regroup and accept the travel vote only when ready.
- On arrival, check the supplied weapon upgrades, perk effects, regenerating armour/ammunition support and Mags of Holding-style temporary boosts. They help this arena and do not grant the corresponding crafting plans. Tombstone protection is disabled here; survive and extract rather than relying on a carried-item fallback.
Phase 1: establish the arena route
- Find a safe movement loop and cover each other’s approach lanes while clearing the first wave. Keep a clear path to a downed teammate and watch the phase counter for its ending HVT. Kill that marked boss, then claim the phase Reward Rift and replenish before the next counter begins.
Phase 2: maintain crowd control and resupply
- As pressure increases, use the equipment gained from the prior phase rather than hoarding it through a down. Keep enemies away from revives, pick up needed armour/ammunition and focus the ending HVT when its marker appears. Confirm Phase Complete and claim the next reward before advancing.
Phase 3: balance specials with the wave
- Prioritize specials disrupting your movement or draining health while retaining a safe loop for the normal horde. Split boss damage and crowd-control roles when the phase-ending HVT appears. Finish the displayed objective, revive/reload and inspect its reward before the fourth phase.
Phase 4: preserve the final-fight reserve
- Expect heavier pressure and protect a safe revive lane rather than spreading across the arena. Use available support against the ending HVT while another player covers its adds. After completion, equip the reward supplies and check every player’s revival capacity before the last phase.
Phase 5: finish the final HVT
- Clear the final wave and defeat its elite Disciple/HVT objective. Remove protective elite minions if the main target becomes invulnerable, then focus its exposed critical area; cover revives and keep the horde occupied. Wait for the final completion/reward cue rather than treating the first boss damage window as victory.
Claim Mark of the Survivor and leave
- After all five phases, confirm the Mark of the Survivor unlock and cooldown-reset reward. Use the red exit portal to finish extraction; it ends the deployment. Check the actual crafting menu afterward for the reset state. Entry or an early phase reward alone grants neither final completion nor a completed cooldown reset.
Sources and review
Illustrated instructions from the references below, source-reviewed on 8 October 2026 and reorganized on 9 October 2026. The guide links, saved-progress compatibility and page behavior have software checks. These walkthroughs have not been verified in a complete in-game playthrough. Gameplay-image and chart creators are credited with each illustration.
- Official Call of Duty guide ↗
- primagames.com reference (2) ↗
- r/CODZombies community guide (3) ↗
- charlieintel.com reference (4) ↗
Select any reference image to enlarge it. Screenshot and symbol sources are credited in the linked walkthroughs; this guide uses local copies for reliable access.