


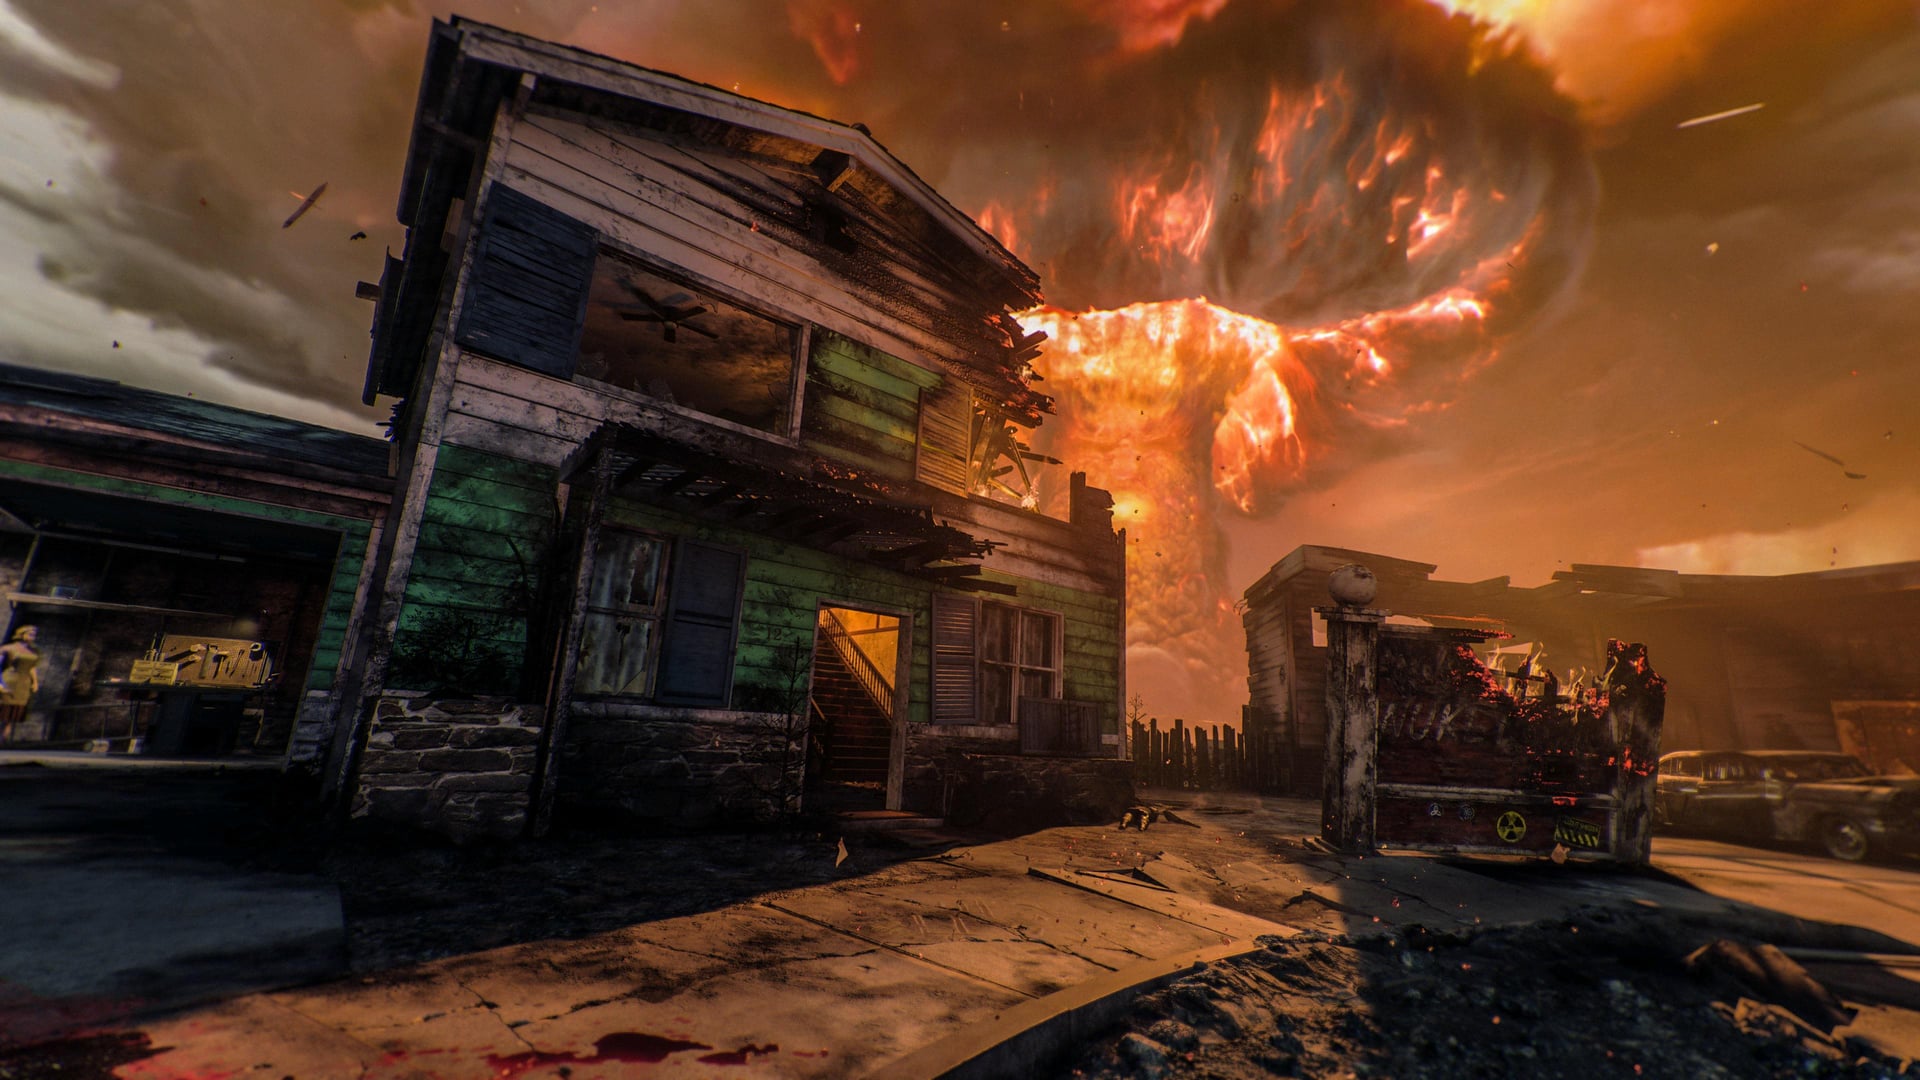
Killing time was never this much fun! Play gruesome games with the creepy Twins, destroy the Dark Heart and escape the warden's temporal prison!
Key Features
This is a walkthrough of the key features of the map, such as Pack-a-Punch, Wonder Weapons, etc.
- Get 4 parts:
- The Sealant: In Normal Nuketown, go to the bedroom in Yellow House Upstairs and get it from the bottom of the shelf near the window.
- The Barrel: Find the Cyst that is emitting a humming sound in Destroyed Nuketown and feed it souls until it drops The Hammer.
- The Hammer:
- Get the SO3 Vial found on the desk in Destroyed Yellow House Upstairs then interact with the kitchen sink in Destroyed Green House to get the H2SO4 Vial. The Vial can be used 3 times before the need to refill it at the sink.
- In Destroyed Nuketown, find the mannequin that emits a humming sound. There is a total of 12 mannequins; 9 around Cul-De-Sac and the houses and 3 in Trinity Ave.:
- Behind the swing in Yellow House Backyard
- Inside the garage of Green House, next to the Crafting Table.
- Near the big garage door in Trinity Ave.
- In Green House Backyard, behind the Perk location.
- Return to Normal Nuketown and pour the H2SO4 Vial on the corresponding mannequin.
- Go to Destroyed Nuketown, and if done correctly, the mannequin will have dissolved and dropped The Hammer.
- The Stock:
- In Destroyed Nuketown, find black goo on a wall that is emitting a humming sound. There are multiple locations.
- Return to Normal Nuketown, find the corresponding wall and throw an explosive to the wall to create a hole.
- Go back to Destroyed Nuketown. If done correctly, the hole will have The Stock inside available to be picked up.
- Melee the workbench in Destroyed Truck Interior to open and build the Blundergat.
Sundergat Upgrade
- After a few rounds in Destroyed Nuketown, a Tortured Zombie will spawn surrounded by a fire tornado. Bring the Tortured Zombie next to the bench and kill it with the Blundergat. Note: if the Tortured Zombie is near other zombies, it will weaken and die after its health bar is depleted.
- Wait until the next round, then repeat the above step.
- In the next round, a third Tortured Zombie will spawn, but will transform into a Mimic when approaching. Repeat the process and kill it near the bench with the Blundergat.
- Travel back to Normal Nuketown and melee the workbench before placing the Blundergat.
- Return to Destroyed Nuketown, and melee the workbench again to pick up the Sundergat.
Main Quest
① Setup
- Obtain the Blundergat and upgrade to the Sundergat.
- The Twins Swing: swing seat (Normal, Yellow House) → RC-XD race (Destroyed) → Chalk → rehang swing → Twins scene.
The next three sections can be done in any order / simultaneously.
② Strange Tree / Hopscotch
- Irradiated Seeds (Destroyed garage toolbox) → plant in Normal Trinity Ave mound → fill tree with souls (Blundergat/Sundergat).
- 3 Combat Axes → Strange Firewood → fireplace (Molotov).
- Stand on the massive X in Destroyed Trinity Ave until it stays blue → Normal: hopscotch scene → jump 1→12→1 (avoid smoke, 30s fail wait).
- Golden music box spawns → fill with souls (Sundergat) → escort to fireplace.
③ Piano / Bouncing Ball
- Destroyed Green House: turn Piano Teacher (Brain Rot/Psych) → teleport back → it plays piano & explodes.
- 8 glowing notes in Destroyed — blink order 1–8 → interact in order → piano order on wall is always 86756535.
- Kill 3 floating zombies → souls over the X → Normal: ball trial — kill airborne zombies before ball lands → music sheet → escort to piano (Sundergat).
④ Toy Box / Four Square
- Destroyed PaP area: shoot speaker pole → Goggles (use Wisp Tea to bring in).
- Death Perception: find Headset outline → Normal toy box scene.
- Red ball → shoot to the massive X in Destroyed Green House Backyard → Four Square trial — bounce ball square-to-square until timer ends.
- Cymbals spawn → fill with souls (Sundergat) → escort to toy box.
⑤ Clock Tower
- Destroyed: shoot crumbled clock → hands to 0.
- Teleport to Normal; shoot the hands again during the teleport animation.
- White orb appears → scene: piano → toy box → fireplace → Twins at the swing with a yellow portal → boss fight.
⑥ Dark Heart Boss
- P1: 3 goo piles (Trinity/Yellow/Green House) → fill cysts with souls → clear goo → defend Concentration Field on each revealed object → damage orange spots; redirect tornadoes with Molotovs.
- P2: Rad-Hounds spawn; kill from green orbs to clear goo → defend fields again → ⅔ health.
- P3: Shock Mimics; bring Tortured Zombie to each object & kill to clear goo → defend → finish the Heart.
- In Normal Nuketown, shoot at the swing in the Yellow House Backyard and pick up the Swing Seat.
- Travel to Destroyed Nuketown and find the RC-XD Controller:
- Against the boxes on the right side of Pack-a-Punch when looking at it.
- Against a fence at Green House Backyard
- On one of the shelves in the garage of Yellow House
- Interact with it to trigger a race. Drive the RC-XD and follow the ramps and jump over the debris to enter the garage. Then drive to the door and detonate it.
- Walk into the garage which will trigger a brief scene with a corpse turning into ash. Pick up the Chalk that will spawn shortly after.
- Go to the Yellow House Backyard and interact with the swing chains to place back the Swing Seat and the Chalk. This should trigger a scene with the Twins.
NOTE: The steps in the next three sections can be done at the same time in any order.
- While in Destroyed Nuketown, go to the Yellow House Garage and crounch in front of the red toolbox on a shelf. Interact with the toolbox to open it and collect the Irradiated Seeds.
- Return to Normal Nuketown and go to Trinity Ave. There will an earth mound on the garden on the left side of Pack-a-Punch when looking at it. Place the Irradiated Seeds which will turn into a small there. Kill zombies with either version of the Blundergat to fill the tree with souls.
- Travel back to Destroyed Nuketown and obtain three Combat Axes. Throw each Combat Axe at the grown tree at Trinity Ave. to collect a total of three Strange Firewood.
- Return to Normal Nuketown and place the Strange Firewood inside the fireplace of the Yellow House then throw a Molotov to lit the fireplace on fire.
- While in Destroyed Nuketown, locate a massive X which can be found on the ground in Trinity Ave, facing the Wunderfizz machine. Step on the X until it glows blue and remains blue when you leave.
- Travel to Normal Nuketown and return to the same location in Trinity Ave., a small scene should play with the Twins drawing a hopscotch game on the ground.
- Interact with the white orb in front of the game to start the trial.
- While in third person mode, you will need to jump from 1 to 12 then 12 to 1 while avoiding the black smoke. Note: if you fail the step, the hopscotch will glow red and you'll need to wait 30s to interact with the white orb again.
- A golden music box will spawn in the middle of the hopscotch. With the Sundergat, kill zombies to fill the box with souls and escort it to the fireplace at Yellow House.
- While in Destroyed Nuketown, travel to Green House Backyard and wait there until a zombie called Piano Teacher will spawn from outside the map.

- Turn the Piano Teacher with either Brain Rot or a Psych Grenade and follow the Piano Teacher in Green House.
- Quickly teleport back to Normal Nuketown and the Piano Teacher should start interacting with the piano before exploding.
- Travel back to Destroyed Nuketown and find 8 notes glowing blue around the map.
- Each note will blink a specific amount of times from 1 blink to 8 blinks, forming an order. Interact with each note in that order.
Note Order & Piano Open helper
Open full-page tool ↗Destroyed Nuketown: record how many times each blue note blinks. Collect them from 1 blink to 8 blinks.
Pickup order · incompleteMissing counts: 1, 2, 3, 4, 5, 6, 7, 8
Normal Nuketown · piano reference
After collecting all eight notes, return to Green House and play:
8675653512345678Number the white keys from left to right. This fixed tune is separate from the randomized outdoor pickup order.
Location photos
Reference photos from Call of Duty: Zombies Guides.

Green backyard · bunker 
Yellow backyard · garden fence 
Cul-de-Sac · yellow bus 
Cul-de-Sac · teleporter fence 
Trinity Ave · garage door 
Trinity Ave · brick wall 
Trinity Ave · tree rock 
Trinity Ave · broken fence Saved on this device - Return to Normal Nuketown and in the Green House. The notes will now appear on the wall in the same order. Interact with the piano to play the notes in the order seen on the wall. Note: the order is always 86756535.
- Travel back to Destroyed Nuketown. Outside the map there will be three floating zombies in either Green House Backyard or Yellow House Backyard, kill all three zombies to free their souls.
- The souls will now appear above the massive X on ground in Trinity Ave.
- Return to Trinity Ave. in Normal Nuketown and you'll see the Twins drawing a circle. A glowing ball will then appear in the center.
- Interact with the ball to start the trial.
- The ball will start bouncing and lifting up zombies in the air. You need to kill every zombie in the air before the ball hits the ground.
- If done correctly, a glowing music sheet will appear at the center of the circle. With the Sundergat, kill zombies to fill the sheet with souls and escort it to the piano at Green House.
- While in Destroyed Nuketown, go to the Pack-a-Punch area in Trinity Ave.
- There will be a pole with a lot of speakers outside the map. Shoot the very top to drop the Goggles on the ground then use Wisp Tea to bring the Goggles into the map to collect them.
- Obtain Death Perception, and look for a Headset outline:
- Next to trash cans in Cul-De-Sac near the car at Green House
- The coat rack on the wall in the bedroom of Green House Upstairs
- In the hand of a headless mannequin next to the perk location in Yellow House Backyard
- Travel back to Normal Nuketown and interact with the blue toy box against the crates near the chalk circle.
- Return to Destroyed Nuketown and reach Green House Backyard where a massive X will appear on the ground.
- Find a red ball around the map:
- On top of munition crates in Trinity Ave.
- On top of a house in Trinity Ave.
- On top of the Yellow House mezzanine
- Shoot the red ball to drop it on the ground then shoot it to make it move all the way to the massive X which should make the X glow.
- Teleport back to Normal Nuketown and return to Green House Backyard to find the Twins drawing a Four Square.
- The ball will spawn within the squares, interact with it to start the trial.
- With your melee weapon make the red ball bounce into a square then into another one. Continue until the timer ends. Note: the ball can only bounce once in a square before moving to the next.
- If done correctly, glowing pair of cymbals will appear above the Four Square. With the Sundergat, kill zombies to fill the cymbals with souls and escort the to the toy box at Trinity Ave.
- In Destroyed Nuketown, shoot at the crumbled clock to move both the white and red hands on 0.
- Start to teleport back to Normal Nuketown, but just before the animation ends, shoot the red hand once.
- If done correctly, a white orb will appear in the middle of the map.
- This will trigger a scene with the orb moving to the piano turning into the Twins, then move to the Toy Box, then the fireplace.
- The Twins will finally appear at the swing in Yellow House Backyard with a yellow portal that will start the boss fight.
Phase 1
- The Dark Heart will spawn three massive pile of black goo around the map. One a Trinity Ave., one at Yellow House Backyard and one at Green House Backyard.
- Each pile of goo will have a cyst attached near it, kill zombies to fill each cyst with souls. If done correctly, the black goo will disappear revealing an object (Piano, Music Box, Fireplace)
- One of the three object will have a Concentration Field around it. Defend the field from zombies and enemies before they can destroy it. Once it is done, the field will move to the next object.
- Once all three objects are done, the Dark Heart will be damageable in glowing orange areas. The Heart will periodically conjure meteors as well as fire tornadoes. The tornadoes can be redirected by throwing Molotovs in their paths.
- Once a third of the Heart's health bar is depleted, it will go into immune state again, and a Max Ammo and Max Armor power-up will spawn in front of Green House.
Phase 2
- During this phase, Rad-Hounds will spawn in addition to regular zombies.
- The objects are again covered with black goo with a green orb floating above them. Kill all the zombies that spawn from the green orb until the black goo disappears.
- Once again, a Concentration Field will appear around one object and move to the others once successfully defended. While defending, the Dark Heart may conjure meteors and fire tornadoes to attack the players. Repeat for all three objects to be able to damage the Dark Heart once more.
- Similar to last phase, once two thirds of the Heart's health bar is depleted, it will go into immune state again, and a Max Ammo and Max Armor power-up will spawn in front of Green House.
Phase 3
- During this phase, Shock Mimics will spawn in addition to regular zombies and Rad-Hounds.
- The objects are again covered with black goo. A Tortured Zombie will appear in the middle of the map, bring it to one of the objects and kill it to remove the goo. Note: Similar to the previous steps, the Tortured Zombie's health will gradually be drained when zombies are close by.
- Once again, a Concentration Field will appear around one object and move to the others once successfully defended. Similar to the second phase, repeat for all three objects to be able to damage the Dark Heart once more.
- Damage the Dark Heart until it is killed and the cutscene is triggered.
Side Quests and Easter Eggs
Find three Mr Peeks headphones around the map:
- Normal Yellow House, on a nightstand upstair.
- Under a truck in Destroyed Trinity Ave.
- Near the Perk location at Normal Trinity Ave.
- In Destroyed Nuketown, shoot the clock hands to display 1:15 as it would be on a standard clock.
- Travel to Normal Nuketown and loot will spawn at the back of Cul-De-Sac. The rewards are:
- A Legendary Weapon, a Killstreak, a Rare Aether Tool (Blue), a Raw Aether Crystal (PaP 1), a Perk can.
Pour the acid on all the mannequins that can be found on Normal Nuketown. The Vial only contains 3 doses of acid, and needs to be refill in the Destroyed Green House kitchen sink.
If done correctly, the last mannequin that was dissolved will drop a Random Perk Power-Up when going back to Destroyed Nuketown.
- Obtain Death Perception.
- In Normal Nuketown, find the outline of key inside one of the flower pots around the map. Shoot the pot to collect a Lost Key. Note: if you shoot a flower pot that does not contain the key, teleport to Destroyed Nuketown then back to Normal Nuketown to reset the step.
- Collect a total of 5 Lost Keys.
- Once all the keys are collected, go to the bedroom in Normal Green House Upstairs and interact with the suitcase on the ground.
- If done correctly, the suitcase will open and offer some Salvage, Essence and a free Aether Tool.
- Build the Blundergat.
- Travel to Normal Nuketown, interact with the stove in Yellow House to turn it on.
- Kill a zombie next to the stove to drop a piece of meat on the pan and throw a Molotov at the pan.
- Return to Destroyed Nuketown, a mannequin will be sit at the table.
- Teleport back and forth until a Bonus Point appears on the table.
- Return to Normal Nuketown and reach the bunker in Green House Backyard, the mannequin should be next to it. With Brain Rot or a Psych Grenade, turn a zombie to make it knock the bunker until the door opens. Note: several zombies might be needed.
- Go to the bunker in Destroyed Nuketown and several loot should have dropped on the ground including a Mystery Perk can.
- Build the Blundergat.
- Interact with the mannequin head with a mask found on the ground of Normal Green House Upstairs.
- Follow the head as it travels to the headless mannequin in Green House Backyard and kill zombies to fill the head with souls.
- Once done, the head will move towards another headless mannequin in front of the Yellow House garage. Kill zombies to fill it with souls.
- The head will then move to Yellow House Upstairs and stops in front of another headless mannequin. Kill zombies to fill it with souls.
- If done correctly, the floating head will attach itself to the mannequin and the mannequin will start spinning before exploding dropping high-tier loot.
- Build the Blundergat.
- Travel to Destroyed Nuketown and go to the Perk location in Trinity Ave., on the right side there will be a mannequin outside the map.
- Look at the mannequin for a few seconds until its head will turn away from you. It will then start teleporting and following you around the map.
- Return to Normal Nuketown and look for that mannequin. There are several possible locations:
- Driver seat of the truck at Trinity Ave.
- Behind the fences on the left side of Pack-a-Punch in Trinity Ave.
- In the wooden shed behind the Mystery Box in Green House Backyard.
- At the top of the chimney of the left house in Trinity Ave.
- Shoot at the mannequin head, and if done correctly, it will drop high tier loot.
Once the Blundergat is built, a purple cyst will appear in Destroyed Green House Backyard, placing specific items in front of it to obtain loot and a specific free perk based on the items selected.
Deadshot Daiquiri
- You will need to bring this 4 items and place them in front of the Cyst.
- Head - In Destroyed Nuketown, open the Trinity Ave. garage with the RC-XD and pick up the head on the safe.
- Bone - In Destroyed Nuketown, on the ground near the fence behind the Perk location in Green House Backyard.
- Guts - In Destroyed Nuketown, beneath a truck near Pack-a-Punch in Trinity Ave.
- Ham - In Normal Nuketown, on the counter of the Green House kitchen next to a mannequin.
- Kill zombies near the cyst to feed it with souls. Once the cyst is full, a HVT Doppleghast called Zynvara will spawn.
- Once the HVT is killed, loot will drop on the ground including a Deadshot Daiquiri can and 1000 Salvage (before Round 15) or 2000 Salvage (after Round 15)
Elemental Pop
- You will need to bring this 4 items and place them in front of the Cyst.
- Battery - In Normal Nuketown, inside the Truck Interior where the Blundergat workbench is located.
- Bone - In Destroyed Nuketown, on the ground near the fence behind the Perk location in Green House Backyard.
- Guts - In Destroyed Nuketown, beneath a truck near Pack-a-Punch in Trinity Ave.
- Ham - In Normal Nuketown, on the counter of the Green House kitchen next to a mannequin.
- Kill zombies near the cyst to feed it with souls. Once the cyst is full, a HVT Mimic will spawn.
- Once the HVT is killed, loot will drop on the ground including an Elemental Pop can and 1000 Salvage (before Round 15) or 2000 Salvage (after Round 15)
Quick Revive
- You will need to bring this 4 items and place them in front of the Cyst.
- Dog Collar - In Normal Nuketown, between plants next to the garage door of the red house in Trinity Ave.
- Bone - In Destroyed Nuketown, on the ground near the fence behind the Perk location in Green House Backyard.
- Ham - In Normal Nuketown, on the counter of the Green House kitchen next to a mannequin.
- Kill zombies near the cyst to feed it with souls. Once the cyst is full, a HVT Rad-Hound will spawn.
- Once the HVT is killed, loot will drop on the ground including a Quick Revive can and 500 Salvage (before Round 15) or 1000 Salvage (after Round 15)
Vulture Aid
- You will need to bring this 4 items and place them in front of the Cyst.
- Bucket - In Normal Nuketown, next to the door between Yellow House Garage and Yellow House Backyard.
- Bone - In Destroyed Nuketown, on the ground near the fence behind the Perk location in Green House Backyard.
- Ham - In Normal Nuketown, on the counter of the Green House kitchen next to a mannequin.
- Kill zombies near the cyst to feed it with souls. Once the cyst is full, more HVT zombies will spawn.
- Once the zombies are killed, loot will drop on the ground including a Vulture Aid can and 500 Salvage (before Round 15) or 1000 Salvage (after Round 15)
Aether Crystal + Speed Cola
- You will need to bring all 7 items and place them in front of the Cyst.
- Head - In Destroyed Nuketown, open the Trinity Ave. garage with the RC-XD and pick up the head on the safe.
- Bone - In Destroyed Nuketown, on the ground near the fence behind the Perk location in Green House Backyard.
- Guts - In Destroyed Nuketown, beneath a truck near Pack-a-Punch in Trinity Ave.
- Ham - In Normal Nuketown, on the counter of the Green House kitchen next to a mannequin.
- Dog Collar - In Normal Nuketown, between plants next to the garage door of the red house in Trinity Ave.
- Battery - In Normal Nuketown, inside the Truck Interior where the Blundergat workbench is located.
- Bucket - In Normal Nuketown, next to the door between Yellow House Garage and Yellow House Backyard.
- Kill zombies near the cyst to feed it with souls. Once the cyst is full, a HVT Dippleghast, a HVT Mimic and a Rad-Hound will spawn.
- Once all three enemies are killed, loot will drop on the ground:
- Before Round 15 - Refined Aetherium Crystal (PaP 2) Speed Cola can, 1000 Salvage
- After Round 15 - Flawless Aetherium Crystal (PaP 3), Speed Cola can, 2000 Salvage
There are 7 Power-Up statues around Paradox Junction giving out the corresponding Power-Ups when shooting them, with two additional statues appearing after the first 7 are activated.
- Bonus Point: Inside the house debris on the left side of Pack-a-Punch in Destroyed Trinity Ave.
- Insta-Kill: On top of the BBQ grill outside Normal Green House Backyard.
- Double Points: Behind fences on the right side of the houses at the back of Destroyed Cul-De-Sac.
- Nuke: On top of the clock tower in Normal Nuketown from Normal Green House Backyard.
- Full Power: Near the drawers opposite of the TV in Normal Green House Upstairs.
- Max Armor: On a bench inside the yellow bus in Destroyed Cul-De-Sac
- Max Ammo: On top of a generator next to the Yellow House in Normal Nuketown.
- Fire Sale: Top room of the Destroyed Yellow House when seen from the back of Cul-De-Sac. Only available after all the others have been activated.
- Random Perk: On top of the cabinet behind the bunk bed in Normal Yellow House Upstairs. Only available after all the others have been activated.
Relics
There are 3 Relics that can be unlocked from playing Paradox Junction, those Relics are then used as gameplay modifiers for Cursed mode.
The Relics are divided into three groups: Grim, Sinister, and Wicked. Each group fill the Cursed Tier bar differently with the Grim Relics filling up a third of the bar, the Sinister Relics filling up two thirds, and the Wicked Relics filling up the entire bar. As such you will need to apply different Relics to reach the desired Tier level.
- Tier I: Any 3 Grim — Unlocks Golden Armor (45,000 Essence)
- Tier II: 2 Sinister + 2 Grim (example loadout) — Unlocks Ultra Rarity (8,000 Salvage or 17,500 Salvage from default rarity)
- Tier III: 3 Grim + 2 Sinister + 1 Wicked (example) — Unlocks Pack-a-Punch IV (100,000 Essence)
Make sure to scroll sideways to see the steps. Higher tiers just need the total difficulty value to match the target fill; swap relics as you discover them.
Grim Relics
- Reach Round 20
- In Normal Nuketown, brain rot a Rad-Hound and pet it.
- Call in a DAWG Killstreak in Destroyed Nuketown, put it in Sentry Mode and pet it.
- Travel to Normal Nuketown and interact with the green portal in Green House Upstairs.
- Survive 4 waves while enemies only take damages from their elemental weakness. Shadow Rift for Toxic Zombies and Rad-Hounds
- Light Mend for Doppelghasts
- Brain Rot for Shock Mimics
Sinister Relics
- Throw a grenade inside the broken outside chimney of Destroyed Green House near Cul-De-Sac. This will drop the Dog Collar of Notso.
- Return to Normal Nuketown and turn a Rad-Hound using Brain Rot/Psych Grenade. If done correctly, the dog will start digging in Yellow House Backyard. The dog will then stop and you can pick up the ball in its mouth.
- Reach Round 40 and down yourself near the fences at the very back of Green House Backyard, behind the Perk location. If done correctly, a headstone will rise from the ground. Interact with the headstone to place the ball and dog collar.
- Return to Normal Nuketown and interact with the yellow portal against the wall of Yellow House Backyard.
- Survive 5 waves while killing all the enemies of each wave before the time runs out (90 seconds).
Wicked Relics
- Activate Cursed Mode Tier II. Do not pick the Seed Relic for this.
- Equip the Mister Peeks Field Upgrade and use the Mystery Box until Mister Peeks appears. Activate the Field Upgrade to drop Mister Peeks on the ground and pick it up. This needs to be done in both versions of Nuketown.
- Place Mister Peeks on the mailbox of Yellow House in both versions of Nuketown.
- Reach Round 60.
- Pick the Ultra Knife found in the mailbox of either version of Nuketown which will now be opened. Doing so will spawn a HVT Mimic. Kill the Mimic with the Knife, which can be Pack-a-Punched. Note: If you kill the Mimic with something else, it will eventually respawn the next round.
- If done correctly, travel to Destroyed Nuketown and interact with the red portal that spawned in front of the Green House front balcony.
- Survive 6 waves with all Armor Plates removed and with 50 less health point.
Wall-Buys and Perk-a-Colas
- Velox 5.7 — Destroyed Cul-De-Sac
- Razor 9mm — Destroyed Green House Backyard
- M10 Breacher — Destroyed Yellow House Backyard
- Echo 12 — Normal Yellow House Backyard
- Dravec 45 — Normal Green House Backyard
- CODA 9 — Normal Cul-De-Sac
- XR-3 Ion — TBD
- MK.78 — TBD
- Carbon 57 — Normal Trinity Ave.
- VS Recon — TBD
- MXR-17 — TBD
- M8A1 — Destroyed Trinity Ave.
Mister Peeks · Cursed mode: Check his possible spawn locations. Shoot him when he appears to drop an egg that can contain perks and other loot.
Note: Der Wunderfizz appears after purchasing 4 Perk-a-Colas or after reaching Round 20.
- Quick Revive — Destroyed Cul-De-Sac
- Randomized Perk — Destroyed Yellow House Backyard
- Randomized Perk — Normal Yellow House Backyard
- Randomized Perk — Normal Yellow House Downstairs
- Randomized Perk — Destroyed Yellow House Upstairs
- Randomized Perk — Normal Green House Backyard
- Randomized Perk — Destroyed Green House Backyard
- Randomized Perk — Normal Green House Downstairs
- Randomized Perk — Normal Cul-De-Sac
- Randomized Perk — Normal Trinity Ave.
- Der Wunderfizz — Destroyed Trinity Ave.
Miscellaneous Features
Sources and review
Guide text is adapted from the r/CODZombies community wiki with AI assistance. The references below also informed the map and puzzle helpers. Source and software checks do not replace an in-game playthrough.