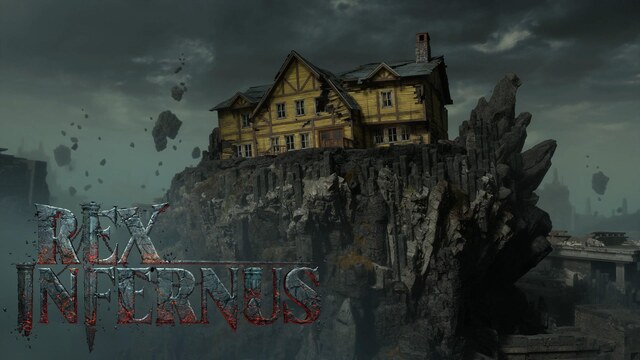
As reality stands on the cusp of destruction, the crew face their ultimate challenge. Cleanse the Shadowsmith places of power, find the Warden's inner sanctum, and put an end to his loathsome existence.
Key Features
This is a walkthrough of the key features of the map, such as Pack-a-Punch, Wonder Weapons, etc.
- Activate the Pack-a-Punch Machine in Nexus Forge.
- Interact with one of the small pilars with a glowing green orb to collect the Void Claw.
- Note: The Void Claw will only be available for about 30 seconds before it needs to be collected again.
Void Talon Upgrade
- From the Nexus Forge, look at Her House and shoot at the basketball located in the broken window. Shoot at it until it falls out of the map.
- Note: Obtain Warden’s Blight before beginning this sequence.
- In the subsequent rounds, four blue symbols will appear on Her House.
- Note: Advance a round after shooting the basketball for the first symbol, then three more rounds for the remaining symbols. Record their appearance order.
House Symbols Tracker Open helper
Open full-page tool ↗After obtaining Warden’s Blight, shoot the basketball in the broken roof from Nexus Forge. Advance a round for the first symbol, then three more rounds for the others.
Click or tap each symbol on the photo as it appears. The numbered circles record your shooting order.
Tap the photo to place symbol 1.
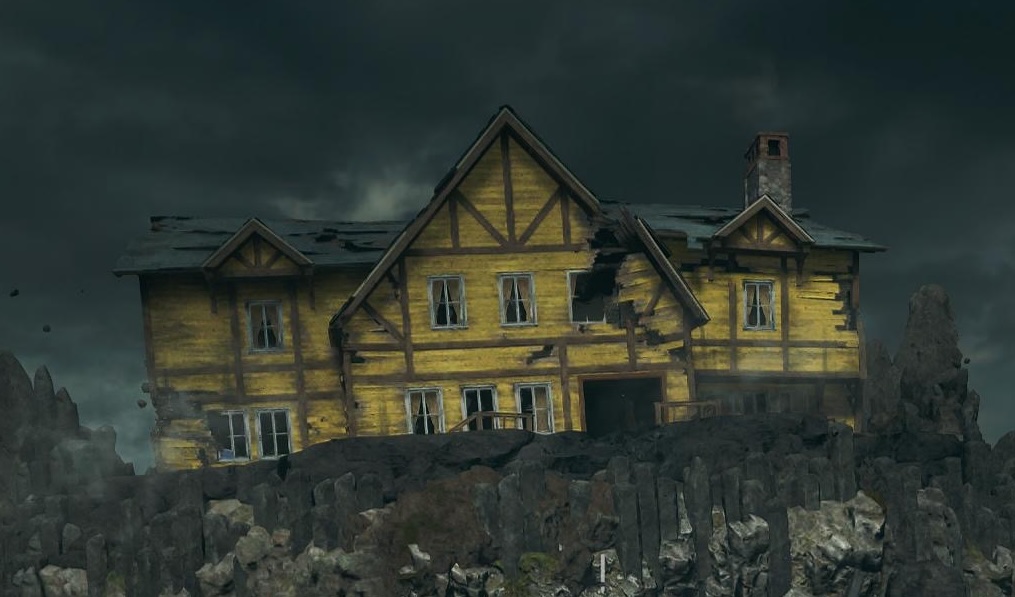 Appearance order · 0/4 marked
Then activate Exfil, kill the HVT and take the portal into the house. Select a number and tap the photo to correct its position.
Keyboard controls
Focus the photo and use the arrow keys to aim. Hold Shift to move faster. Press Enter or Space to place the circle.
Saved on this device
- Note: Advance a round after shooting the basketball for the first symbol, then three more rounds for the remaining symbols. Record their appearance order.
- On an Exfil round, shoot at the symbols in the order they appeared. If done correctly, the exfil booth will send you to Her House on completion. The Twins will appear and drop a Raw Aether Crystal.
- Inside Her House, travel upstair and shoot a charged shot of the Warden's Blight inside the bathroom. If done correctly, the Eye of the Forge will drop on the ground.
- Pick it up then wait for the portal to appear to return to Nexus Forge.
- Find one of the pillars with the glowing green orb and interact with it to empower it with the Eye of the Forge.
- Note: With the Void Claw, it is possible to get the Eye of the Forge back into your inventory to empower another pedestal, such as the boss arena.
- If done correctly, the Void Talon will be available to pick up.
- Note: The Void Talon lasts significantly longer than the Void Claw.
- Look for a purple orb floating around Nexus Forge and use the Void Claw to drag the orb to the Pack-a-Punch Machine. The orb will start circling around the Pack-a-Punch.
- Interact with the wheels on either side of the Pack-a-Punch to surge the Nexus. If done correctly, the orb will be thrown into the two cauldrons on top of the stairs.
- Travel to Dravakar Entrance and climb to the platform at the top of the entrance by wall-jumping. Open the wall on the right side of the structure hanging from the central wall, this can be done with PhD Flopper, explosives, Ray Gun, etc. If done correctly, the wall will open and the Fracture of Nyxara can be collected.
- Interact with one of the cauldrons to obtain the Astral Flame. Quickly travel to Nyxara Sanctuary and shoot at the eye statue inside the room with the Astral Flame.
- An orb will start bouncing around the room. Using the Void Claw, change the position of the crystals on the walls to make the orb bounce towards Nyxara Main Chamber. Wall-jump (or use the Void Claw) to the missing crystal and place the Fracture of Nyxara. Continue to change the position of the following crystals until the orb hits a door leading to Nyxara Inner Sanctum.
- Stay near the vines in the middle of the inner sanctum until the progression bar is filled. Wait a round then interact with the vines to eat a fruit.
- If done correctly, you will spawn into a forest where you need to find 3 charred bodies.
- One is located against a rock in the middle of the area. After a short in-game animation, a part can be collected.
- One is located in the cabin, the floorboard near the body needs to be melee to reveal and collect a part.
- One is located on the opposite side of the spawn location, near a cavern entrance.
- Travel to Dravakar Sanctuary and interact with the blue writing on the wall. A quote will play. The quote indicates the direction the four pillar symbols in the next room (Moon, Star, Galaxy, Meteor "Runner").
- To change the direction of the symbols, there will be 3 Pull Switchs to interact with.
- One is located on the left side of the pillar room next to an Armor wall-buy. This is the "Left Switch".
- One is located in the room with the blue writing inside the wall opposite of the writing. This is the "Middle Switch".
- One is located on the right side of the pillar room inside a wall. This is the "Right Switch".
- To change the direction of the symbols, there will be 3 Pull Switchs to interact with.
- Interact with the levers to change the direction of the symbols based on the quote — tap the quote you hear:
Pillars & Levers Open helper
Open full-page tool ↗Match the opening words of the riddle in Dravakar Sanctuary.
These counts assume no earlier pulls. Resetting this helper only clears your recorded riddle; it does not reset the in-game pillars.
Saved on this device - Interact with the lever inside the central pillar to input the combinations. If done correctly, the pillar will lower, revealing an opening.
- Use Void Claw to enter Dravakar Inner Sanctum and interact with the anvil to collect the Warden's Blight.
Main Quest
Note: Several of the items needed can be collected in any order, or prior to their respective steps. Likewise, steps can be done in any order or concurrently with others.
☁️ ① Swirling Pool
- Veytharion's Sanctuary: collect the 4 cubes (pillar by GobbleGum, 2 windows in Mule Kick room, near Void Claw pedestal).
- Left opening bottom→top: Fire, Hand, Water, Leaf. Shuffle to the right opening → Water, Leaf, Hand, Fire. Fire must never touch Leaf/Water; slide empties if a round ends.
- Shoot/melee the circle to move the slide. Reward: swirling pool + Random Perk. Interacting with the pool triggers rain the next round (needed for every temple cleansing).
⚙️ ② Nexus Forge
- With Void Talon: free the 3 pillar Pull Switches + 6 panels around the Nexus Core.
- Clear the webs (explosives/Molotov, Astral/Ursuper Flam, or Warden's Blight) — Deathspinners spawn.
- Purple orb → Pack-a-Punch → surge, then quickly interact the ground Pull Switch next to Deadshot Daiquiri at the Nexus Core bottom.
- Pillars around the Forge can now be moved.
🛕 ③ Cleanse the Temples
- Align the 3 pillars in front of each temple first.
- Per temple: quest item → cauldron + Astral Flame shot → attach floater to a zombie → its symbol matches a Titan Trap shackle (Caltheris / Veytharion Passage) → trap it.
- Tile mini-action → reflector: Dravakar re-plate several times · Nyxara prone · Caltheris aim 30 s · Veytharion keep jumping.
- Lift reflector (charged Warden's Blight) → aim beam at the marked wall → kill zombies beneath → wall breaks.
- Shoot Visage → lockdown → destroy 4 Shadow Souls → shoot again until screen turns white.
- Purple orb under the face + Warden's Blight lift → purple eyes → rain + Astral Flame to the face point = cleansed.
- Items: Dravakar — Blacksmith's Hammer (Shatter Blast shields) · Nyxara — Ancient Scroll (Shadow Rift in forest) · Caltheris — Shimmering Thread (purple orbs) · Veytharion — Woven Sash (rain; Spira / Ruinas / Aranea Insula).
👹 ④ Warden Boss Fight
- Start in the Nexus Core circles. Void Claw/Talon recommended — he pushes you out of the arena.
- P1: Dread Skulls (Dead Wire) stun him → shoot the tail critical point.
- Immune: destroy Shadow Souls (Light Mend) → P2: destroy Stingers (Cryofreeze) or they trigger a wipe; dodge stun circles.
- Intermediate room: survive or kill the HVT. P3: armor-providing Shadow Souls + skulls. P4: more skulls before each stun.
Temple Ring Solver Open helper
Set the three pillars as they are in your game. Find the fewest presses through every temple, then follow the route one temple at a time.
Current positions
Tap a named stop to place the Inner pillar. Empty and House are positions, not temples.
Through the temples
Set all three current positions to calculate a route.
See every temple stop and exactly which ring to turn.
How the rings move
One press moves the chosen ring one stop and the other two rings two stops, in the lever’s direction. Match the direction before each instruction. Follow tour instructions in order so you do not skip an alignment.
- Travel to Veytharion's Sanctuary and acquire four cubes to bring into the room with the Void Claw pedestal. Note: Death Perception makes it easier to see them.
- One cube is located on a pillar in the Veytharion Main Chamber, next to the GobbleGum machine. Simply double jump and interact with the cube to drop it.
- One cube is located on the bottom window in the room with Mule Kick.
- One cube is located above the upper window in the room with Mule Kick.
- One cube is located near the edge in the same room with the Void Claw pedestal.
- Place the cubes on the wall in the left vertical opening in this order: Fire (bottom) - Hand - Water - Leaf (top).
- The goal is to move the cubes from the left vertical opening to the right vertical opening to form this order: Water (bottom) - Leaf - Hand - Fire (top)
- Note: The Fire cube must never touch either the Leaf or Water cube, otherwise all the cubes will disappear and return to their original spots. Furthermore, if the cubes are not placed in a vertical opening when a round ends, they will return to their original spots.
- Transfer the cubes from the left opening to the right opening. Note: Shoot or melee the circle on the wall to move the slide back and forth between the two openings after placing the cubes in the slide.
- Transfer 1
- Put Hand and Fire cubes in the slide and bring it to the right.
- Place the Fire cube in the right opening.
- Bring back slide to the left.
- Transfer 2
- Add the Water cube in the slide and bring it to the right.
- Place the Hand cube in the right opening first, then place the Water cube. Put the Fire cube back in the slide first, then the Hand cube.
- Bring back slide to the left.
- Transfer 3
- Put Hand cube in the left opening first, then put the Fire cube.
- Put the Leaf cube in the slide, then the Hand cube.
- Place the Leaf cube in the right opening.
- Bring back the slide to the left.
- Transfer 4
- Put the Fire cube in the slide.
- Place the Hand cube in the right opening first, then the Fire cube.
- Transfer 1
- If done correctly, the wall will open revealing the swirling pool and a Random Perk drop.
- Note: Interacting with the swirling pool will trigger rain the next round. This will be needed for the final step for each temple cleansing.
- With the Void Talon, free the three Pull Switchs located on the pillars around the Nexus Forge and the six panels located on each side of the Nexus Core, revealing machinery entangled with spider webs.
- Clear the spider webs with either explosives/Molotov, or Astral/Ursuper Flam, or Warden's Blight. Note: Deathspinners will spawn when clearing the webs.
- Once done, bring a purple orb to the Pack-a-Punch machine and surge the Nexus Forge.
- While the surge is happening, quickly travel down the Nexus Core and interact with the Pull Switch located on the ground at the bottom of the stairs next to Deadshot Daiquiri.
- If done correctly, the pillars around the Nexus Forge can be moved around.
Align all three Nexus Forge pillars in front of each temple before cleansing it.
Temple Ring Solver Open helper
Set the three pillars as they are in your game. Find the fewest presses through every temple, then follow the route one temple at a time.
Current positions
Tap a named stop to place the Inner pillar. Empty and House are positions, not temples.
Through the temples
Set all three current positions to calculate a route.
See every temple stop and exactly which ring to turn.
How the rings move
One press moves the chosen ring one stop and the other two rings two stops, in the lever’s direction. Match the direction before each instruction. Follow tour instructions in order so you do not skip an alignment.
- Align the pillars in front of Dravakar's temple.
- With Shatter Blast equipped, return to Dravakar Inner Sanctum, and look for viking shields hanging on the walls.
- Kill a zombie with Shatter Blast next to a shield to drop it and reveal an opening. Do each viking shield until the Blacksmith's Hammer is available.
- Note: The other rewards are a Self-Revive, Shadow Rift Ammo Mod and Light Mend Ammo Mod.
- Bring the Blacksmith's Hammer to the cauldron in Dravakar Main Chamber then light the cauldron with an Astral Flame shot. If done correctly, a piece of ice will start floading above the cauldron. Bring a zombie near the cauldron so the piece of ice attaches itself to it.
- A specific symbol will float around the zombie and that symbol will match the shackle of the Titan next to Caltheris' temple. Bring the zombie to the Titan Trap in Caltheris Passage and activate the trap. If done correctly, one of the shackles will be destroyed.
This step can be done immediately after the pillars have been aligned.
- Return to Dravakar Main Chamber and interact with the tile on the ground to trigger a quote. While on the tile, re-plate yourself several times until the tile moves, revealing a reflector.
- Note: Re-plating doesn't need to be continous, what matters is the number of times re-plating was done while on top of the tile.
- Shoot at the reflector with a charged shot of the Warden's Blight to lift it into the air. The reflector's beam will need to be oriented towards the top-right wall of Dravakar Main Chamber, next to the opening leading to Dravakar Sanctuary. Shoot the reflector to move the beam around until it is pointing agains that wall. Then kill zombies beneath the reflector to send waves of energy and destroy the wall.
- Note: The trigger square can be seen when looking through the EAM IR-VIZ Reflex sight from the Season 05 - Week 3 challenges.
- If done correctly, the wall will be destroyed revealing Dravakar's Visage. Shoot at the Visage to trigger a lockdown. Destroy all four Shadow Soul that have spawned around the arena. Once done, shoot at the Visage again until the screen turns to white.
- Bring a purple orb right under Dravakar's faceoutside of the temple, and lift it up with Warden's Blight. If done correctly, Dravakar's face should have purple eyes.
- Wait for rain to appear (or interact with the swirling pool) then obtain an Astral Flame and shoot at the forehead of Dravakar's face.
- If done correctly, all corruption from the temple will disappear indicating the temple was cleansed.
- Bring the Ancient Scroll to the cauldron in Nyxara Main Chamber then light the cauldron with an Astral Flame shot. If done correctly, a piece of fire will start floading above the cauldron. Bring a zombie near the cauldron so the piece of fire attaches itself to it.
- A specific symbol will float around the zombie and that symbol will match the shackle of the Titan next to Veytharion' temple. Bring the zombie to the Titan Trap in Veytharion Passage and activate the trap. If done correctly, one of the shackles will be destroyed.
This step can be done immediately after the pillars have been aligned.
- Return to Nyxara Main Chamber and interact with the tile on the ground to trigger a quote. Prone on the tile until it moves, revealing a reflector.
- Note: Lying on the tile doesn't need to be continous.
- Shoot at the reflector with a charged shot of the Warden's Blight to lift it into the air. The reflector's beam will need to be oriented towards the bottom-left wall of Nyxara Main Chamber, below the ground, near the door leading to Nyxara Inner Sanctum. A vertical/pointy shadow can be seen on that wall, the beam needs to be oriented below that shadow. Shoot the reflector to move the beam around until it is pointing agains that wall. Then kill zombies beneath the reflector to send waves of energy and destroy the wall.
- Note: The trigger square can be seen when looking through the EAM IR-VIZ Reflex sight from the Season 05 - Week 3 challenges.
- If done correctly, the wall will be destroyed revealing Nyxara's Visage. Shoot at the Visage to trigger a lockdown. Destroy all four Shadow Soul that have spawned around the arena. Once done, shoot at the Visage again until the screen turns to white.
- Bring a purple orb right under Nyxara's face outside of the temple, and lift it up with Warden's Blight. If done correctly, Nyxara's face should have purple eyes.
- Wait for rain to appear (or interact with the swirling pool) then obtain an Astral Flame and shoot above the snout of Nyxara.
- If done correctly, all corruption from the temple will disappear indicating the temple was cleansed.
- Align the pillars in front of Caltheris' temple.
- Travel to the bottom part of Caltheris Main Chamber and find the four plates on the ground. Stand on one plate to complete a sharshooting challenge by shooting glowing orbs appearing around the room.
- Note: Far-Left plate will spawn orbs on the left wall, Left plate will spawn orbs on the wall in front of the room, Right plate will spawn orbs in the back of the room, Far-Right plate will spawn orbs on the right wall.
- Complete all four challenges to open the right wall, revealing a lantern and two purple orbs. The lantern can be interacted once every round to spawn more orbs.
- With the Void Claw, bring purple orbs towards you and interact with the orb until one drops the Shimmering Thread.
- Note: The Shimmering Thread can be acquired from any orb. The lantern is not mandatory but can provide additional orbs.
- Bring the Shimmering Thread to the cauldron in Caltheris Main Chamber then light the cauldron with an Astral Flame shot. If done correctly, a piece of rock will start floading above the cauldron. Bring a zombie near the cauldron so the piece of rock attaches itself to it.
- A specific symbol will float around the zombie and that symbol will match the shackle of the Titan next to Caltheris' temple. Bring the zombie to the Titan Trap in Caltheris Passage and activate the trap. If done correctly, one of the shackles will be destroyed.
This step can be done immediately after the pillars have been aligned.
- Return to Caltheris Main Chamber and interact with the tile on the ground to trigger a quote. Aim with your weapon for 30 seconds while standing on the tile until it moves, revealing a reflector.
- Note: Aiming while on the tile doesn't need to be continous.
- Shoot at the reflector with a charged shot of the Warden's Blight to lift it into the air. The reflector's beam will need to be oriented towards the wall of Caltheris Main Chamber right next to the left opening doorway. Shoot the reflector to move the beam around until it is pointing agains that wall. Then kill zombies beneath the reflector to send waves of energy and destroy the wall.
- Note: The trigger square can be seen when looking through the EAM IR-VIZ Reflex sight from the Season 05 - Week 3 challenges.
- If done correctly, the wall will be destroyed revealing Caltheris's Visage. Shoot at the Visage to trigger a lockdown. Destroy all four Shadow Soul that have spawned around the arena. Once done, shoot at the Visage again until the screen turns to white.
- Bring a purple orb right under Caltheris' face outside of the temple, and lift it up with Warden's Blight. If done correctly, Caltheris' face should have purple eyes.
- Wait for rain to appear (or interact with the swirling pool) then obtain an Astral Flame and shoot at the forehead of Caltheris' face.
- If done correctly, all corruption from the temple will disappear indicating the temple was cleansed.
- Align the pillars in front of Veytharion's temple.
- Wait for rain to appear (or interact with the swirling pool), and collect the Woven Sash which can be found in different locations:
- Outside of Spira Insula, after the second platform when coming from Nyxara Sanctuary
- Outside of Ruinas Insula, behind the wall behind the Mystery Box location
- Outside of Aranea Insulta, below the ground right after the platform when coming from Veytharion Sanctuary
- Bring the Woven Sash to the cauldron in Veytharion Main Chamber then light the cauldron with an Astral Flame shot. If done correctly, a piece of flesh will start floading above the cauldron. Bring a zombie near the cauldron so the piece of flesh attaches itself to it.
- A specific symbol will float around the zombie and that symbol will match the shackle of the Titan next to Veytharion' temple. Bring the zombie to the Titan Trap in Veytharion Passage and activate the trap. If done correctly, one of the shackles will be destroyed.
This step can be done immediately after the pillars have been aligned.
- Return to Veytharion Main Chamber and interact with the tile on the ground to trigger a quote. Keeping jumping on the plate until it moves, revealing a reflector.
- Note: Jumping on the tile doesn't need to be continous.
- Shoot at the reflector with a charged shot of the Warden's Blight to lift it into the air. The reflector's beam will need to be oriented towards the left window opening of Veytharion Main Chamber, right next to the doorway leading to the rest of the temple. Shoot the reflector to move the beam around until it is pointing agains that wall. Then kill zombies beneath the reflector to send waves of energy and destroy the wall.
- Note: The trigger square can be seen when looking through the EAM IR-VIZ Reflex sight from the Season 05 - Week 3 challenges.
- If done correctly, the wall will be destroyed revealing Veytharion's Visage. Shoot at the Visage to trigger a lockdown. Destroy all four Shadow Soul that have spawned around the arena. Once done, shoot at the Visage again until the screen turns to white.
- Bring a purple orb right under Veytharion's mouths outside of the temple, and lift it up with Warden's Blight. If done correctly, Veytharion's mouths should turn purple.
- Wait for rain to appear (or interact with the swirling pool) then obtain an Astral Flame and shoot above the front mouth of Veytharion.
- If done correctly, all corruption from the temple will disappear indicating the temple was cleansed.
Travel to Nexus Core and stand in one of the circles to start the encounter. At the start of the fight, the Warden will take the form of a Scorpion-man. The Warden will move extremely fast, with the goal of pushing you out of the arena. The use of Void Claw (or Void Talon) is recommended.
Phase 1 - The Warden is accompanied by a Dread Skull (weak to Dead Wire), destroying the Dread Skull will stun the Warden revealing a critical point at the end of its tail. Repeat the process until a third of the health is gone and the Warden becomes immune. While it is immune, Shadow Soul (weak to Light Mend) will appear around the map, destroy them all to start Phase 2.
Phase 2 - In addition to the Dread Skulls, the Warden will spawn floating circles that will stun and deal damages. Moreover, Warden's Stingers (weak to Cryofreeze) will appear around the arena. It is important to destroy as many stingers otherwise they can create a wipe attack. Continue until only a third of its health remains.
Intermediate Phase - The Warden will send you to a close room where the objective will be to either survive a specific amount of time, or to eliminate a HVT. Once the objective is complete, you will be teleported back into the arena.
Phase 3 - Alongside the Warden's Stingers, circles, Dread Skulls, Shadow Souls will appear around the arena providing armor to the Warden and need to be destroyed. Repeat the same process until there is no more health.
Phase 4 - A surprise fourth phase will start. The Warden will have a third of health remaining and even more Shadow Souls providing armor. Additionally, several Dread Skulls need to be destroyed before the Warden can be stunned. Repeat the same process until the fight is finally done.
Side Quests and Easter Eggs
Find three Mr Peeks headphones around the map:
On top of a pillar in Nyxara Main Chamber, requires wall-jumping to reach.
At a window in Ruinas Insula.
Around a skull hidden between a rock and a low wall in Arena Insula.
There are four masks available in Rex Infernus, all the masks can be used within the same game and each mask can be removed and placed on a specific pedestal to easily swap between them all.
Horned Skull Mask (Stone Cold Strongold x Ring of Fire)
- Remain inside Her House for at least 9 rounds.
- Melee the painting on the right side of the chimney to collect the Horned Skull Mask.
- Note: Meleeing the painting after 5-6 rounds will reward with 600 Essence or some Ammo while after 7-8 rounds it will be either a free Perk can or a Rare Aether Tool.
The Horned Skull Mask offers a damage and armor boost while standing still, with a circle that will damage any enemy entering it. Note: There is a cooldown of 1 minute between each use. The mask can be placed on the pedestal inside Veytharion Sanctuary.
Cowboy Hat Mask (Spider Immunity)
- Ride a Web Mother next to the Pack-a-Punch machine and kill around 50 enemies. Note: Riding the Web Mother is time-limited and may require several tries.
- Once enough enemies have been killed, the Web Mother will jump into the Pack-a-Punch dying instantly and dropping the Cowboy Hat Mask.
The Cowboy Hat Mask offers some immunity against Deathspinners and Web Mothers. The mask can be placed on the pedestal inside Nyxara Inner Sanctum.
Astronaut Helmet Mask (Longer-lasting Void Claw)
- Collect six parts of Mr Peeks:
- The head is on a shelf in Her House next to Quick Revive.
- A part is against a rock pillar just outside of Caltheris' Passage on the right side; requires the Void Claw.
- A part is located on the other side of the cliff opposite of the Mystery Box location in Ruinas Insula; requires the Void Claw.
- A part is located floating over an edge below the main ground and a platform in Aranea Insula; requires the Void Claw.
- A part is located on top of a rock pillar above Juggernog in front of the higher platform in Spira Insula; requires the Void Claw.
- A part is located outside of Nexus Forge, in-between Veytharion's and Dravakar's temples; requires the Void Claw.
- Make sure all the doors around the map are open.
- Travel to Caltheris Main Chamber and look for Mr Peeks on the ledge of the platform above the Mystery Box location.
- Interact with Mr Peeks to start a Grappling Hook parkour course. Cross every Mr Peeks circle until it reaches the doorway of Nyxara Entrance.
- Completing the parkour course in 50 seconds or less will drop the Astronaut Helmet, alongside other loot such as a Raw Aetherium Crystal.
- Note: Complete the parkour course will reward with loot such as Essence, Salvaga and a Mystery Perk while completing it under a minute will aware a Ray Gun.
The Astronaut Helmet offers an increased 30 seconds of use for the Void Claw and Void Talon. The mask can be placed on the pedestal in Caltheris Main Chamber on the platform above the Mystery Box location.
Spiked Skull Mask (Twins Ammo effect)
- Travel to the forest from Nyxara Inner Sanctum.
- Note: This can be done once per round after the fruit has spawned.
- Interact with the music box located below a fallen tree trunk and leave the forest.
- Return to the forest and interact with a blue toy box located between two trees.
- Three items will appear above the toy box, interacting with an item will trigger a mini-game by the Twins:
- Teddy Bear: Collect glowing plushies while being pursued by enemies who will move only when you're not looking before the time runs out.
- Mask: Quickly find the Twins before the time runs out. Note: When the Twins are found, their energy will move towards the direction of their next spot.
- Rope: Do a skipping rope game, failing 3 times will end the mini-game.
- Completing the Mask mini-game will reward with 1000 Essence; completing the Rope mini-game will reward with 600 Essence; and completing the Teddy Bear mini-game will reward with 600 Essence.
- Note: Completing all the mini-games will reward with possible Aether Tool, Aetherium Crystal, Mystery Perk, and Wonder Weapon.
- Return to the forest and complete all three mini-games once more. However, the min-games will be harder to complete this time around
- Teddy Bear: Zombies are faster with less time to complete.
- Mask: Being stunned every time the Twins are found.
- Rope: Longer with more variation, failing 2 times will end the mini-game.
- Completing the harder version of all the mini-games will reward with the same kind of loot as the normal version with the Spiked Skull Mask also becoming available.
The Spiked Skull Mask offers a Twins ammo effect for your gun, the Twins will appear on the ground like a lightning strike kill all the zombies nearby. The mask can be placed on the pedestal inside Dravakar Sanctuary, on the left of the Armor wall-buy and doorway.
- With the Void Claw, open the various Dig Spots until one of them drops a glowing cassette.
- Travel to Aranea Insula and find the cassette player. Interact with the player to place the cassette.
- If done correctly, you will be teleported to Her House to complete a rythm mini-game. Buttons will be shown on screen and needs to be pressed in the correct order before the time runs out.
- Once the mini-game is finished, a trophy will appear in Nexus Forge containing loot and Essence.
Corrupted Press F
- Purchase the M34 Novaline from Dravakar Sanctuary.
- Pack-a-Punch three different weapons.
- Wait for rain to appear (or interact with the swirling pool) and if done correctly, the M34 Novaline wall-buy will start glowing.
- Obtain the Astral Flame and shoot at the wall-buy while it's raining. This should spawn a Web Mother HVT.
- After killing the HVT, the Unstable TR2 can be picked up in front of the wall-buy. Quickly return to Nexus Forge as the weapon will constantly damage you.
- Pack-a-Punch the weapon to obtain the Corrupted Press F
- Note: The Corrupted Press F is an Ultra weapon that will still damage you if your shot doesn't damage/kill any enemy.
Corrupted Pluto
- Purchase the M10 Breacher from Caltheris Entrance.
- Pack-a-Punch three different weapons.
- Wait for rain to appear (or interact with the swirling pool) and if done correctly, the M10 Breacher wall-buy will start glowing.
- Obtain the Astral Flame and shoot at the wall-buy while it's raining. This should spawn a Web Mother HVT.
- After killing the HVT, the Unstable Olympia can be picked up in front of the wall-buy. Quickly return to Nexus Forge as the weapon will constantly damage you.
- Pack-a-Punch the weapon to obtain the Corrupted Pluto
- Note: The Corrupted Pluto is an Ultra weapon that will still damage you if your shot doesn't damage/kill any enemy.
There are 7 Power-Up statues around Rex Infernus giving out the corresponding Power-Ups when shooting them, with two additional statues appearing after the first 7 are activated.
Bonus Point: Inside the structure outside the map on the right side of Her House when seen from Nyxara Passage.
Insta-Kill: Inside the arch on the right side of the pit beneath Nyxara Entrance.
Double Points: In the structure outside the map, behind Her House when looking from Caltheris Passage.
Nuke: On the flat roof of a structure outside the map when seen from Caltheris Main Chamber.
Full Power: At the very top of the left pillar in Veytharion Main Chamber when looking from the entrance of the temple.
Max Armor: On the ground of the left window in Dravakar Entrance when looking from the entrance of the temple, requires to jump to see it.
Fire Sale: Inside the structure outside the map, behind the Mystery Box location in Spira Insula. Only available after all the others have been activated.
Random Perk: On the bridge outside the map below Aranea Insula. Only available after all the others have been activated.
Wall-Buys and Perk-a-Colas
| CODA-9 | Her House |
| Warden 308 | Her House |
| MK.78 | Nexus Core |
| Ryden 45K | Nexus Forge |
| Echo 12 | Nyxara Passage |
| Peacekeeper Mk1 | Nyxara Entrance |
| VS Recon | Nyxara Sanctuary |
| DS20 Mirage | Spira Insula |
| M8A1 | Veytharion Passage |
| Akita | Veytharion Main Chamber |
| Shadow SK | Veytharion Sanctuary |
| XM325 | Aranea Insula |
| XR-3 Ion | Aranea Insula |
| Dravec 45 | Dravakar Passage |
| AK-27 | Dravakar Main Chamber |
| M34 Novaline | Dravakar Sanctuary |
| M15 Mod 0 | Ruinas Insula |
| M10 Breacher | Caltheris Entrance |
| X9 Maverick | Caltheris Entrance |
Mister Peeks · Cursed mode: Check his possible spawn locations. Shoot him when he appears to drop an egg that can contain perks and other loot.
Note: Der Wunderfizz appears after purchasing 4 Perk-a-Colas or after reaching Round 20.
| Quick Revive | Her House |
| Deadshot Daiquiri | Nexus Core |
| Stamin-Up | Nyxara Passage |
| Double Tap Root Beer | Nyxara Main Chamber |
| Juggernog | Spira Insula |
| Vulture Aid | Veytharion Passage |
| Mule Kick | Veytharion Sanctuary |
| Widow's Wine | Aranea Insula |
| Speed Cola | Dravakar Entrance |
| Death Perception | Dravakar Main Chamber |
| Phd Flopper | Ruinas Insula |
| Wisp Tea | Caltheris Passage |
| Elemental Pop | Caltheris Main Chamber |
| Der Wunderfizz | Nexus Core |
Miscellaneous Features
Sources and review
Guide text is adapted from the r/CODZombies community wiki with AI assistance. The references below also informed the map and puzzle helpers. Source and software checks do not replace an in-game playthrough.