Key Features
House, barn and four perks
- Open the farmhouse, take an MP5 when you can afford it and work toward Jugger-Nog upstairs. Speed Cola is downstairs; the Box sits on the upper balcony. Learn the balcony drop before you use it under pressure, then move away from its landing point.
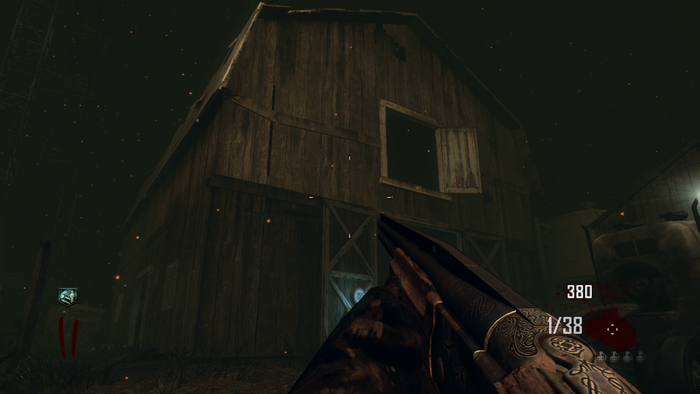
- Quick Revive is outside near the barn and Double Tap is upstairs in the barn. Perks already have power. Use the barn doorway and upper opening as two different exits, checking the ground before dropping. The photographed barn is a shared TranZit layout reference; this standalone mode has different equipment.
Farm barn exterior and upper escape opening. Shared TranZit layout reference by art director Daniel Romeo Padilla; Survival equipment differs. - There is no Pack-a-Punch machine or way to build one in this arena. A wall weapon with refillable ammo is therefore valuable even beside a stronger Box gun. In Survival, Galvaknuckles in the small shed cost 6,000 and help early melee point building; do not rely on one-hit melee indefinitely.
Control the yard
- Gather zombies in the yard with a wide loop and leave room around the central obstacles. Watch spawns from both buildings before cutting across. When the yard becomes crowded, use a building route only if you can see its exit; narrow stairs are poor places to turn around.
- Assign the house and barn sides to different players and call out a balcony drop. Two independent trains crossing the middle can trap both players. Clear zombies away from a downed teammate before attempting the revive, and keep one player free to rescue the rescuer.
- After a down, take a nearby wall gun before gambling on the Box, then recover Jugger-Nog. Solo Quick Revive supplies limited self-revives; co-op Quick Revive speeds teammate revives. The farmhouse fridge is not a working TranZit weapon locker in standalone Farm.
Farm in Grief
- The house balcony and barn stairs are the main pressure points. Avoid waiting behind an opponent at the Box; they can hold the doorway while fresh zombies arrive. Pay for a usable escape route when it is needed rather than losing the team while waiting for the opposition to open it.
- Grief pits two teams against the zombies. You cannot kill an opponent directly with bullets, but shots slow them and melee can push them. When the other team is completely down, your team still has to survive the remaining zombies to win. If both teams fail, the round can restart. Guard teammates and preserve an escape route instead of chasing an opponent into a corner.
- Most pickups benefit the team that collects them. Call out Max Ammo before anyone spends their last magazine; coordinate revives around Insta-Kill or a Nuke. The meat pickup attracts zombies to its landing point or the player it hits. Use it to redirect a crowd away from a revive. A Fire Sale opens Box opportunities for both teams, so check who controls each approach.
- Clear the approach before reviving. Opponents can obstruct the doorway or push an upright reviver; crouching makes you harder to displace. Do not dive onto a prone player: the collision can down both of you. Keep one teammate outside the rescue so a failed revive does not end your team.
Side Quests
Mode boundaries
- Farm has no separate main Easter egg, buildable quest or complete music activation. Turbine doors, bus parts, weapon storage and the teddy sequence belong to full TranZit. They are covered in that guide so you do not spend a Survival run chasing unavailable interactions.
Sources and review
Written for the original Black Ops II release, on Original difficulty unless a mode is specified. Instructions were cross-checked against the linked community sources on 3 October 2026. Gameplay: Activision / Treyarch; photographs and charts: COD Zombies Guides, its credited contributors, mmmrkennedy and other sources named below. Shared-layout images may show another edition; follow the BO2 instructions. Source review and website checks are not an in-game playthrough.
- callofduty.fandom.com reference ↗
- GameFAQs original BO2 walkthrough (2) ↗
- Official Call of Duty guide (3) ↗
Select any reference image to enlarge it. Screenshot and symbol sources are credited in the linked walkthroughs; this guide uses local copies for reliable access.