Main Quest
World tier 3 — red-rift chain and Ravenov contact
- At world tier 3 or higher, select your region’s Red rift in the finder. Enter the ground portal, then steer/parachute into the next red rift suspended in the sky. Repeat through the airborne chain until no further rift appears and a beam falls toward the ground.
A missed portal or slow approach can end the chain. Continue to another region for another attempt. Keep the next portal in view as each teleport releases you.
Excision begins at a red rift, not the Maxis radio - Follow the final beam to its landing site and collect the Beacon Listening Device. If you started in Sanatorium, there is no ground rift for this phase: complete the region objective, warp elsewhere and begin there. Sanatorium is used after the device and contact.
Collect the device dropped at the end of the rift chain - Finish the normal region objective. At the beacon, select Respond to Ravenov and then warp when available. This quest interaction directs the next destination to Sanatorium. Prepare your weapons and armor before going; the escort and final boss will require them.
Outbreak quest location finder Open helper
Choose your quest, region and objective for annotated maps, object photographs and availability checks.
Choose your quest, current region and objective to reveal its location reference.
Inputs are shared with the inline guide on this device. Photos: mmmrkennedy · game imagery: Activision / Treyarch.
Sanatorium — helicopter, red orb and Aether Bunny
- Go to the crashed helicopter in Carved Hills at the northwest edge of Sanatorium. Approaching it starts an enemy wave. Defeat the attackers, then interact with the Omega audio recording in the helicopter to hear the next instruction.
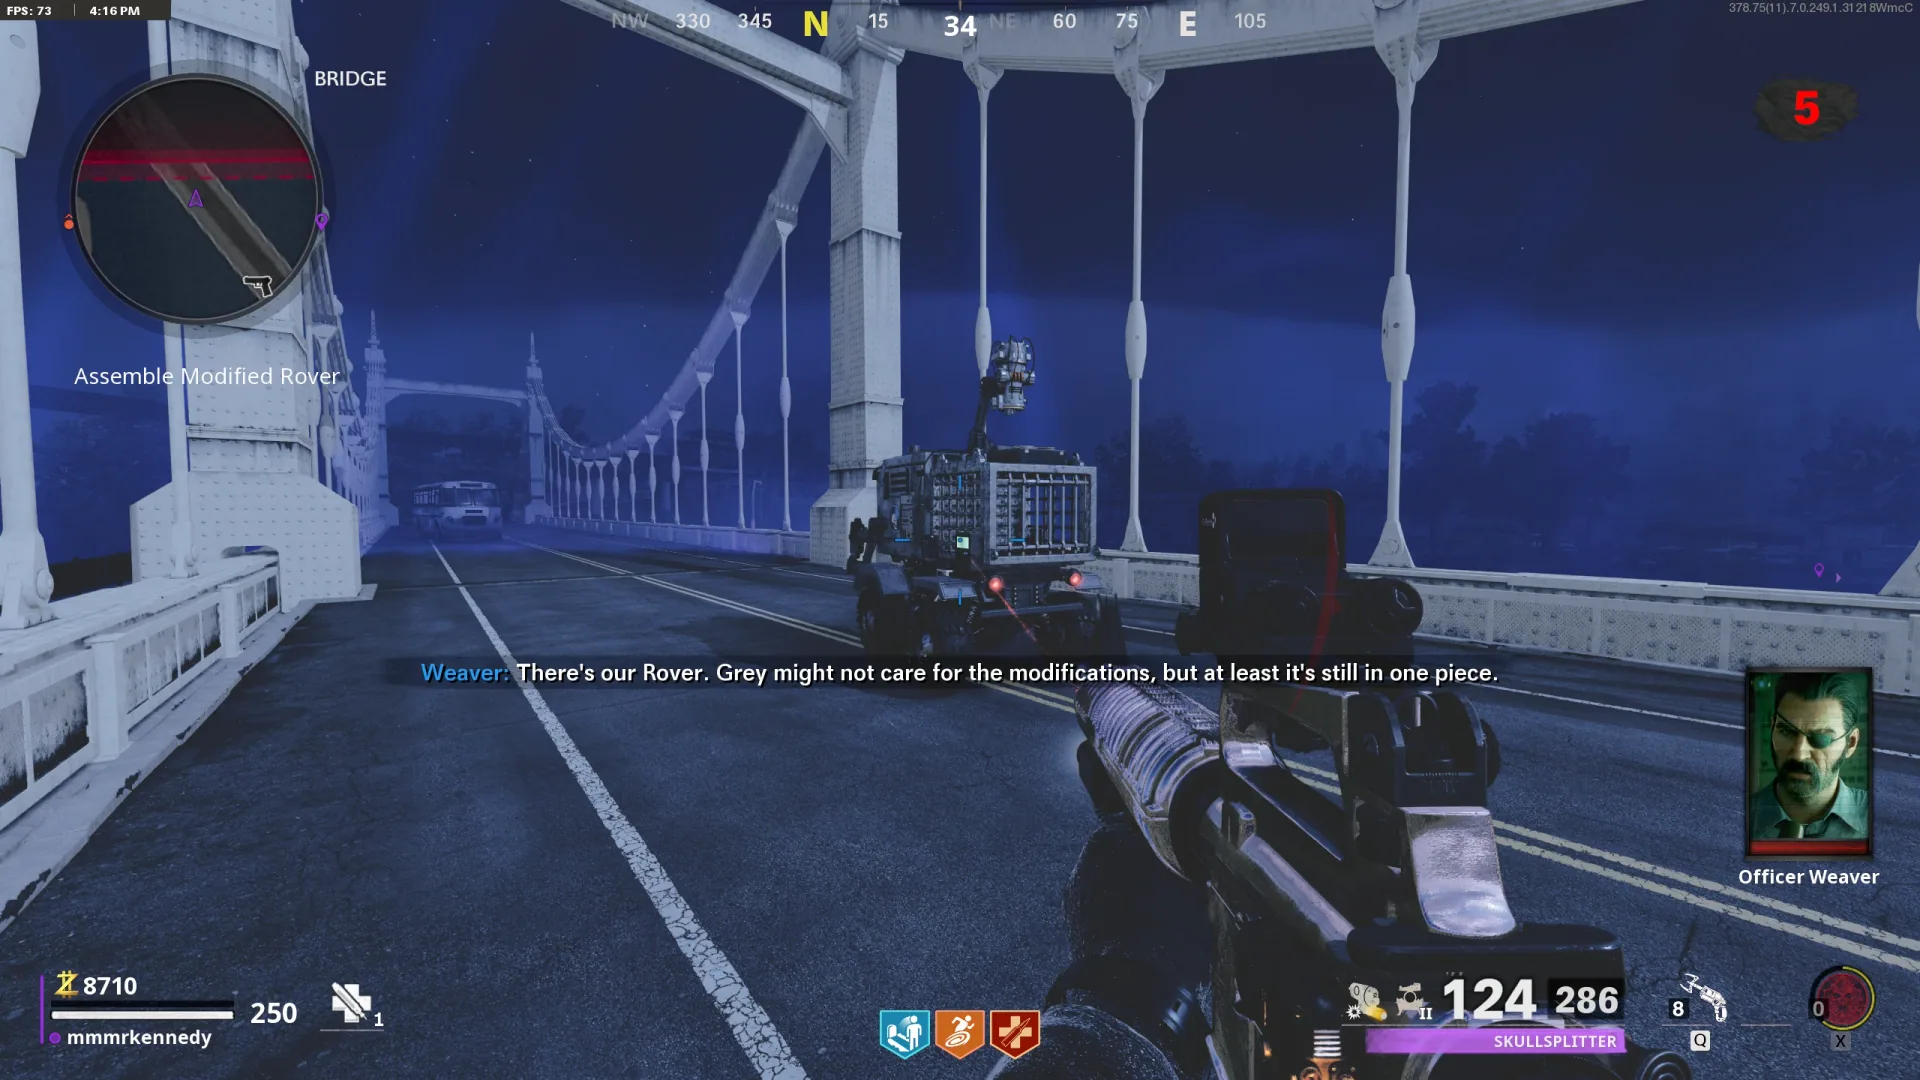
Sanatorium crash-site map Interact with the recording inside the wreck after the wave - Find the special red Aethereal Orb at one of the marked locations. Stand on the side opposite the central bridge and shoot it toward the rover. Reposition behind it after every move and guide it along the route. At the bridge it waits above the modified rover; an ordinary purple loot orb cannot substitute.
If it moves away from the bridge, stop firing, move around to its other side and redirect it. Continuous fire from the wrong side only makes the route longer.
Possible red-orb spawns in Sanatorium This red quest orb differs from the ordinary purple loot orb Guide the orb to this bridge rover - Find a broken Mystery Box containing the Aether Bunny at one of the marked sites. Interact to start its defense, kill the spawned enemies, then pick up the bunny. Carry it to the bridge rover and install it. After the red orb enters the rover, use the dropped recording to finish the preparation dialogue.
Carrying the bunny replaces your Field Upgrade. If you cannot collect it, finish the nearby defense enemies and try the interaction again.
Possible broken Mystery Box / bunny sites The bunny sits on a broken box; normal Mystery Boxes do not count Install the bunny on the bridge rover
Escort, rooftop recording and Orda exfil
- Do your final Pack-a-Punch, perk and armor purchases before activating the modified rover. Activation closes off the usual preparation route. Stay inside its safe field and escort it across the bridge to Monument Walk, clearing enemies without chasing them deep into the surrounding gas.
Do not confuse this with a routine Escort objective: the quest rover takes you into the finale and its bubble protects against the surrounding hazard.
- At the monument, follow the objective to the roof and play the Omega recording beside the dead soldiers. Let the dialogue finish, then head to the marked East Gardens exfil zone. The HUD countdown governs the remaining time; move immediately rather than waiting on the rooftop.
The rover brings you to Monument Walk Play the recording beside the bodies on the roof - Kill the exfil enemies, including Orda, before the timer ends. Attack Orda from range, use its exposed mouth for critical damage and avoid its slam. Check for remaining enemies around the edges if the counter does not reach zero, then board the helicopter when the prompt appears. Boarding completes Operation Excision.
Orda dying alone does not finish the quest. Clear the required enemy counter and take the helicopter.
Side Quests
Optional rewards before the rover
- The open regions offer the same world events, fishing, loot radios and D.I.E. crates as other Outbreak runs. Complete any preparation you need before activating the special Sanatorium rover. After a successful quest, visit Zoo on another run to update the Pact if this adds a new completion.
Sources and review
Walkthrough adapted from the community and illustrated references below, with AI-assisted source checks on 3 October 2026. Gameplay photographs: mmmrkennedy; game imagery: Activision / Treyarch. Match-specific numbers and sequences must come from your game. Source and software checks do not replace an in-game playthrough; a full in-game walkthrough has not been performed.
- r/CODZombies community guide ↗
- mmmrkennedy illustrated guide (2) ↗
- charlieintel.com reference (3) ↗
- esportstalk.com reference (4) ↗
Select any reference image to enlarge it. Screenshot and symbol sources are credited in the linked walkthroughs; this guide uses local copies for reliable access.