Key Features
Region preparation and how Outbreak works
- Use the first two world tiers to buy armor, improve weapon rarity, Pack-a-Punch a reliable damage weapon and collect perks. Loot buildings and complete manageable side events before finishing the region objective. Once the objective is complete, the beacon offers services and the choice to warp or exfil. Warping advances the world tier and enemy difficulty.
A region is a location; a world tier is difficulty. “Ruka on tier 3” and “Ruka on tier 5” are different runs. Use Endless: the three-region playlist cannot carry these quests through their later stages.
- Start either main-quest route at world tier 3 or later. Ravenov Implications starts at a particular Maxis radio and eventually fights Legion in Ruka. Operation Excision starts with a red-rift flight chain and eventually escorts a rover in Sanatorium. Both work solo or in a squad; choose one route for the run and use its matching beacon contact.
The optional Unknown Signal music event also uses a radio and amplifiers. Only the main-quest radio drops the Beacon Listening Device and enables the Maxis response.
- Choose your current region and objective in the finder below. It covers Alpine, Armada, Collateral, Duga, Golova, Ruka, Sanatorium and Zoo. Ruka lacks a projector, while Sanatorium lacks Excision’s starting red rift. For those combinations, move on instead of searching an unavailable location.
If your objective is unavailable, finish the region’s normal objective and warp. Quest-forced Ruka/Sanatorium travel only happens after the correct beacon/projector sequence.
Outbreak quest location finder Open helper
Choose your quest, region and objective for annotated maps, object photographs and availability checks.
Choose your quest, current region and objective to reveal its location reference.
Inputs are shared with the inline guide on this device. Photos: mmmrkennedy · game imagery: Activision / Treyarch.
Main Quests
Choose a story quest
- Ravenov Implications, also called Operation Inversiya, takes the radio → microfilm → projector → missile-silo route and ends with Legion. Bring a strong ranged boss-damage weapon, a way to control crowds and enough upgrades before entering the bunker. Its three launch consoles are A, B and D.
- Operation Excision follows red rifts → Ravenov contact → Sanatorium crash site → modified rover → Orda exfil. It is a separate quest completion for the Pact. Its red orb and bunny belong to that quest, and are different from ordinary free-roam loot events.
Side Quests
D.I.E. elemental crates — four region-specific upgrades
- Obtain a D.I.E. from the Mystery Box, Legendary Trials or a random high-tier reward. Unlike Die Maschine, Outbreak has no four-part weapon-building quest: carry the D.I.E. to an elemental crate and interact to change its variant. You can Pack-a-Punch the weapon normally.
- Alpine — Cryo-Emitter: Frozen pond near Upper Highway at the south of Alpine. Open the pictured crate with the D.I.E. equipped to take the variant.
Alpine: elemental-crate map Alpine: Cryo-Emitter crate - Duga — Electrobolt: Climb to the top of the large radar-array structure on the right/east of the map. Open the pictured crate with the D.I.E. equipped to take the variant.
Duga: elemental-crate map Duga: Electrobolt crate - Golova — Nova-5: On the silo/platform at the train loading area near the western boundary. Open the pictured crate with the D.I.E. equipped to take the variant.
Golova: elemental-crate map Golova: Nova-5 crate - Ruka — Thermophasic: Inside the Burnt Forest near the southern boundary. Open the pictured crate with the D.I.E. equipped to take the variant.
Ruka: elemental-crate map Ruka: Thermophasic crate
The Pact — permanent starting-weapon rarity
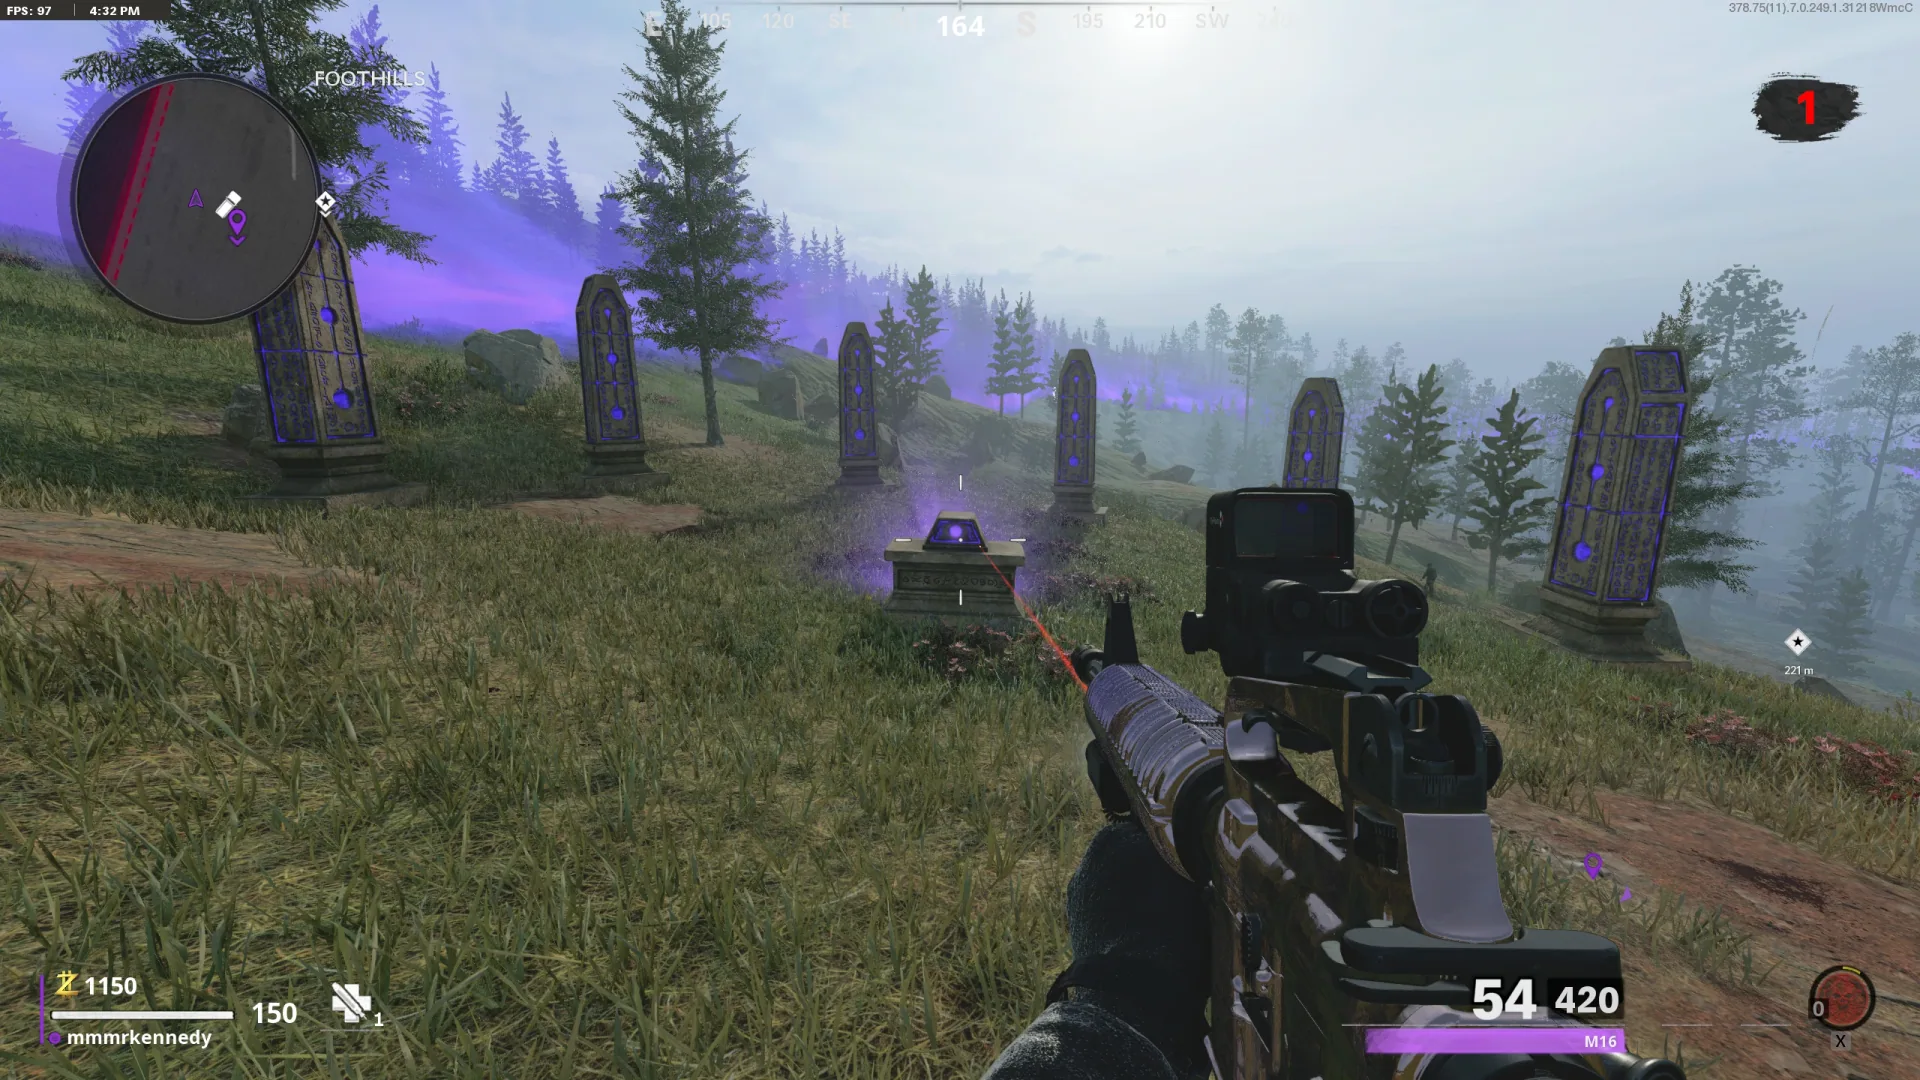
- Complete at least two of the six distinct Cold War story quests on your account: Die Maschine, Firebase Z, Ravenov Implications, Operation Excision, Mauer der Toten and Forsaken. Repeating one quest does not fill another pillar. Visit Zoo’s ritual site in the northeast hills and interact with the altar to make the Pact.
Guide checkboxes on this website do not grant in-game credit. The game’s ritual pillars and account rewards are the authority.
Zoo: the ritual site is outside the main zoo complex The altar and six quest pillars show the Pact’s completion checks - The Pact improves the rarity of your starting loadout weapon in subsequent supported Zombies matches: two or three completed quests give Uncommon; four or five give Rare; all six give Epic. Return to the altar after more completions to update the reward. You can break the Pact there and make it again later.
This is weapon rarity, not starting Pack-a-Punch. Pillars read left to right as Die Maschine, Firebase Z, Inversiya, Excision, Mauer and Forsaken.
- To reach Zoo deliberately, interact with a hidden mask in another region before selecting an ordinary beacon warp. Use the finder’s Zoo-mask option for photographs and an annotated map. Make this a dedicated Pact trip so a mask does not compete with a main quest’s forced destination.
- Alpine: At the base of the red fan in Lower Chairlift.
- Armada: Inside the central ship’s Control Room.
- Collateral: On a bucket beside the Warehouse door.
- Duga: At the Unused Lot bus stop.
- Golova: In front of the Town Center statue.
- Ruka: On a barrel in the Obstacle Course.
- Sanatorium: At the bottom of the Sanatorium Pool.
World events — what to do and when to use them
- Locked Golden Chest: interact with the locked chest to summon its attackers. Kill the entire event wave, including specials that wandered behind cover, then return for the unlocked reward. Starting it while undergeared can overwhelm you; armor and a packed weapon make the event more dependable.
- Dragon Relic: pay to activate the rocket-like relic, then kill zombies inside the ring around it so their souls feed the dragon. Keep kills inside the ring throughout its countdown. Filling the reservoirs improves the reward; when the dragon departs, open the chest it leaves.
- Fury Crystal: shatter the large red crystal to start a short hunt for its smaller red crystals in the surrounding area. Listen for their hum, search every floor and shoot them all before the timer expires. Collect the Aether Tool while holding the weapon whose rarity you want to raise.
Inspect the surrounding buildings before triggering it. A rarity tool does not add a Pack-a-Punch tier, and the held weapon is the one that receives the upgrade.
- Black Chest: interact to release three purple orbs. Shoot an orb to engage it, keep moving while it attacks and spawns enemies, and destroy it before taking on the next. Once all three are destroyed, open the chest. Its released spirit can protect the squad when a player is badly hurt, but that help only lasts in the current region.
Fight one orb at a time where possible. Their movement and repeated enemy spawns make this harder than a simple chest-opening task.
- Distress Call / horde event: use the marked remains or radio to begin the revenge encounter, then defeat the approaching group and its priority enemies. Claim the dropped reward when the wave is complete. Keep a retreat lane instead of fighting from the interaction corner.
- Roaming Orda: fight it from range, shoot the glowing mouth and move away from the slam. Stay engaged and clear nearby enemies; breaking off for too long lets it recover. Kill it for a large loot drop. This optional Orda is distinct from Excision’s required final exfil boss.
- Omega Supply helicopter: shoot down the transport before it escapes and collect the supply crate where it falls. It rewards salvage, useful for rarity and armor. Check your ammunition and the landing area before committing a boss-damage magazine to it.
Hidden loot, radios, fishing and movement tricks
- Ordinary Aethereal Orb: find a small floating purple orb and shoot it to release Essence and move it to a new position. Follow and repeat until its final reward drops. Excision’s red orb follows a quest route to a rover; do not substitute the ordinary purple orb.
- Unknown Signal: activate an ordinary radio, clear the interference enemies, listen to the resulting signal and tune its three nearby amplifiers to match. Return to the main radio for loot and a music-track reward. A subtitle frequency number can help distinguish tones; recheck the radio if the target changes after an interference wave.
- At a fishing rod beside the fishing zombie, interact to cast and reel when the rod visibly dips. Collect the pulled-up loot and repeat while that spot remains usable. Rewards are random and may include salvage, Essence, armor, perks or a rare weapon. A Mimic can also emerge, so leave room to retreat.
- If you encounter the rare punk-styled zombie named Ronald Raygun wandering an Outbreak region, kill it and collect the Ray Gun it drops. There is no reliable fixed spawn to farm within a match. This is different from Forsaken’s dancing pizza NPC, whom you must keep alive.
- After selecting Warp at the beacon, damage the beacon repeatedly during its departure animation to skip an extra world tier. Use this only when your equipment can handle the extra difficulty; skipping tier 2 is a speed route, not a requirement for either quest.
For a first completion, use the extra preparation tier instead. Do not skip a tier where you still need a quest radio or rift.
- Outbreak Intel spans fixed artifacts, audio logs, documents, radio transmissions, special-enemy drops and Intel Trials across regions. Several seasons added more items. Keep a separate collectible list if aiming for all Intel; finishing the two main quests is not the same collection.
Sources and review
Original walkthrough cross-checked against the community and illustrated references below on 3 October 2026. Gameplay photographs: mmmrkennedy; game imagery: Activision / Treyarch. Match-specific numbers and sequences must come from your game. Source and software checks are complete; a full in-game walkthrough has not been performed.
- r/CODZombies community guide ↗
- mmmrkennedy illustrated guide (2) ↗
- gamesradar.com reference (3) ↗
- Steam Community walkthrough (4) ↗
- GameSpot walkthrough (5) ↗
- gameranx.com reference (6) ↗
- gameranx.com reference (7) ↗
Select any reference image to enlarge it. Screenshot and symbol sources are credited in the linked walkthroughs; this guide uses local copies for reliable access.