Main Quest
Power and Elvira’s projector
- Take the switch handle from the zombie hand on the beach by the OSA. Fit it to the Power Station box near the drive-in. Take Elvira’s book from the Ice Cream Parlour backroom safe and give it to her at the TV Studio.
- Take the Market cleaver from behind the Deadeye Dewdrops counter. Fill Elvira’s vial with cleaver kills (read scoreboard progress), then return it to summon her. Lead her to the closed TV Studio portal so she opens it. Later projector entrances alternate behind the Parlour and at the RV Park, marked by a lightning storm.
Initial closed portalmmmrkennedy; game imagery Activision and the relevant game studio · Source ↗ Open projector portalmmmrkennedy; game imagery Activision and the relevant game studio · Source ↗ Active portal stormmmmrkennedy; game imagery Activision and the relevant game studio · Source ↗ Parlour portalmmmrkennedy; game imagery Activision and the relevant game studio · Source ↗ RV Park portalmmmrkennedy; game imagery Activision and the relevant game studio · Source ↗
Required tools and Seismic Wave Generator
- Take the crowbar in Motel’s maintenance room. Retain access to the Market cleaver for the radioactive leg and fat ingredients. Repair the Market freezer trap using the part on Gas Station’s left-side boxes.
- Build the Seismic Wave Generator at the Parlour backroom bench: blueprint at its rear door, coil by the back corner, leg on the outside bench and metal part by the drive-in playground porta-potties. Return parts individually when your carry slot is occupied. It raises the buried beach arm in the next phase.
Assemble six body parts and three mirrors
- In the projector room press the wall button before leaving; the alternate return takes you inside the locked RV. Take the head by its large front window. In Market, activate the repaired freezer trap, crowbar the hanging pig beside the torso during/after freezing, then recover the torso.
Alternate exit buttonmmmrkennedy; game imagery Activision and the relevant game studio · Source ↗ RV headmmmrkennedy; game imagery Activision and the relevant game studio · Source ↗ Hanging pigmmmrkennedy; game imagery Activision and the relevant game studio · Source ↗ Frozen torsommmrkennedy; game imagery Activision and the relevant game studio · Source ↗ - Take the left arm from the RV firepit beside the Volk. Put a Seismic Wave Generator close to the beach arm that held the switch handle; avoid covering the arm itself. Let its pulses raise the arm until it can be collected.
- Cleaver-kill a radioactive soldier zombie, available from Scene 5, for the left leg; if it does not drop, check where the first such kill happened. Cook a standard grenade beneath the hanging leg on the Snack Shack/TV Studio path’s final left tree, then collect it from the ground.
Radioactive soldiermmmrkennedy; game imagery Activision and the relevant game studio · Source ↗ Dropped legmmmrkennedy; game imagery Activision and the relevant game studio · Source ↗ Hanging tree legmmmrkennedy; game imagery Activision and the relevant game studio · Source ↗ Fallen tree legmmmrkennedy; game imagery Activision and the relevant game studio · Source ↗ - After summoned Elvira leaves, take her couch mirror. Crowbar the RV bathroom mirror and take the sink fragment. Crowbar the passenger-side mirror from the roofed white car on Main Street. At Spawn, put six body pieces on the upright bed; fit the broken mirror at the pill-bottle table, Elvira’s mirror on the zombie-window crates and car mirror on the crate beside Up ’N Atoms.
Elvira couch mirrormmmrkennedy; game imagery Activision and the relevant game studio · Source ↗ RV bathroom mirrormmmrkennedy; game imagery Activision and the relevant game studio · Source ↗ White car side mirrormmmrkennedy; game imagery Activision and the relevant game studio · Source ↗ Upright body bedmmmrkennedy; game imagery Activision and the relevant game studio · Source ↗ Broken mirror positionmmmrkennedy; game imagery Activision and the relevant game studio · Source ↗ Elvira mirror cratesmmmrkennedy; game imagery Activision and the relevant game studio · Source ↗ Car mirror cratemmmrkennedy; game imagery Activision and the relevant game studio · Source ↗
Read the reels, activate life and reverse death
- Take the punch card from the Parlour backroom desk and fit it to Spawn’s machine. At the TV Studio shelf, read five film reels left to right, counting the floor reel as position three. Their digits are a permutation of 3,4,5,6,8. Record the observed order before entering it.
Punch cardmmmrkennedy; game imagery Activision and the relevant game studio · Source ↗ Spawn machinemmmrkennedy; game imagery Activision and the relevant game studio · Source ↗ Five film-reel ordermmmrkennedy; game imagery Activision and the relevant game studio · Source ↗ Reel number close-upmmmrkennedy; game imagery Activision and the relevant game studio · Source ↗ - Interact as each required number’s light illuminates; lights count from zero at the left. A wrong sequence/three strikes or damage ejects you, but the correct sequence remains the same and can be retried. After acceptance, activate the machine again to create the zombie.
- Enter the recorded order in reverse, then activate again for the death ray. Collect the resulting key and open the Gas Station garage door. The later safe/bomb code is not reversed.
Life ray, pressure and bomb memory Open helper
The TV Studio’s film reels show the five life-ray digits (floor reel is third). Keep that order, its reversal and the later four-digit safe code separate.
Build chemistry equipment and bomb
- Collect the chemistry tube from the Market backroom couch, gauge from the RV picnic table nearest Mule Munchies and screen from the picnic table on the RV/beach path. Fit them to the empty garage table.
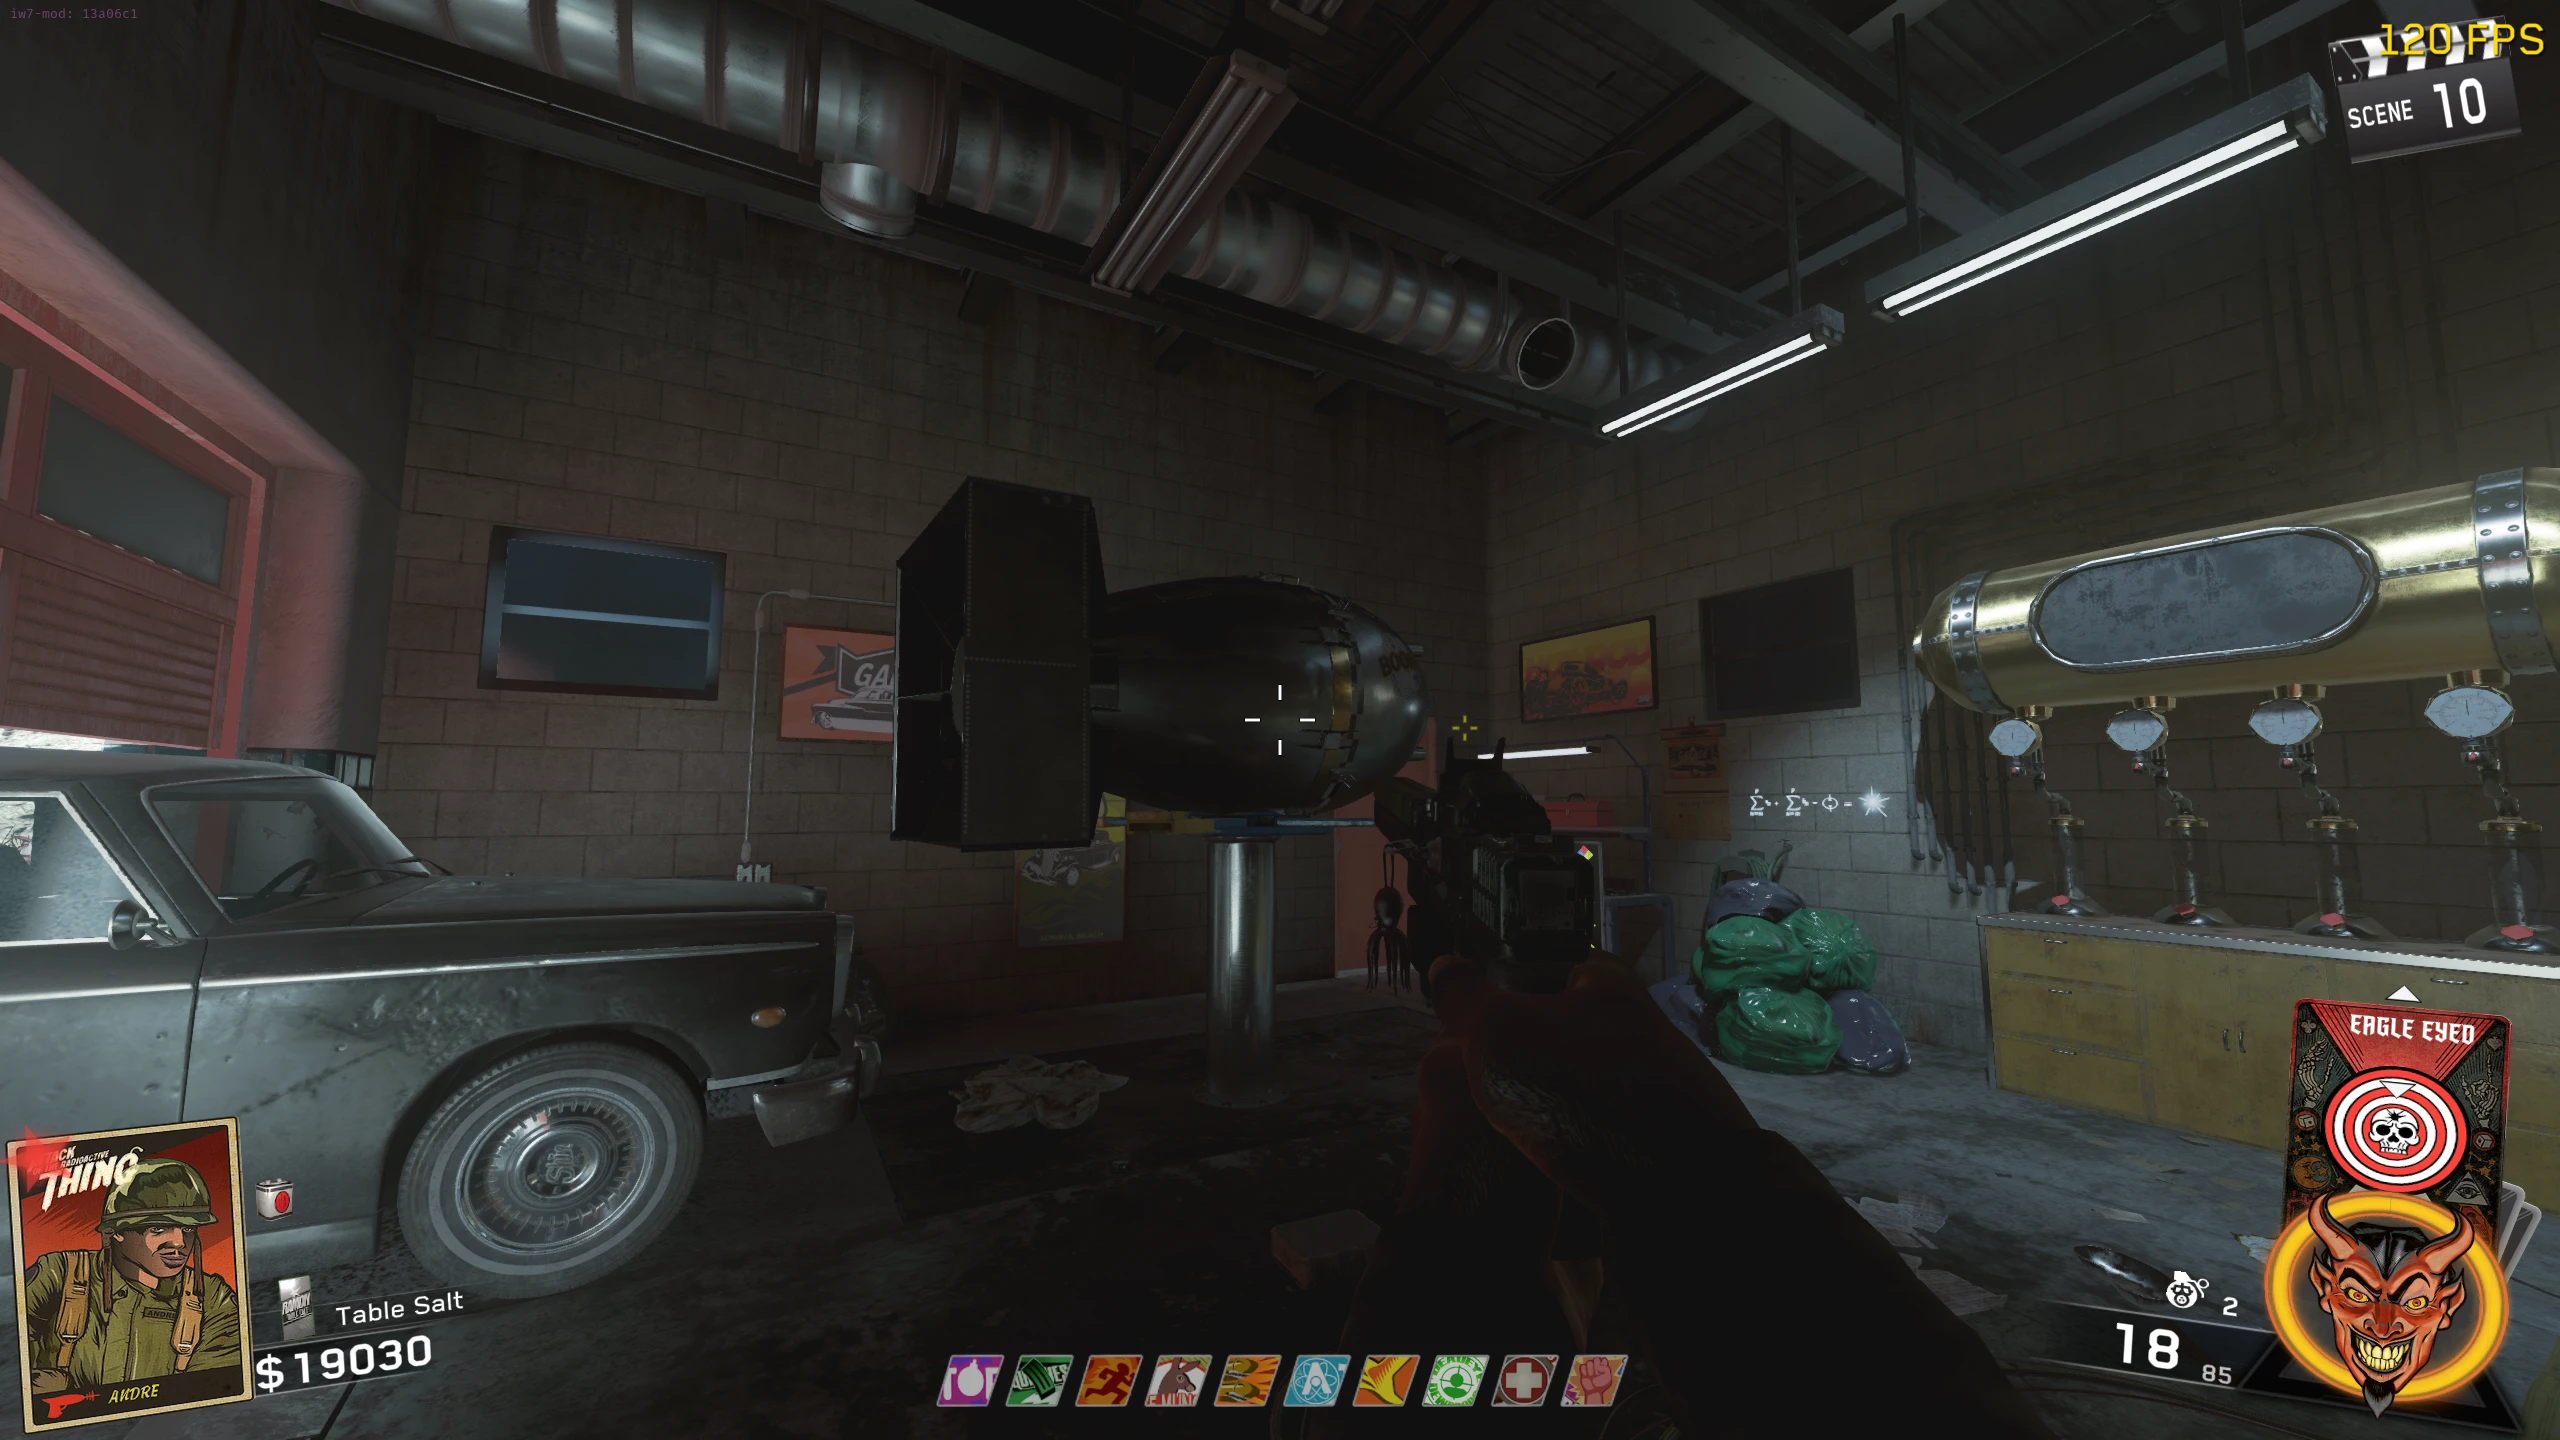
Chemistry tubemmmrkennedy; game imagery Activision and the relevant game studio · Source ↗ Chemistry gaugemmmrkennedy; game imagery Activision and the relevant game studio · Source ↗ Chemistry screenmmmrkennedy; game imagery Activision and the relevant game studio · Source ↗ Garage chemistry tablemmmrkennedy; game imagery Activision and the relevant game studio · Source ↗ - Collect three different bomb parts: under the red car on the TV Studio/Motel road, at the stream’s end below the beach wooden bridge and beyond the TV Studio right fence/gate from Snack Shack. Fit all three to the garage nuke.
Bomb part: red carmmmrkennedy; game imagery Activision and the relevant game studio · Source ↗ Bomb part: beach streammmmrkennedy; game imagery Activision and the relevant game studio · Source ↗ Bomb part: TV Studio fencemmmrkennedy; game imagery Activision and the relevant game studio · Source ↗ Assembled nukemmmrkennedy; game imagery Activision and the relevant game studio · Source ↗
Set pressure gauges and save the bomb code
- Prone at the Market backroom desk’s left side and read its four numbers. With the crowbar, stop each of the four pressure hands on one number: Gas Station rear, Snack Shack right side, Power Station rear and Motel maintenance room. Any number can be assigned to any gauge; use every required desk value. A wrong stop can be reset with another melee.
Desk number landmarkmmmrkennedy; game imagery Activision and the relevant game studio · Source ↗ Desk underside viewpointmmmrkennedy; game imagery Activision and the relevant game studio · Source ↗ Gas Station gaugemmmrkennedy; game imagery Activision and the relevant game studio · Source ↗ Snack Shack gaugemmmrkennedy; game imagery Activision and the relevant game studio · Source ↗ Power Station gaugemmmrkennedy; game imagery Activision and the relevant game studio · Source ↗ Motel gaugemmmrkennedy; game imagery Activision and the relevant game studio · Source ↗ - Take the paper from the now-open safe. Read the separate four-digit sequence in the scoreboard and save it outside the game before entering the boss: the arena does not let you consult that menu when needed. Keep any leading zero and use its original order.
Life ray, pressure and bomb memory Open helper
The TV Studio’s film reels show the five life-ray digits (floor reel is third). Keep that order, its reversal and the later four-digit safe code separate.
Determine O and the reaction filter
- Read M on the Motel office wall beside the window. At the TV Studio control panel, choose Red, then Green and Blue. Inspect the four O markers in each filter: Gas Station front door, Market backroom couch wall, concrete bridge underside and locked RV refrigerator (visible through its front window).
Motel M numbermmmrkennedy; game imagery Activision and the relevant game studio · Source ↗ Colour filter controlmmmrkennedy; game imagery Activision and the relevant game studio · Source ↗ Gas Station O markermmmrkennedy; game imagery Activision and the relevant game studio · Source ↗ Market O markermmmrkennedy; game imagery Activision and the relevant game studio · Source ↗ Bridge O markermmmrkennedy; game imagery Activision and the relevant game studio · Source ↗ RV O markermmmrkennedy; game imagery Activision and the relevant game studio · Source ↗ - Exclude a candidate wherever its marker shows O ≠ value. The true O remains equal in all three filtered views. Multiply that confirmed O by M, then compare the product with the actual three-colour TV bands beside Elvira; the middle range includes its boundaries. Record the required colour and read all subsequent diamonds in that filter.
Radioactive Thing chemistry Open helper
Confirm O in every colour, record the TV bands, select the radio’s positively endorsed final compound, and read each diamond in the calculated filter. The chart is by RayPoopertonIII.
Open illustrated reference
Identify the positively endorsed final compound
- From Scene 10, take a zombie-dropped battery and repair/listen to the radio at Power Station’s porta-potty or the Motel couch. One radio describes manufacturing; the other judges the five candidate compounds. Cycle its recordings, advancing a round when it needs rewind.
- Choose only the compound explicitly endorsed for the mutated-crab problem. Negative recordings, including the “crude solution” wording, are not the answer. Use the tool’s five named choices; if the finished chemical is refused by the nuke, re-listen rather than choosing by convenience.
Radioactive Thing chemistry Open helper
Confirm O in every colour, record the TV bands, select the radio’s positively endorsed final compound, and read each diamond in the calculated filter. The chart is by RayPoopertonIII.
Open illustrated reference
Make the complete dependency route
- In the confirmed reaction colour, read each needed ingredient’s top and left diamond numbers. Boards: Spawn tent hall; TV Studio by Bang Bangs; RV beside Mule Munchies; beach below the RV path; Gas Station garage; dirt path behind Market toward power. The tool lists the needed board for raw and crafted ingredients. Changing the observation filter requires fresh values.
Spawn boardmmmrkennedy; game imagery Activision and the relevant game studio · Source ↗ TV Studio boardmmmrkennedy; game imagery Activision and the relevant game studio · Source ↗ RV boardmmmrkennedy; game imagery Activision and the relevant game studio · Source ↗ Beach boardmmmrkennedy; game imagery Activision and the relevant game studio · Source ↗ Gas Station boardmmmrkennedy; game imagery Activision and the relevant game studio · Source ↗ Market rear boardmmmrkennedy; game imagery Activision and the relevant game studio · Source ↗ - Use the dependency route from the selected final compound. Collect orange/raw ingredients at their pickup landmarks and manufacture intermediate compounds in order. A crafted intermediate’s own board diamond is different from the keypad code used to create it. The recipe plate is credited to RayPoopertonIII.
Recipe and ingredient sheet · RayPoopertonIIIRayPoopertonIII (visible chart creator credit); hosted by mmmrkennedy · Source ↗ Racing Fuelmmmrkennedy; game imagery Activision and the relevant game studio · Source ↗ Vodkammmrkennedy; game imagery Activision and the relevant game studio · Source ↗ Insect Repellentmmmrkennedy; game imagery Activision and the relevant game studio · Source ↗ Drain Openermmmrkennedy; game imagery Activision and the relevant game studio · Source ↗ - For each reaction, place its ingredients on the garage squares and input the sum of every top + left pair minus O once. Press the large button. Gas effects and a new chemical at the garage’s right confirm success; damage/failure means recheck ingredients, colour and numbers. Mark “made” only after this cue, then carry the resulting ingredient into the next reaction.
- Take the final radio compound and give it to the assembled bomb. Refusal means the desired compound was misidentified; confirm the radio again before remaking the route.
Radioactive Thing chemistry Open helper
Confirm O in every colour, record the TV bands, select the radio’s positively endorsed final compound, and read each diamond in the calculated filter. The chart is by RayPoopertonIII.
Open illustrated reference
Charge and enter the beach arena
- Save the four-digit bomb code, refill ammunition and finish upgrades before departure. All players interact with the loaded nuke to charge it, then interact again to commit to Crog-Zilla.
Escort, chest damage, acid and belly code
- Stay near the beach cart to push it into the water. Shoot descending eggs/fireballs before they force you away. The nearby OSA Max Ammo is a resupply landmark. Once the bomb launches into Crog-Zilla, watch for raised-claw slams and glowing-head beam attacks and move clear of their lanes.
- Shoot the exposed glowing chest using a beach death ray: OSA ledge, RV path, main-street path or concrete bridge. After the first confirmed hit, the Spartan SA3 can also damage that spot. Continue until the chest stops glowing and interact with the empty cart together to begin the next stage.
Exposed chestmmmrkennedy; game imagery Activision and the relevant game studio · Source ↗ Spartan wallbuymmmrkennedy; game imagery Activision and the relevant game studio · Source ↗ Death ray: OSAmmmrkennedy; game imagery Activision and the relevant game studio · Source ↗ Death ray: RV pathmmmrkennedy; game imagery Activision and the relevant game studio · Source ↗ Death ray: main streetmmmrkennedy; game imagery Activision and the relevant game studio · Source ↗ Death ray: bridgemmmrkennedy; game imagery Activision and the relevant game studio · Source ↗ - Defend while radiation pushes the team toward the wall below the bridge. When it clears and lasers appear, all players jump/slide through the obstacle route and reach/interact with the cart before its in-game deadline. A missed player sends the team into another acid/laser cycle; prepare for the renewed attempt.
- Inside the belly, every player enters the original saved four-digit safe code at the illuminated-number machine. Each has their own strikes/time window; one teammate cannot enter it for another. Failure repeats acid and lasers. Complete all entries for the ending; the Soul Key is automatic here, while Director’s Cut’s talisman is collected on the beach.
Director’s Cut beach talismanmmmrkennedy; game imagery Activision and the relevant game studio · Source ↗
Life ray, pressure and bomb memory Open helper
The TV Studio’s film reels show the five life-ray digits (floor reel is third). Keep that order, its reversal and the later four-digit safe code separate.
Side Quests
Double Pack-a-Punch and travel pads
- Take the crowbar into the alternate locked-RV projector exit. Break the cabinet above its window and recover the fuses before you are returned. Refill Elvira’s vial with the cleaver, place fuses at the shaking Power Station floor spot and electrify them with the repaired power trap. Recover and install them in the projector. A missed RV pickup can be retried on another visit.
- Activate all four travel pads. Their fixed cycle is Power roof → TV Studio → RV Park → Main Street/Gas Station → Power. Each used pad has its own cooldown. The repaired trap parts are in the power-area bus trashcan, Gas Station boxes, RV bathroom picnic table and Motel/TV white truck.
M.A.D. upgrades and useful craftables
- Obtain M.A.D. from the Wheel; it does not use Pack-a-Punch. Crowbar open its three upgrade boxes: RV men’s-bathroom wall (grip), TV Studio exterior (crank) and Gas Station rear brick wall (plunger). The crank allows held-aim charging; swapping weapons cancels charge. Plunger refills at radioactive eggs, which take several rounds to return.
- Hypnosis: Market safe-room blueprint plus red-crate bulbs, liquor-shelf cage and produce/bread-floor radio; assemble at its backroom bench. Mind Control: Motel maintenance blueprint, TF-141 ground battery, pool-chair jukebox and office-stair speaker. Violet Ray: power-bus bench blueprint, nearby barrel bulbs, switch-cart lamp and Market-rear dumpster antenna. Each device requires its blueprint and three parts, with one carried part at a time.
- Once the garage is open, give Elvira the pages on its shelf. Her subsequent summons gain the lava attack. This upgrade is separate from portal access and the mirror pickup.
Skull Hop · six skulls and spelling
- Shoot five active skulls among these candidates: power-room chair, screen-rear dumpster, Market bottom shelf, bridge bus tire, TV window, Snack Shack bathroom, Mason’s sign, Change Chews dumpster, offshore rock and Motel upper-right balcony. A default/variable-scope sniper makes distant sites easier.
- Put the Gas Station floor canister into the Parlour radiation puddle and stay nearby until its prolonged ready sound (roughly five minutes). Collect promptly; leaving pauses progress and delaying pickup can reset it. Do not replace the scorestreak-slot canister before the next step. Repair the Motel pool trap, place the canister in the pool and kill exactly sixteen zombies in one activation.
- Read the word above the Parlour UDM bench. Translate the four swingset glyphs in physical order from Slappy Taffy toward the Parlour. Use the spelling tool’s shortest position sequences; shoot the top-right screen glyph after each letter to lock it. A mistaken bottom row can be reset by filling four symbols then adding a fifth. Zero remainder wraps to Z.
- Melee the RV propane-table “Don’t Blink” paper. Retrieve a canister from the pool, place it before a Wyler portrait, activate the portrait and melee the canister. Stay inside its bubble and shoot at least seven ghosts before it ends. Repeat with fresh canisters at Gas Station rear, Market safe room, Parlour and Motel office. A failed bubble can be retried.
- Confirm the fifth cabinet skull, then shoot the machine with a crank-upgraded charged M.A.D. The source reports a retry-blocking cabinet bug; its Skull Hacker workaround is optional card-dependent recovery, not a main-quest prerequisite. Enter together and use platform colour to match the displayed side bars when firing cubes at skulls. Stop when the bars flash, move to the new colour and clear three rounds. Wrong hits/falls can make red escapees; a red cube can save them before escape.
Skull Hop spelling solver Open helper
Translate the four actual glyphs using the alphabet, in physical order from Slappy Taffy toward the Ice Cream Parlour. The solver uses positive positional offsets and wraps zero to Z.
Open illustrated reference
Music, diaries, calling cards and Elvira
- Collect five records: power-building sheet-metal side, Market cash register, Snack Shack blue tarp, Motel/Bombstoppers trashcan and open RV table. Brachyura Boogie then plays from jukeboxes. The Director’s Cut Scene 1 TV Studio camera white mask unlocks separate lobby music.
- Use the Motel pool-side diary as an ordinary actor. Before quest completion it has one entry per match; after completing the quest in that same match it permits repeated entries for Dear Diary. The book cannot be used while playing Elvira.
- Message Rerouted: snipe the hillside rock turnstile on the Gas Station/beach path. Make ’Em Squeal: cleaver Market’s leftmost hanging meat for Fat, keep that ingredient, then approach the middle RV toilet already prone. Its first proximity trigger is a single attempt per match; replacing Fat or arriving upright defeats that attempt.
- After earning this Soul Key, select Attack in the lobby and enter Down, Right, Down, Left, Up, Right. Confirm Elvira’s icon before starting.
Sources and review
Source-reviewed on 8 October 2026, using the references below and the research handoff. These instructions and puzzle calculations have software checks; they have not been verified in a complete in-game playthrough. Record symbols, sequences and completion cues from your match. Screenshot and community-chart creators are credited with each illustration.
- Illustrated quest and equipment reference · mmmrkennedy ↗
- Community guide · r/CODZombies (2) ↗
- Illustrated main quest · COD Zombies Guides (3) ↗
- Independent chemical reference · Wells Logan (4) ↗
- Original Skull Hop spelling reference (5) ↗
Select any reference image to enlarge it. Screenshot and symbol sources are credited in the linked walkthroughs; this guide uses local copies for reliable access.