Main Quest
Open the park and projector room
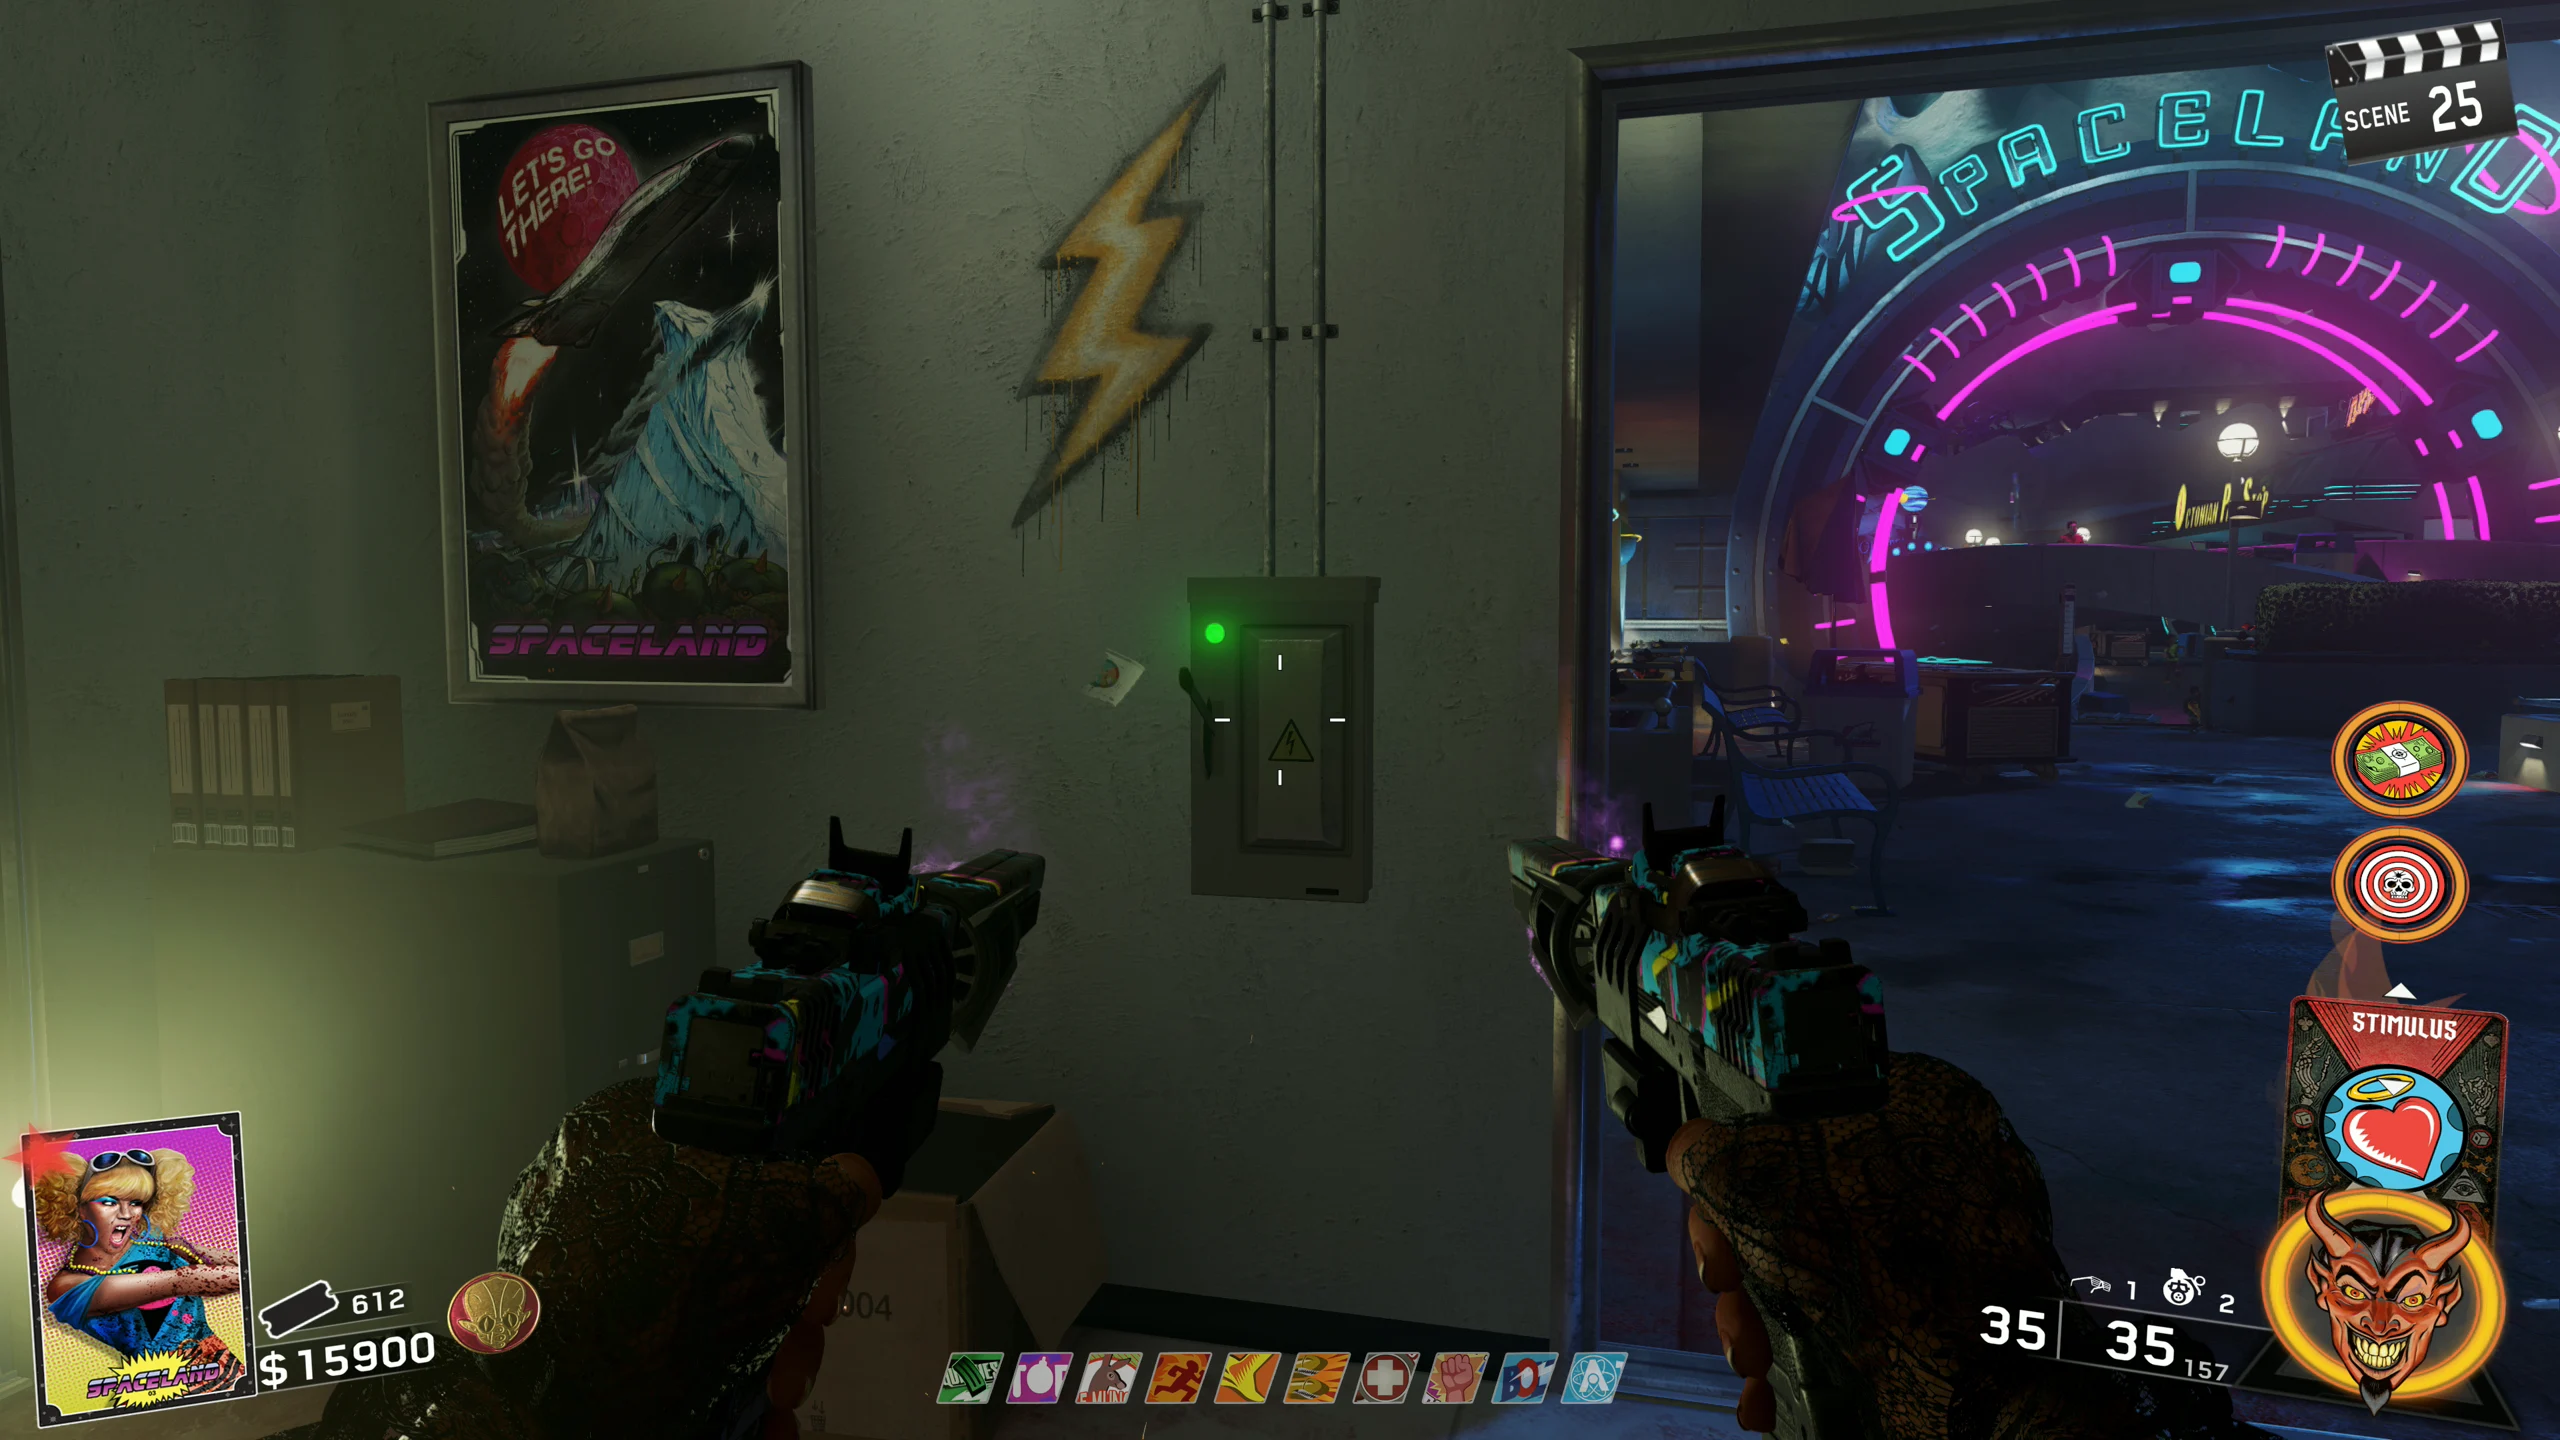
- Switch on all five regional supplies: the Spawn employee room by the M1; Journey’s Star Mission/Rover Rampage hallway; Astrocade left of its portal; Polar Peak by Quickies; and Moonlight Cafe upstairs in Kepler. Each switch powers only its own region.
Spawn powermmmrkennedy; game imagery Activision and the relevant game studio · Source ↗ Journey powermmmrkennedy; game imagery Activision and the relevant game studio · Source ↗ Astrocade powermmmrkennedy; game imagery Activision and the relevant game studio · Source ↗ Polar Peak powermmmrkennedy; game imagery Activision and the relevant game studio · Source ↗ Kepler powermmmrkennedy; game imagery Activision and the relevant game studio · Source ↗ - Activate and travel through Journey, Astrocade, Polar Peak Gift Shop and Kepler’s stair-base portals. The four hub indicators turn blue. Enter Cosmic Way’s central portal to reach the projector; it returns you after its visit window and needs to cool down before reuse.
Journey portalmmmrkennedy; game imagery Activision and the relevant game studio · Source ↗ Astrocade portalmmmrkennedy; game imagery Activision and the relevant game studio · Source ↗ Polar Peak portalmmmrkennedy; game imagery Activision and the relevant game studio · Source ↗ Kepler portalmmmrkennedy; game imagery Activision and the relevant game studio · Source ↗ Four hub indicatorsmmmrkennedy; game imagery Activision and the relevant game studio · Source ↗
Prepare equipment and a Weapon of Rock route
- Bring an upgraded damage weapon, ammunition and a distraction for the SETI-COM defences. Explosive weapons help keep zombies off the device; Bombstoppers protects against your own explosive splash. Select a Weapon of Rock branch below and save its station-specific coins.
- Buy an Arcane Core for 300 tickets and activate the UFOs on the projector-room table. Charge one trap in a single use until its UFO leaves orbit, then kill with the Arcane Core weapon near it until it drops an elemental orb. Trap/core pairs: Journey Rocket → Electric; Astrocade Disco → Laser; Polar Steel Dragon → Wind; Kepler Chromosphere → Fire.
- Buy Golden Teeth for 300 tickets. Lure a Brute into Kepler’s gator mouth so its teeth break, then fit the replacements. Shoot the throat targets with matching elemental cores: left to right Wind, Electric, Laser, Fire. Take the matching crystal for your selected Weapon of Rock.
Souvenir recipe lookup Open helper
Choose the coins you have. Any insertion order makes the same souvenir; Weapons of Rock bonus parts require their named station.
Collect and obtain the SETI-COM
- Collect the calculator from the Cosmic Way bench facing the projector, Astrocade upper trashcan by the broken railing, or Kepler’s yellow table above the ERAD. Only one of its three candidates is used in a match.
Calculator: Cosmic Way benchmmmrkennedy; game imagery Activision and the relevant game studio · Source ↗ Calculator: upper Astrocademmmrkennedy; game imagery Activision and the relevant game studio · Source ↗ Calculator: Kepler yellow tablemmmrkennedy; game imagery Activision and the relevant game studio · Source ↗ - Collect the quest boombox from the lower spawn bridge, Moonlight Cafe counter beside power, or Underground’s Racin’ Stripes room counter. This pickup is separate from a crafted distraction boombox.
Boombox: lower bridgemmmrkennedy; game imagery Activision and the relevant game studio · Source ↗ Boombox: Moonlight Cafemmmrkennedy; game imagery Activision and the relevant game studio · Source ↗ Boombox: Underground countermmmrkennedy; game imagery Activision and the relevant game studio · Source ↗ - Collect the umbrella from the bench below Hyper Slopes, Journey’s trap control by the card dealer, or Polar Peak’s Gift Shop counter. After the parts are collected, advance a round and wait for the shaking screen and Polar Peak UFO’s four tones.
Umbrella: Hyper Slopesmmmrkennedy; game imagery Activision and the relevant game studio · Source ↗ Umbrella: Journey controlmmmrkennedy; game imagery Activision and the relevant game studio · Source ↗ Umbrella: Polar Peakmmmrkennedy; game imagery Activision and the relevant game studio · Source ↗ UFO event landmarkmmmrkennedy; game imagery Activision and the relevant game studio · Source ↗ - Speak to Hasselhoff at Cosmic Tunes: Kepler by Octonian Hunter, Kepler by the geysers, or Journey by Mule Munchies. Take his completed SETI-COM.
Hasselhoff stand: Octonian Huntermmmrkennedy; game imagery Activision and the relevant game studio · Source ↗ Hasselhoff stand: geysersmmmrkennedy; game imagery Activision and the relevant game studio · Source ↗ Hasselhoff stand: Journeymmmrkennedy; game imagery Activision and the relevant game studio · Source ↗
Complete three device defences
- Carry the SETI-COM through its seven candidates: Kepler fountain by Bombstoppers; between Kepler’s purple/orange geysers; Polar Gift Shop; Cosmic Way’s Polar entrance; Journey’s Escape Velocity blood pool; Underground break room; and the Bumper Cars entrance. The correct site shakes the screen and offers placement.
Placement: Kepler fountainmmmrkennedy; game imagery Activision and the relevant game studio · Source ↗ Placement: geysersmmmrkennedy; game imagery Activision and the relevant game studio · Source ↗ Placement: Polar Gift Shopmmmrkennedy; game imagery Activision and the relevant game studio · Source ↗ Placement: Cosmic Waymmmrkennedy; game imagery Activision and the relevant game studio · Source ↗ Placement: Escape Velocitymmmrkennedy; game imagery Activision and the relevant game studio · Source ↗ Placement: break roommmmrkennedy; game imagery Activision and the relevant game studio · Source ↗ Placement: Bumper Carsmmmrkennedy; game imagery Activision and the relevant game studio · Source ↗ - Place and protect the device through its displayed countdown: first 60 seconds, next 90, final 120. Recover it after each success and collect the dropped Max Ammo. Advance a round between successful defences. Failure spawns a Brute; take a replacement from Hasselhoff and retry that defence on the same round.
- After the third success, wait one full round before returning the device to Hasselhoff. Collect the four speakers.
Four speakersmmmrkennedy; game imagery Activision and the relevant game studio · Source ↗
Place and record the speaker layout
- Place speakers on Cosmic Way’s three golden region symbols and in front of the projector gateway. Prepare before interacting with a speaker: activation seals you inside the Cosmic Way/Spawn arena.
- Activate a speaker and record each physical position’s Red, Blue, Yellow or Green beam. Assign speaker numbers using the same orientation throughout the attempt; the colours are not permanently assigned to map positions.
Spaceland speaker sequence Open helper
Number the four physical speakers with the photograph. Record their colours from this match, then record the UFO flashes. Repetitions count.
Open illustrated reference
Repeat three UFO colour sequences
- Watch every UFO flash, including repeated colours. When the UFO and speakers turn white, enter the full order at the corresponding physical speakers. Complete three successful sequences. Co-op has a shorter response window, so assign positions beforehand.
- If the sequence was missed, let the next display show it again. A wrong or partly entered response can spawn a Brute; clear it and replay the renewed display. Retain the speaker layout and reset only the recorded sequence.
Spaceland speaker sequence Open helper
Number the four physical speakers with the photograph. Record their colours from this match, then record the UFO flashes. Repetitions count.
Open illustrated reference
Break the alien backpack fuses
- After the clown wave, fight the aliens emerging from the gateway; their number follows player count. Shoot each glowing neck collar. Green/yellow/red are damage-state cues. Keep moving clear of its energy shots and zombies appearing close to you.
- When an alien kneels, reach its backpack and melee the exposed fuse promptly. Confirm the breaking sound and its recovery, then repeat the damage/downing cycle. The last downing kills it without another fuse melee. Finish every alien.
Alien downed backpack windowmmmrkennedy; game imagery Activision and the relevant game studio · Source ↗
Upgrade the projector and Weapon of Rock
Destroy the overhead UFO and claim the ending
- Shoot four of the five bridge-ring nodes with the upgraded Weapon of Rock. They glow orange. Watch the UFO’s path over the projector and time the fifth node so the charged ring’s upward beam intersects it. A miss requires another charged attempt, not a claimed completion.
- After the UFO ignites and explodes, collect the Soul Key in front of the gateway. In Director’s Cut, also take the talisman appearing there after the key. The special final cutscene requires the unlocked Wyler character branch.
Side Quests
Head-Cutter · Wind / yellow crystal
- Buy Cryo Grenades (350 tickets) and throw one into the Polar entrance yeti’s face. Lure ten zombies through its cold breath and headshot the frozen targets. After the roar, collect the battery from the Gift Shop yeti’s hand.
- Insert three Green coins at Polar Peak’s souvenir station and take the Yeti Plush. Obtain the Wind-core yellow crystal from the gator’s leftmost target, then place all three parts at the Gift Shop Octonian cutout.
Face-Melter · Electric / blue crystal
- With the hub projector open, throw a standard grenade into Journey’s active portal. Relay the returned red grenade toward the hub by picking it up and throwing it before it explodes; each pickup refreshes its fuse. Throw it through the hub gateway and recover the battery where it lands.
- Insert three Blue coins at Journey’s station for the rocket toy. Take the Electric-core crystal from the gator’s second target and assemble at the Escape Velocity cutout.
Dischord · Laser / green crystal
- Pick up zombie-dropped sunglasses and wear them to see five randomly selected targets. Search the Spawn hedge; Cosmic Way ATM, Polar bridge and mountain-mouth sign; Astrocade power, claw machine, Cryptid window, prize floor, Black Hole trashcan and alien cutout; rear store/bumper cars; and the Polar yeti walkway. Shoot all five and collect the battery on the Astrocade dance floor. If hit, recover dropped glasses quickly.
Sunglassesmmmrkennedy; game imagery Activision and the relevant game studio · Source ↗ Spawn targetmmmrkennedy; game imagery Activision and the relevant game studio · Source ↗ Polar bridge targetmmmrkennedy; game imagery Activision and the relevant game studio · Source ↗ Astrocade power targetmmmrkennedy; game imagery Activision and the relevant game studio · Source ↗ Claw machine targetmmmrkennedy; game imagery Activision and the relevant game studio · Source ↗ Dischord batterymmmrkennedy; game imagery Activision and the relevant game studio · Source ↗ - Insert one Red, one Green and one Blue coin at the rear Astrocade station. Take its Disco Ball and the Laser-core crystal from the gator’s third target; assemble by the Astrocade prize-counter cutout.
Shredder · Fire / red crystal
- Shoot the battery on the back-middle of Kepler’s log-ride boat. At the geysers above the river, catch the battery as it shoots upward. Waiting beside one geyser is easier than chasing each burst.
- Insert three Red coins at Kepler’s souvenir station. Take the Alien Souvenir and Fire-core crystal from the gator’s rightmost target; assemble at the Underground/log-ride cutout.
N31L assistance and K.I.T.T.
- Fit the ice-cream stand’s N31L head below Hyper Slopes onto his Cosmic Way body. Complete his five displayed challenges; interact to summon Hasselhoff. You can pause his current challenge through interaction.
- After his return, fit the auxiliary battery (check Kepler’s ice-cream cart/bench/trashcan and Polar’s trashcan/cubbies/counter). Finish the next challenge set and summon again. After that return, find the Underground floppy at the HVR workbench, Racin’ Stripes bench or Banshee table. Finish the final set and summon once more; subsequent summons cost 5,000.
Ghosts ’N Skulls · optional permanent-perk route
- Pop all balloons above Spawn’s Hailstorm. Find successive skulls in sign letters spelling GHOST: G Galaxy Journey/Roller Rampage; H Chromosphere/Hyper Slopes; O Journey Into Space/Cosmic Tunes; S Star Mission/rear Astrocade; T Octonian Hunter/Moonlight Cafe. Stare at each until it breaks. On the dance floor, kill exactly 1 on Green, 9 on Blue, 8 on Pink and 4 on unlit Black in that order; restart at Green after an incorrect count.
- Complete the skull event on Basketball, Black Hole (50 points), Cryptid Attack, Zombie Zoom and Bowling for Planets. Finish the main quest, keep sunglasses on and use the ring laser to destroy the sky skull over the gateway. Finally bait a Brute’s laser into the upstairs Ghosts ’N Skulls cabinet.
- All players enter the energized cabinet. Entangle floating ghosts and fire them at skulls through three rounds; prioritize escaping red skulls. Three escaped skulls fail a round. Re-energize with the Brute laser to retry. Completion grants permanent perks, with solo Up ’N Atoms excluded.
Music and character unlocks
- For the MW1 mix, shoot the teddy pictures on three active Employee of the Month boards. For the MW2 mix, shoot five hidden teddy bears; an absent fifth bear may require a new match. These music hunts are independent of the quest.
- After earning this map’s Soul Key, select it in the lobby and enter Left, Right, Left, Up, Down. Confirm Hasselhoff’s icon before starting; opening another lobby menu can clear the selection.
- After the separate Director’s Cut/Mephistopheles unlock, activate Director’s Cut on Spaceland and enter Left, Left, Down, Up, Up, Right. Completing Spaceland as Wyler after the required finale grants the special ending and Willard’s Test reward.
Sources and review
Source-reviewed on 8 October 2026, using the references below and the research handoff. These instructions and puzzle calculations have software checks; they have not been verified in a complete in-game playthrough. Record symbols, sequences and completion cues from your match. Screenshot and community-chart creators are credited with each illustration.
- Illustrated quest and equipment reference · mmmrkennedy ↗
- Community guide · r/CODZombies (2) ↗
- Illustrated main quest · COD Zombies Guides (3) ↗
Select any reference image to enlarge it. Screenshot and symbol sources are credited in the linked walkthroughs; this guide uses local copies for reliable access.